

These 10 wildlife photography tips are the ones that no one else is talking about but can have the greatest impact on improving your wildlife images. If you’re reading this then you most likely landed here because you have a desire to improve your wildlife photography. After 20 years I’ve learned a thing or two and have kicked myself more than once for not paying attention to the things that could have made me a better photographer in less time. Depending where you are in your journey, some of these you may have already considered or adopted and some will be new ideas for you to consider. If you can course correct NOW on these 10 mistakes your wildlife photography will be drastically improved. So let’s dive right in to the ten mistakes that no one tells you about.

Mistake #2: The “I Know What I’m Doing” Syndrome: Ever heard of that saying, “You don’t know what you don’t know?” Chances are you are a long way from knowing everything you need to know along your journey to becoming the wildlife photographer you will be years from now. Take a page from the book of an Olympic athlete. They train daily for four years just to prepare for that one moment on the big stage where they finally get to compete. Wildlife photography really is no different, be a student of the craft and learn as much as you can from as many people and resources as you can and you’ll see drastic improvements in your work over a relatively short period of time.
Ask yourself before you sign up for that $5,000 trip to shoot eagles in flight in Alaska, are your skills where they need to be to capture the best possible images that you can? Have you put in your time behind the lens? Can you change exposure, ISO, f/stops, shutter speeds to meet the lighting conditions without thinking about it? Do you know the difference between spot, center weighted and matrix metering? These are the types of things you as a wildlife photographer need to train for before you go out on to the big stage and hope to capture National Geographic quality images. Practice, and lots of it takes luck out of the equation and allows you to rely on your skills to capture those award winning images.
Course Correction #2 Practice, Practice, Practice: This is not to say you shouldn’t go on your trip, just that you should acknowledge that the more time you put in to your craft the better your images will be. Practice should not be be in Alaska shooting Grizzly Bears for the first time. Spend time in your back yard shooting birds at the feeder or in the bird bath. Go to the beach and practice tracking and panning gulls in flight so when that moment arrives and the snowy owl takes flight your instincts kick in and the moment is captured.
To accomplish this your camera becomes an extension of you, shooting with it becomes second nature. There’s no time for fiddling with exposure compensations and ISO’s when the action heats up so make it a priority to spend as much time as you can shooting a variety of scenes in varying light conditions. I can tell you that even after a few weeks of not shooting regularly I lose my edge and I have been at this game a long time.

Mistake #3: “Chimping and Chatting” In The Field – Chimping is the fine art of taking a picture and then looking at the back of your camera to see what you captured, usually followed by a series of noises like OU, OU, OU like a monkey. And guess what’s usually happening while you’re chimping? I can’t tell you how many award winning images I’ve missed out on because my eyes were glued to my LCD instead of my subject.
Course Correction #3: Keep Your Eye On The Prize and Your Mouth Shut – If Kenny Rogers could write a song for wildlife photographers the lyrics would go like this, “You never view your images, while you’re sittin’ in the field, they’ll be time enough for chimping, when the shoot is done”. As a best practice DO NOT chimp in the field. Look only at your LCD to view your histograms to make sure your exposures are correct and even then if the light has not changed there’s no need to be constantly checking your images. This activity also eats up your battery much faster which is another reason not to do it. Especially if you are out for a long shoot without a backup battery (which should never happen) or on a shoot where charging batteries is not an option.
And the same goes for idle chit chat on a shoot. There are going to be times when you find yourself with other wildlife photographers shooting the same subject. It’s easy to get drawn into a conversation about the latest gear or happenings around the world but when the action unfolds you won’t be ready to capture it.
Here’s a great example, and I still laugh to myself to this day. While on my last trip to Katmai National Park in Alaska to shoot grizzly bears, two groups of photographers merged along the same side of the river to give the bears space to fish. A mother grizzly and her cubs were lying along the shoreline and every 30 minutes or so there would be an interaction between mom and cubs that was well worth capturing.
My buddy and I were lying on our bellies in the sand glued to the bears while the other photographers stood around chatting with one another. Without fail every time something worth shooting happened the sound of my mirror slapping would alert the group and they would all turn to their cameras, but of course they were too late to the party. If I’d been shooting mirrorless they wouldn’t have had a clue. I’m not saying be anti-social, but if you’re going to be a serious wildlife photographer save the chatter for after the shoot and keep your senses tuned to the natural events that are unfolding around you.
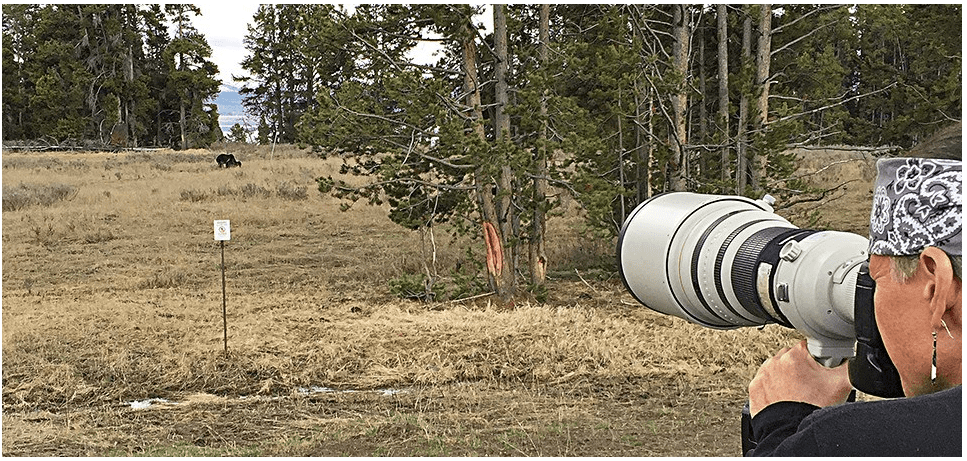
Mistake #4: Laser Focused On The Subject And Nothing Else: The difference between good and great wildlife photography in my opinion is found in the composition and the background the photographer selected to frame up the subject they are shooting. Wildlife photographers tend to get very excited when they see their subjects and they grab their big lens and fill the frame with the animal or bird giving very little thought to the background or composition. STOP & LOOK AROUND. Full frame head shots of your subject are great but do you really need 100 of them from the exact same angle?
Course Correction #4: Pay Attention to Composition & Backgrounds: Move yourself around the subject where possible, being careful not to disturb and scare them off. Changing your vantage point will add and subtract various elements from your images and some will appeal to you more than others. I have always found that environmental shots which portray the surroundings the subject is in are quite often the wildlife photography images I like best, so once you have enough head shots that fill the frame go wide.
Try to visualize what the image might be like if you went wider and brought some of the environment in to the image. Look for pleasing elements to place in the foreground, especially those that create leading lines in to your subject or those that form triangular compositions.
Look for pleasing backgrounds such as snow capped mountain peeks, stands of pine trees or cattails. However you choose to frame the scene, PAY CLOSE ATTENTION. Are there distracting branches or human elements in your image or bright light shining through gaps in the trees. Elements like these detract from your images and often times all it takes is just one step to the right or the left to eliminate them. Make it a habit to look at not only your subject but also what is in front and behind them that might be distracting. Then once the distracting elements are removed look for the gold that’s going to turn this from an ordinary image to an exceptional one.
Course Correction #5: Anticipate The Action – When you’re in the field you need to think like Tom, You need to anticipate where and when the action will unfold. Take the example of an osprey sitting on a perch. You’re taking static close up shots and you are cropped in tight on the bird for full body shots or even head shots if you’re lucky enough to have gotten that close. But what happens if the osprey takes flight, do you think you’d capture the flight shot? Probably not unless you anticipated that moment.
As your mentor during this article I will use the osprey taking flight from a perch as an example to demonstrate the thought process I go through in this typical wildlife photography scenario.
1/ Wind: Determine the direction in which the osprey will take off . The answer is usually in to the wind, the same is true of landing so I would position myself upwind in a location with a pleasing background and no distracting background elements.
2/ Anticipation: Watch for the osprey to poop as birds usually take flight within minutes of defecating. Whether or not the osprey takes flight I remain glued to the back of my camera in anticipation of flight, which could be hours, so my patience will be tested.
3/ Shutter Speed: What shutter speed do I want to use? Do I want to freeze the motion of the wings with 1/2000th or intentionally blur the motion with 1/60th? Whatever I decide, I get those settings established in advance of the scenario I wish to capture unfolding.
4/ Exposure: Take a picture of the static osprey on the perch and then review your histogram to make sure your exposure is correct. I prefer to shoot in manual mode with Auto-ISO, so I set the f/stop and shutter speed and let the camera adjust the ISO up to the maximum range that I determine is correct for my camera. In doing so the exposure will be consistent regardless of the light changing as the osprey moves through the frame.
5/ Composition: Set your variable lens to provide a generous amount of space in the frame for the osprey to fully extend its wings when it takes off. I will be thinking about that five foot wing span and factoring that in to avoid clipping the wings in the frame. As a best practice I always error on being wider than I think I’ll need. The theory being I can always crop in on an image but I can’t replace a missing wing tip. If I am shooting with a prime lens I back up far enough to accommodate the same.
6/ Burst: When the osprey begins to take flight I will be holding down my back button focus (tip#8) to maintain focus on the subject and I will be holding down the shutter to shoot in a burst until the sequence is completed.

Course Correction #6: Slow and Steady Wins The Day – Your success as a wildlife photographer depends on how well you can execute on the steps I’m going to outline below for approaching wildlife. If you follow these 8 approach tips you’re likelihood for a successful outcome will be significantly improved.1
1/ Movement: Move when the animal or bird is feeding or not looking in your direction.
2/ Slow: Take one step at a time, pause and repeat if the subject does not appear disturbed by your approach.
3/ Barrier: Keep your tripod in front of you. For some reason that barrier appears to help put critters at ease.
4/ Zig Zag: Do not approach in a straight line. Move in zig zag fashion and try to make yourself appear disinterested in the subject with little direct eye contact.
5/ Move As One: If you are with someone else or in a group, stay in single file so you appear as one as you move.
6/ Silence: Be as silent as humanly possible being careful not to step on objects that will make noise.
7/ Wind: Think about the direction of the wind. It is always best to approach animals from upwind if possible to minimize your scent.
8/ Safety: Remain at a safe distance. Keep in mind some animals are dangerous so respect their boundaries. Know the rules that have been established in the area you are shooting in and be respectful of these rules, they are for your safety and the safety of the animals.
Course Correction #7: Good Long Lens Technique and a Few Other Tricks – Take the time to make yourself aware of the factors that contribute to long lens vibration and the blurry images referred to above. This is a deeper subject in wildlife photography so I did a separate blog post for those of you who shoot with longer lenses. You’ll find that post at Blurry Images | 12 Tips For Sharper Images. If you follow these 12 tips you will drastically improve the number of keepers from a shoot.
Mistake #8: Not Considering Shooting Angles – Have you ever noticed how many wildlife photographers shoot from a fully extended tripod and they shoot from that position regardless of the subject and where they are located? Sometimes this is the preferred angle to the subject and other times it is not. You need to be keenly aware that the angle you shoot from can make all the difference in the quality of your wildlife photography.
Course Correction #8: Shoot At Eye Level – Take a look at all of the wildlife photography from the best of the best wildlife photographers and one thing will stand out. Their images will create a connection between you and the subject. There are a few reasons why this happens, but one of the key elements is that they most often captured the image at eye-level with the subject. Where you choose to shoot from will be determined by where the subject is located and how large the subject is. If you are shooting a moose eye level might be six feet high and if your shooting a shorebird that might mean lying flat on the ground.
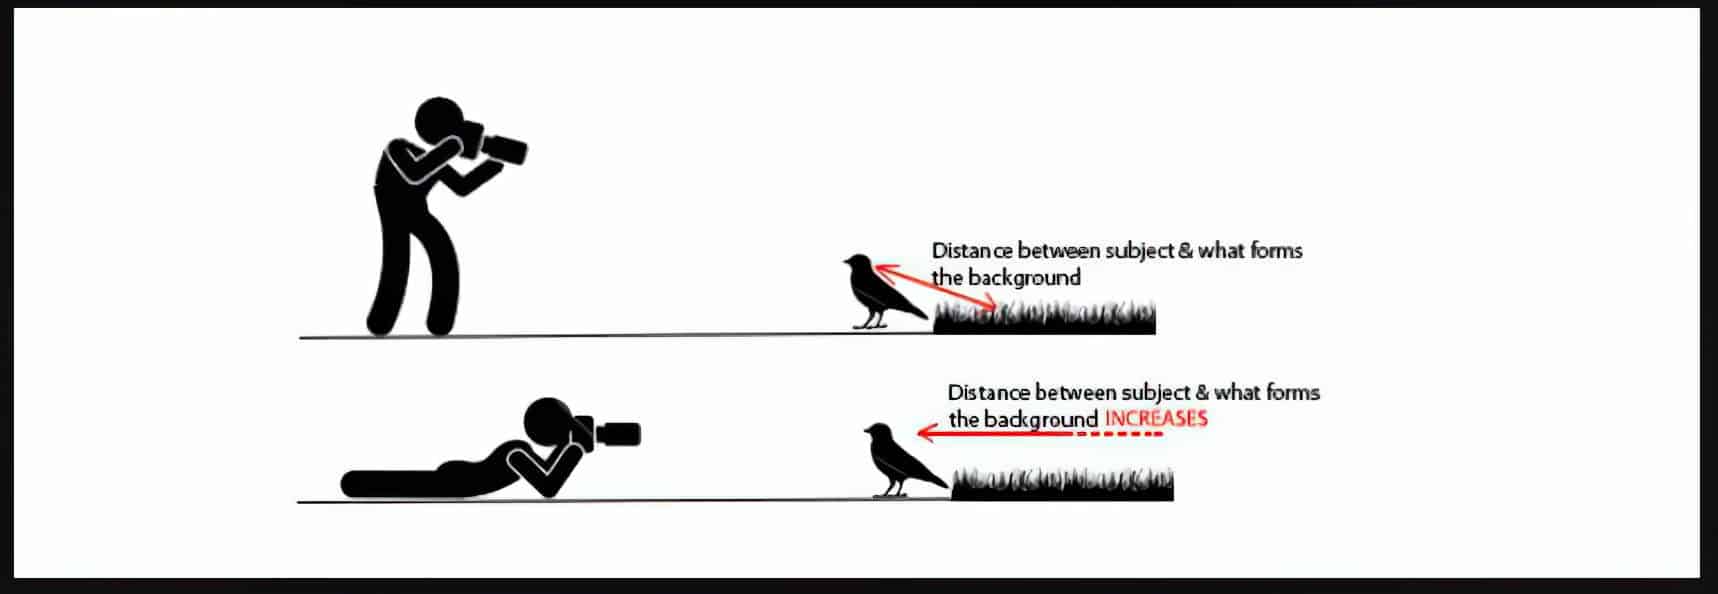
Illustration: Take a look at the illustration above and you will quickly see why the angle you choose matters so much. In the top illustration where the photographer is standing up, the background for the bird will be the ground and because it is close to the bird it will be in focus and be a very distracting element in your photograph. There is a theory here that I wish for you to keep in mind when you are in the field. The more distance there is between your subject and the background, the more out of focus that background will be.
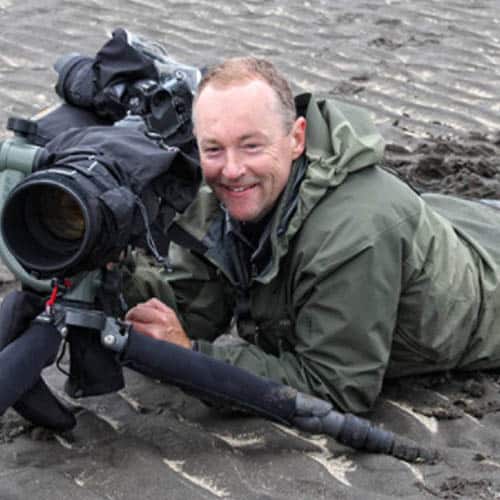
Get Low: Where the photographer is lying down, the background is a long way off and that lends itself to having that dreamy out of focus bokeh that makes your subject pop within your photograph. This may mean you find yourself lying in the mud, but I promise you it will be worth it. The photo below is one from my grizzly bear shoot in Katmai National Park in Alaska. Getting down and dirty in the tidal mud provided the best angle to shoot these bears as they were chasing salmon in the shallow waters while the tide was out.
Mistake #9: Resisting Change– You’re growth as a wildlife photographer is tied to your willingness to keep an open mind and adopt change. Somewhere along your journey your mentor is going to make a suggestion that you’re uncomfortable with and find hard to do because it changes the way you are currently doing things. One of these changes will most surely be to adopt a technique called back button focus, Trust me, if you’ve been focusing with the shutter release this will take some getting used to but it is a technique well worth adopting.
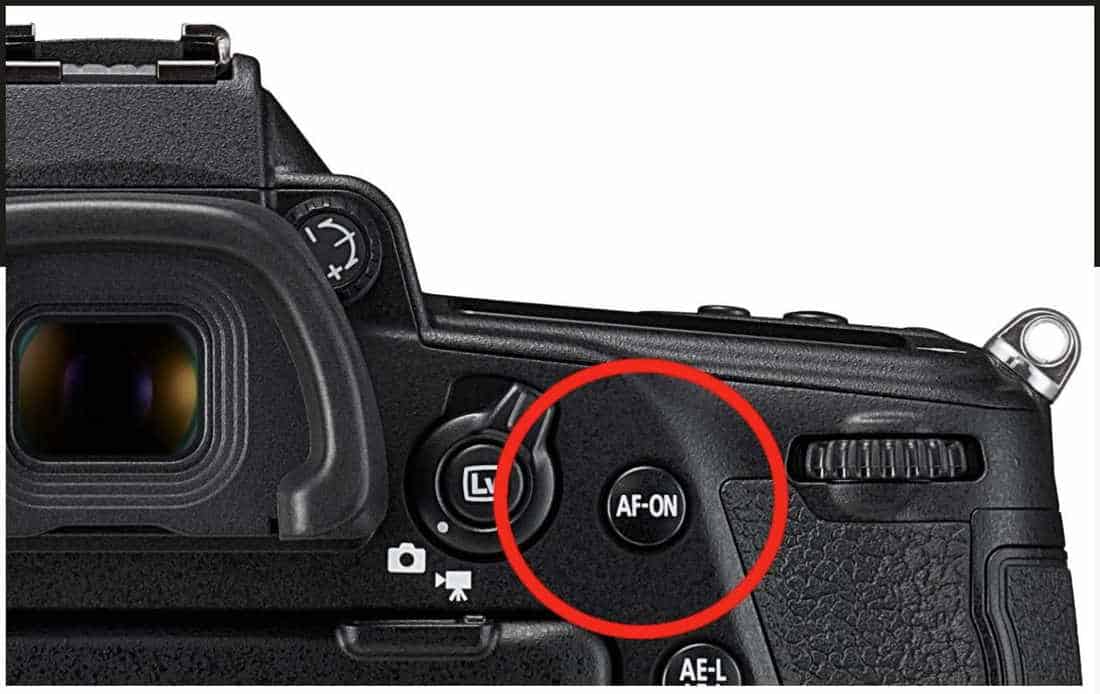
Course Correction #9: Adopt Back Button Focus– By default, auto-focus is activated on a camera when the user presses down halfway on the shutter button. When the user presses down all the way on the shutter button the shutter is triggered and an exposure is made. Back button auto-focus makes it so the shutter button doesn’t control the focus activation, it assigns a button on the back of the camera to activate focusing. There are a few reasons I am suggesting you adopt back button focus:
- Composition: The biggest benefit of back-button focusing is ability to shoot in Canon’s AI-Servo and Nikon’s Continuous Servo (AF-C) mode with all the benefits of One Shot and Single Servo (AF-S). You only need to press the back button focus button when you need to lock focus otherwise you can keep your finger off of it and keep taking pictures. This allows you to focus on your subject then release the button and compose the image however you wish while maintaining that same focal point.
- Focus: You can track focus much easier on a moving object with back button focus and isolate use of the shutter release to selectively capture brief moments during a subject’s movement. If you’re shooting a burst with a high frame per second camera you will be focusing the entire time you are pressing down on the back focus button and not just when the shutter release button is pressed half way.
- Fatigue: It helps reduce shooter fatigue. You’ve probably learned over time the delicate half-pressure of the index finger on the shutter button required to acquire and hold focus without tripping the shutter. Back button focus shifts that focus to the thumb which gives relief to your index finger so it can deliver that subtle slow rolling squeeze you want to deliver sharper images.
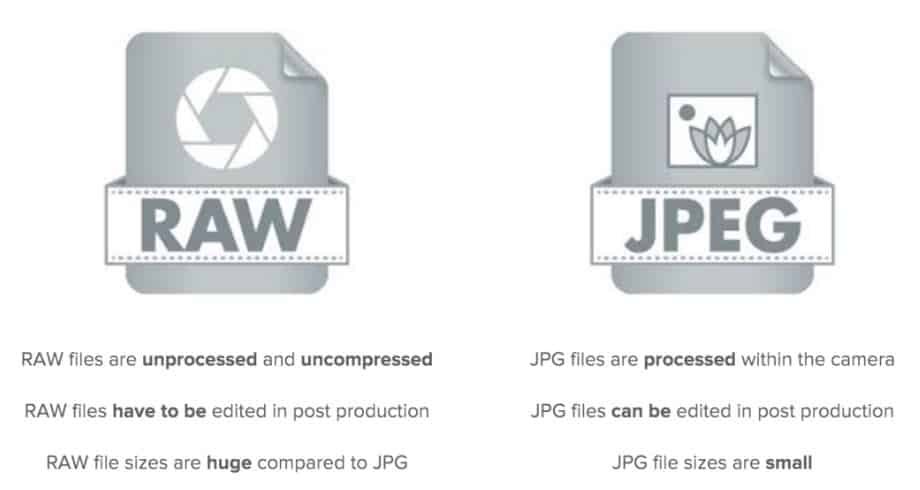
Mistake #10: Shooting in JPEG – Some will argue that shooting in JPEG is not a “mistake” and I do not disagree however I wouldn’t make a very good mentor if I did not at least advise you that when you shoot in JPEG image information is compressed and lost and as a result the full range of edit capabilities is reduced.
If you do choose to shoot in JPEG then I highly recommend you buy Topaz Labs JPEG to RAW. JPEG to RAW AI uses artificial intelligence which allows you to edit JPEG files with the functionality you would have if it were a RAW file. It is extremely good at recovering colour detail and enhancing dynamic range to expose deeper shadows and enhanced highlights in your images.
Course Correction #10: Shoot in Raw – Because no information is compressed with RAW you’re able to produce higher quality images and correct problem images that would be unrecoverable if shot in JPEG. The difference when you shoot in JPEG format is that the camera does it’s own processing to convert the RAW information into a JPEG. However when you shoot in RAW you get to choose how the image will be processed and once you have an eye for editing you’ll do a way better job than your camera ever would.
Below are a few of the reasons why you should consider shooting in RAW:
- Image Quality: Provides the highest level of quality possible. RAW provides you with all of the captured data and greater control in the editing process.
- Flexibility: Allows greater flexibility to correct over/under exposed images due to there being more information in the file.
- White Balance: More options to adjust white balance. With JPEG’s the white balance is set for you by the camera making it harder to adjust later in the edit process.
- Brightness: Greater levels of brightness. RAW records between 4,096 to 16,384 levels depending on whether you select 12bit or 14bit where JPEG records 256 levels of brightness in 8bit.
- Image Detail: Enhanced detail in your images as a result of there being more data in your original file. This will be particularly important when you begin to work with plugins like Topaz Denoise AI and Topaz Sharpen AI. The more image data these tools have to work with the better the output.
While it is true that RAW files take up more space on your memory card and hard drives the cost now a days for storage is so low that the benefits outweigh the cost. And yes RAW files do require editing in all cases whereas JPEG’s can shared and posted without the need for further editing. If all you want are postcard, look what I saw images that’s fine. What we’re talking about in this article is how to step up your game so you can begin to play with the big boys and that isn’t shooting in JPEG.
BONUS TIP
Mistake #11: Noisy, Not Sharp, No Pop – That’s a lot to think about but if you’re going to print, post and share your wildlife photography the quality of those images is a reflection of your work. Images that are noisy, not sharp and lifeless negatively reflect on how your images are perceived by your audience. Not taking the time to learn at least the basics of photo editing will hold you back from becoming the world renowned wildlife photographer you strive to be or at least one your mother can be proud of.
Course Correction #11: Become a Master of The Editing Process – Dedicate time to learning and adopting a solid editing process for our wildlife photography. Regardless of whether you use Adobe Photoshop, Lightroom, ON1 Photo RAW, Capture One, etc. the process is the same. If you chose to shoot in RAW you’ll be adjusting blacks, whites, shadows, highlights, contrast, exposure and vibrance in Camera Raw. Photo editing is another one of those topics which is an article unto itself however I will leave you with one piece of advice.
There are plugin’s that make the editing process much simpler and more effective than just using your stand alone editor. I use the Topaz Labs Utility Bundle with every image that I edit, especially for selective sharpening and removal of noise. And if I have to crop in on a subject or require a large print I use the Topaz Gigapixel AI which is part of the bundle and is used to enlarge images up to 600% without loosing any of the detail. I did a full review in one of my earlier blog posts on the Topaz Utility Bundle if you’d like to learn more. You’ll also find a few Topaz Labs related video’s that you might find helpful on my coolwildlife You-Tube channel.


Comments
Best Tripod and Gimbal Head for Wildlife Photography 2021 | Cool Wildlife
How To Become A Wildlife Photographer | Cool Wildlife
Comments are closed.