

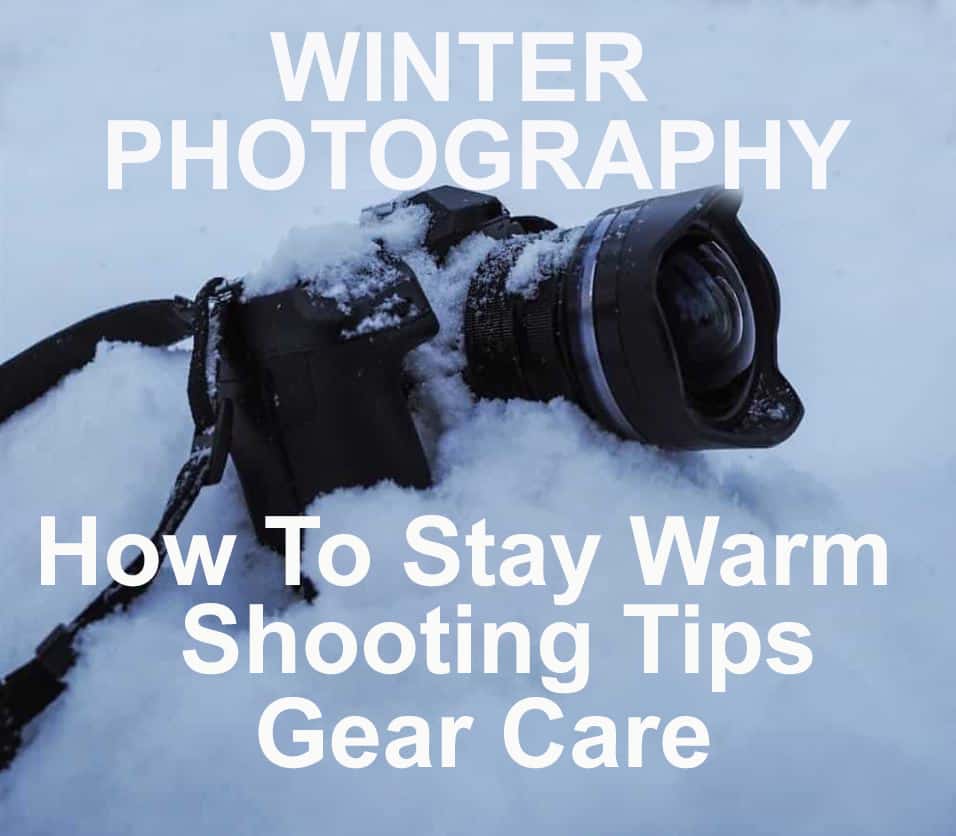
11 of the best cold weather photography tips to help you embrace winter photography.
- Use Heated Gloves, Insoles and Vests to Stay Warm
- Dress In Layers to Stay Dry
- Prevent Condensation on Cameras and Lenses
- Keep Batteries Warm And Bring Spares
- Use Snow Covers to Keep Gear Dry
- Carry Microfiber Cloths/Towels for Drying
- Underexpose by .5-2.0 Stops to Retain White Detailed Snow
- Avoid Heat Waves That Create Soft Images
- Pay Attention to White Balance to Avoid the Blue Hues
- Stick Felt Tabs On Your Camera For Better Feel on Controls
- Use Carbon Fiber Tripod legs to Stay Warmer and Lighten the Load
This post does include affiliate links. You can support my channel by clicking on any of the links in this post. It provides a small commission if you make a purchase at no additional cost to you.
Section 1: Keeping Yourself Warm
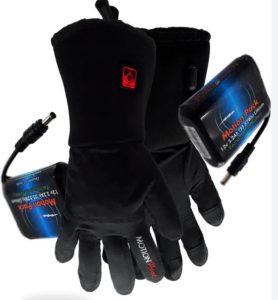
Heated Gloves, Insoles and Vests
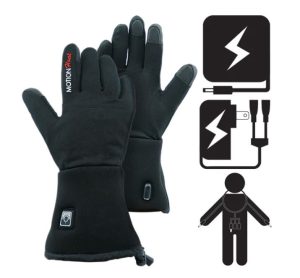
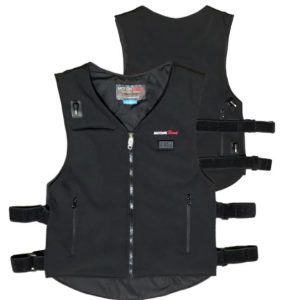
When it comes to staying warm during prolonged winter photography shoots in extremely cold conditions I rely on battery-powered gear.
The best solution I have found is from Motion Heat. Their system has a heated vest, gloves and insoles. You can purchase them independently or as a system that works together.
I use the heated vest to keep my core warm but those batteries also serve to power the gloves and insoles through cables that run to each.
There’s a lot to talk about when it comes to heated gear so I put together an entirely separate post with a video to provide you with all of the details.
I have also worked out a deal with Motion Heat to provide my readers with a 15% discount.
Canadian Shoppers: Click Here to Save 15% on All Motion Heat Purchases
USA/International Shoppers: Click Here to Save 15% on All Motion Heat Purchases
For a full review of all three motion heat products check out my post below.
Best Winter Photography Gloves For Raynauds 2024 | Field Tested
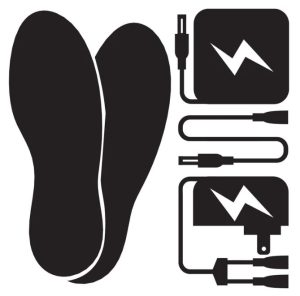
Best Heated Insoles
For those of you just looking to keep your feet warm Motion Heat just released a new version of their heated insole.
I’ve put them to the test and can confidently say they are the best insoles I have owned. In this post I’ll give you 8 reasons why I think they stand out from the pack.
Best Heated Insoles 2024 | Voted #1 in Canada
Dress In Layers
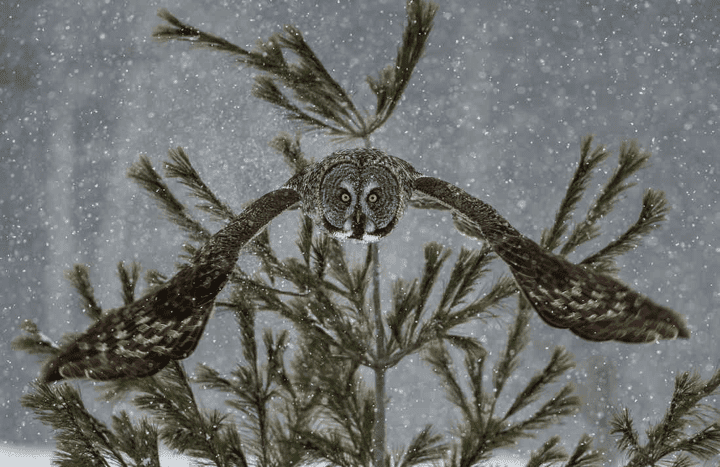
 Winter is my favorite time of year to shoot. There’s just something special about an owl perched in a tree with snow falling all around it. The coats of the animals we photograph are full and magnificent like no other time of the year.
The key to enjoying winter shooting is being prepared. Nothing ruins a winter shoot more than being cold, wet, and miserable because you didn’t dress properly for the weather. You need to know before you head what temperatures, wind and precipitation are forecasted. Only then can you select the right clothing for the day’s shoot.
Choosing the right gear is tailored to the individual. We all have different thermostats, some of us run cold and some hot. Whether you expect to be on the move or staying in one spot will also aid you in how you dress.
With that in mind, the concept you need to adhere to is that of layering.
Base Layer
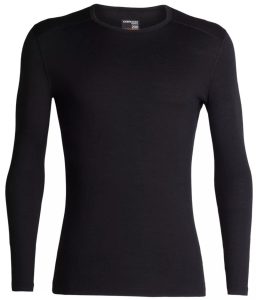 The base layer is one that fits snug to your body. I’m a huge fan of merino wool for this layer. It wicks away moisture, dries quickly, and best of all it does not smell even after several days of use. This makes it great for trips where weight restrictions limit how much you can bring along. I was hesitant to mention this due to the gross factor, but I wore the same base layer for 10 days on my last coastal brown bear shoot in Alaska and there was zero body odor. Synthetics are another popular option however I do find they take on an unpleasant odor after a day in the field. Whichever you choose, stay away from cotton as your base layer. Cotton retains moisture making you damp and increasing the rate of heat loss from your body.
The merino wool layering system is usually found in three weights depending on the manufacturer. Icebreaker as an example has a 150, 200 and 260 layer. Each layer gets heavier as the numbers increase.
You’ll need to decide which base layer suits the day based on your internal thermometer, how cold the day will be, and what level of activity you expect.
Mid-Layer
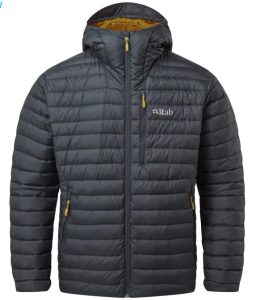 The mid-layer is the insulating layer that provides warmth. Once again the temperature and your own body will dictate how many and what weight of mid-layers you’ll wear. Note I said how many, that’s important. You want to be able to remove and add layers easily if you’re going to be active. Fleece and wool of varying weights are common choices for mid layers. I will often wear a 150 or 200 merino wool base layer with a 260 over top. On extremely cold days, especially when I know I will standing around, I will also use a puffy down coat and down pants as one of my mid-layers. They’re great at trapping warm air between your base layer and you for additional warmth.
Pants that are water and wind resistant, rugged, insulative and easy to move in are ideal for the mid-layer.
Shell Layer
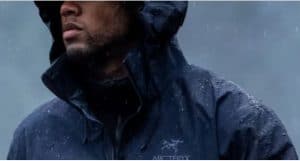 Staying dry is essential to staying comfortable and safe in cold environments. My personal preference for this layer is a Gore-tex Pro Shell for both my jacket and pants.
As a wildlife photographer I am quite often lying in the snow for hours at a time. I have found that the Gore-tex Pro shell does a great job at keeping me dry.
It is worth mentioning that if you’ll be lying or sitting in the snow you’ll want much warmer mid-layers as the cold will penetrate to your body. That’s another reason that I use a heated vest and down jackets and pants. The shell layer also serve you well in cutting the wind whenever it picks up.
Lying on a waterproof neoprene matt is another trick I use in winter to insulate me from the snow.
Pro Tip: The secret to staying warm is to avoid sweating. If you’re going to be hiking looking for wildlife, wear what layers you need to be warm without over-heating and pack the rest. By layering you can peel off layers as required to avoid sweating.
Once you’ve found your subject you can throw on additional layers as needed.
Footwear
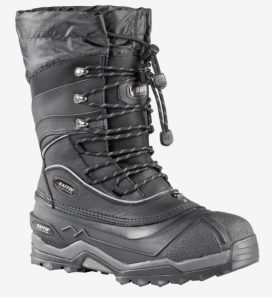 A good polyester or merino wool sock serves as the base layer in your boots that will help wick moisture from your foot and provide insulation from the cold.
Insulated and waterproof boots are essential for winter photography. Once again, my personal preference for waterproofing is Gore-tex and there are many manufacturers including that in their winter boot offerings.
If you know you’ll be standing in one spot shooting in extreme cold, heated insoles are a must for me. And standing on something other than snow can really help as well.
We get a lot of freezing rain in Eastern Ontario where I live and that makes for slippery conditions. For addition traction I wear cleats such as the Kahtoola Microspike Ice Cleats to prevent falls.
Headwear
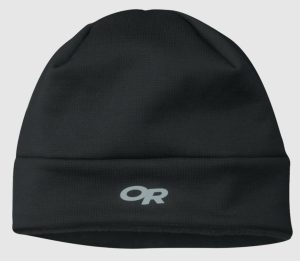 Keeping your head warm is critical. I wear a thick hat that has a wind-stopper technology built in with coverage over the full length of my ears. The Outdoor Research Wind Pro hat is such a hat.
On extremely cold and windy days I also wear a balaclava under my hat. It has a nose hole built in and holes at the mouth so that I can cover everything but my eyes.
Pro Tip: When wearing a balaclava condensation from an exhale can fog up your viewfinder so pay attention and do not exhale onto your camera.
Gloves
 For photographers that require a degree of dexterity to operate camera controls yet have enough warmth to keep their hands cold we once again turn to layering.
I run with the Motion Heat battery operated glove liner with their shell mitten over top. The interior liner has three heat settings so I can adjust the temperature to the level required to keep my hands warm.
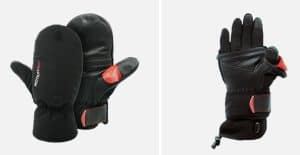
The outer mitten has a zipper across the palm and a flap of leather at the thumb to allow my fingers to come outside of the shell for operating my camera.
Alternate Solutions
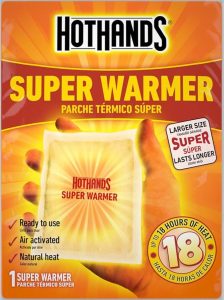 For those of you who do not wish to go the battery operated glove, insole and vest route you may wish to try the Hot Hands Products. These are light weight air activated heat-generating materials that provide warmth without batteries. You can drop them into mittens, pants pockets, boots, or even under your hat for that bit of extra warmth.
I used these for years before I discovered the Motion Heat line of battery operated gloves, vest and insoles. I never found that they provided enough heat to keep me warm enough on really cold days but they were better than nothing.
For those of you who really want to dive into the heated vest, gloves and insoles from motion heat check out my video review.
Section 2: Gear Care
Prevent Condensation
 Now that we’ve covered keeping ourselves warm it’s time to move to a few gear related tips.
Condensation is easily one of the biggest issues you’ll run across in winter photography. When you transition from the cold of the outdoors to somewhere warm such as your car or home you will notice that condensation forms on your camera or lens.
This condensation can form on the inside of your front element and when that occurs there is no way for you to wipe it off. You must wait until it dissipates and that can take several hours and ruin a shoot.
Fortunately there are ways to prevent this from happening. When shooting from your car, keep the heat off so that your car is the same ambient temperature as the outdoors.
If you are not willing to do that, you must seal your camera in your camera bag or plastic bag before bringing into your warm car.
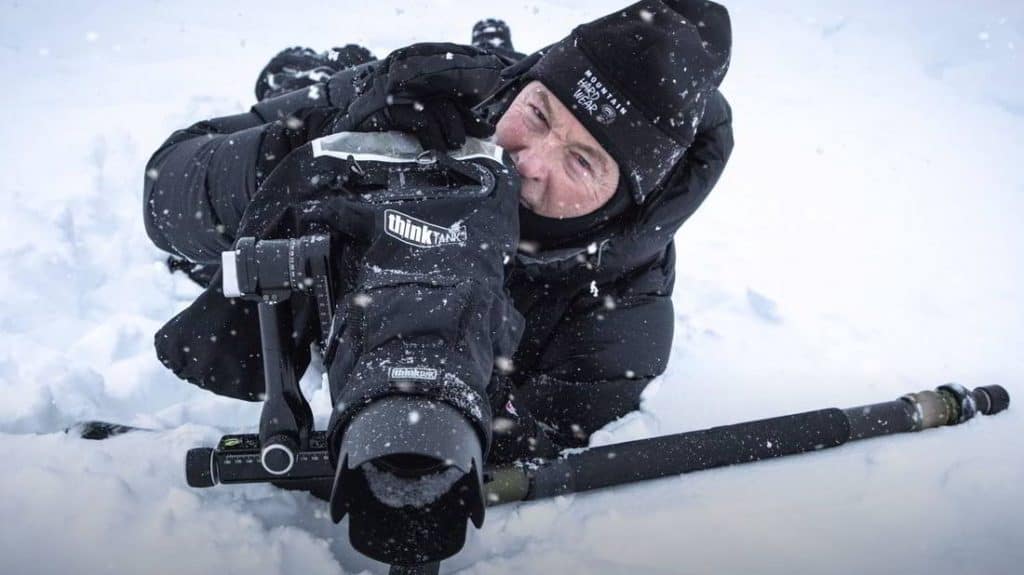
I carry my Nikon Z9 camera attached to the Nikon 400 2.8 TC lens with the hood attached in the Lens Trekker 600 AW III Backpack.
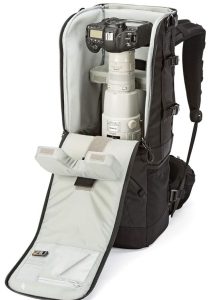 This allows my to stow away my camera and lens without fiddling with the lens hood and it is ready to shoot as soon as I pull it from the bag.
When I am done a shoot, I remove the battery and memory card from my camera, put in a new fully charged battery and place the camera and lens into my bag before I place it in my car or enter my home.
This allows me to charge my drained battery and offload my memory cards without having to open my camera bag for the next few hours.
If you do not have a camera bag you’ll want to pick up a dry bag or even a cheap plastic bag as long as it has an air tight seal that is large enough to accommodate your camera and lens.
Don’t be in a hurry to take your camera out of the bag, it takes hours for your camera and lens to warm up to a temperature that will not cause condensation.
Battery Management
 Keeping batteries warm in cold weather during photography is crucial to maintain their performance. A drop of 10 °C (18 °F) can cause your battery life to deplete by as much as half.
The trick is to keep them warm. I place my spare batteries in the inner lining of my jacket so that the heat from my body keeps them warm.
If you have multiple batteries, which I highly recommend, rotate them. Keep the ones you’re not using in a warmer spot and switch them out periodically to maintain their warmth.
Pro Tip: A battery that shows as drained in your camera once warmed up will provide you with additional charge. Keep this in mind if you ever find yourself without battery power as it just may extend a shoot that you thought was over.
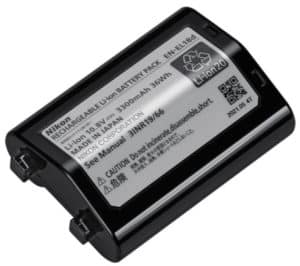
Worthy of note, the larger batteries in professional cameras such as the Nikon EN-EL 18D pictured here that work with the Nikon Z9 will last much longer than the smaller batteries such as the Nikon EN-EL15C found in the Nikon Z6II and Nikon Z7II.
In summary, cold weather will significantly affect battery life. It’s always a good idea to carry extra batteries and keep them as warm as possible to ensure your photography session isn’t cut short!
Snow Covers
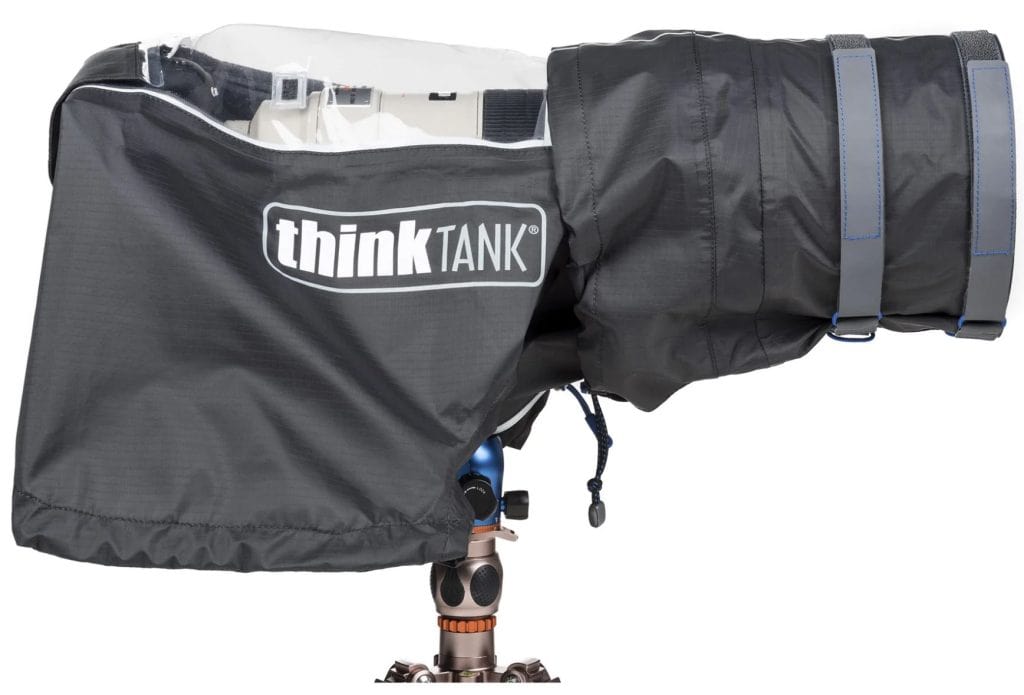
When the forecast calls for a snow day that’s when I know I need to be out shooting. There’s a dimension that’s created within an image that is shot during a snowfall that just can’t be had on a bright. clear winter day.
As good as the weather sealing is on today’s camera’s and lenses I always cover my camera and lens with a snow/rain cover when shooting in these conditions.
There are a number of excellent options on the market today. I own and use the ThinkTank Hydrophobia and the Lenscoat Raincoat Pro products.
Both come in a variety of sizes to fit both small, medium and large lenses.
Microfiber cloths/towels
No matter how careful you are there will come a time when you will get snow on your front element. For me, this happens most often when I am lying in the snow and upon try to get my old tired body off the ground I scoop snow into the lens hood.
Having a microfiber cloth on hand to clean off the front element comes in very handy.
On those snowy days I bring a towel with me to wipe the snow off my snow cover before taking it off and placing my camera and lens in my camera bag. I try not to place wet gear into my camera bag whenever possible.
Section 3: Shooting Tips
Exposure
 Adjust Exposure Compensation: This subject could go really deep but all you need to know is that your camera will always meter a scene and try its best to render the image in 18% middle grey, halfway between black and white.
This is important to know when shooting winter scenes because the snow will make the cameras meter underexposure the image. This leads to dull grey snow images.
You will need to experiment by using a positive exposure compensation (usually between +0.5 to +2.0) to brighten up the image and retain the delicate details of the snow.
Embrace Dynamic Range: Winter scenes often boast a wide dynamic range with bright snow and deep shadows. To maintain details in both highlights and shadows, use the camera’s histogram to ensure the exposure doesn’t clip either extreme.
Utilize the Golden Hours: Take advantage of the soft, golden light during sunrise and sunset. The angled light during these times can add warmth and depth to your winter shots, creating stunning contrasts against the snow.
Best of all you don’t have to wake up at 4:00 am to capture this light in the winter months.
Prioritize Metering Modes: Experiment with different metering modes like evaluative/matrix, center-weighted, or spot metering. In snowy landscapes, spot metering can be particularly useful as it measures the light from a specific point, preventing overexposure from vast snowfields.
White Balance
 Mastering white balance in winter photography is about understanding the nuances of light and color temperature. By utilizing your camera’s settings effectively, making manual adjustments, and leveraging post-processing tools, you can capture the true essence of winter landscapes and wildlife.
Winter scenes might appear overly blue due to the cool lighting conditions. Adjust the white balance setting to avoid this and maintain the natural colors. Use the ‘Cloudy’ or ‘Shade’ preset for warmer tones. This applies mainly to those of you shooting in JPEG,
I shoot in RAW so I leave my Nikon Z9 on auto white balance and let the camera do it’s thing. I do this because RAW allows you to change the white balance to whatever setting you want in post.
Heat Waves
Car Cautions
If you insist on shooting from your car and you haven’t taken my previous advice to turn off the heat you may find your images to be very soft.
This is caused by heat waves radiating out of your car into the cold air and you shooting through it.
The same heat waves radiate off of the hood of your car so DO NOT use the hood of your car as a brace for your camera.
Lose The Lens Hood
When your lens comes out of your toasty warm camera bag and you place the lens hood on it traps hot air in the barrel of the hood. This can create heat waves which render out of focus images.
I recommend having the lens hood off your camera for a minute or two in the cold air before attaching it.
Felt tabs
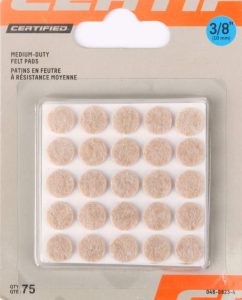 When you’re wearing gloves, it can be difficult to locate and depress the buttons on your camera. To make it easier, I use inexpensive, self-stick 3/8-inch round felt tabs on my horizontal and vertical shutter and AF buttons in cold weather.
Plus, the packages come with enough tabs to share with everyone who wants to give it a try. The small tabs are available at Lowe’s, Home Depot, and other retailers.
Tripod legs
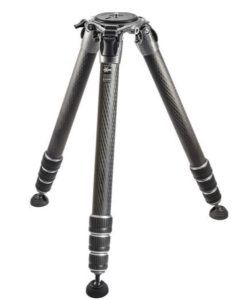 You will no doubt have noticed that metal becomes very cold as the temperatures drop. That’s why I recommend a carbon fiber tripod to anyone who will be shooting in winter.
I have three different carbon fiber tripods for varying applications. My go to everyday tripod is the Jobu Algonquin Tripod. It’s great for most shooting, can handle the big glass and is light weight.
If I’m not going to be hiking and I know I’ll be using my Nikon 600mm f/4 FL ED VR lens which is a beast then I will use my Gitzo 5543LS tripod. It is a heavy duty tripod that does a better job of minimizing the vibration when using the heavier glass like the 600mm.
Last but not least is the lighter and taller Gitzo 3543XLS tripod that I carry when I’m going to need a taller tripod, such as when shooting upward at owls in trees. This allows me to look through the viewfinder without hunching over which saves my aging back.
Not only will your hands stay warmer with carbon fiber but they are significantly lighter than their aluminum counterparts. Do take note however that carbon fiber becomes more brittle in colder temperatures. The deeper the snow, the more the legs need to spread. Pulling out the leg locks will allow the legs to splay out sufficiently, preventing them from breaking at the tripod flange.
Additionally, do not try to stand up by pushing down with all your weight on a tripod leg in cold temperatures, or you risk breaking the leg. Tripod foot spikes or rock claws will help in snow and on icy surfaces to keep your tripod feet from slipping.
If you need to extend the legs of your tripod start with the lower legs first to keep the snow and wet on the bottom of the leg rather than in the first collar.
This is especially important if you are bringing your tripod in and out from warm to cold as that snow that has melted in the collar will freeze once exposed to the cold making it difficult to turn the collar and extend the legs.
Conclusion
Winter is my favorite time of year to shoot wildlife. If you dress for the weather, know how to protect your gear and pay attention to the shooting tips I have provided you’ll be ready to embrace winter and enjoy your photography all year round.