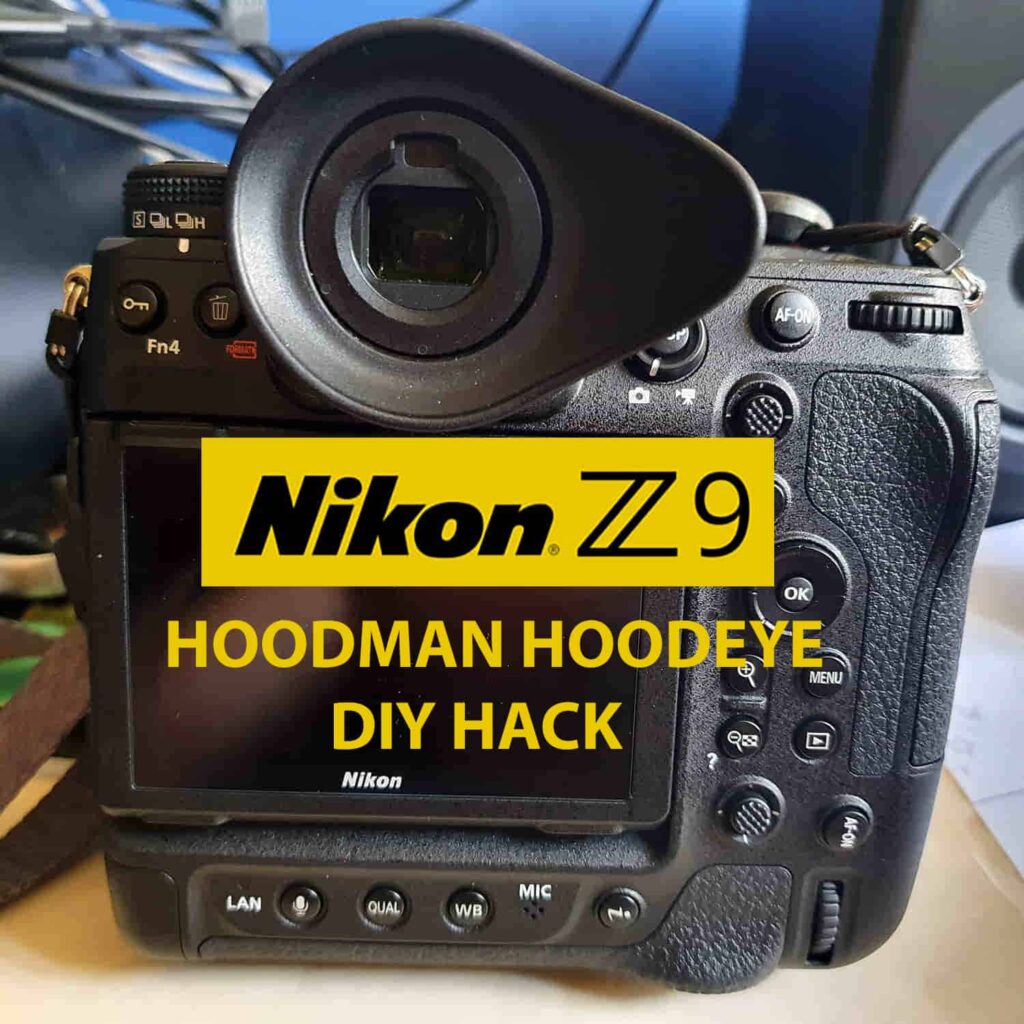
Nikon Z9 Hoodeye Eyecup | Eye Piece Replacement DIY
Nikon Z9 step-by-step guide on how to replace the original Z9 eyepiece with a Hoodman HoodEYE eyecup that was made for the Nikon Z6/Z7. The full instructions below will walk[…]
Read the post.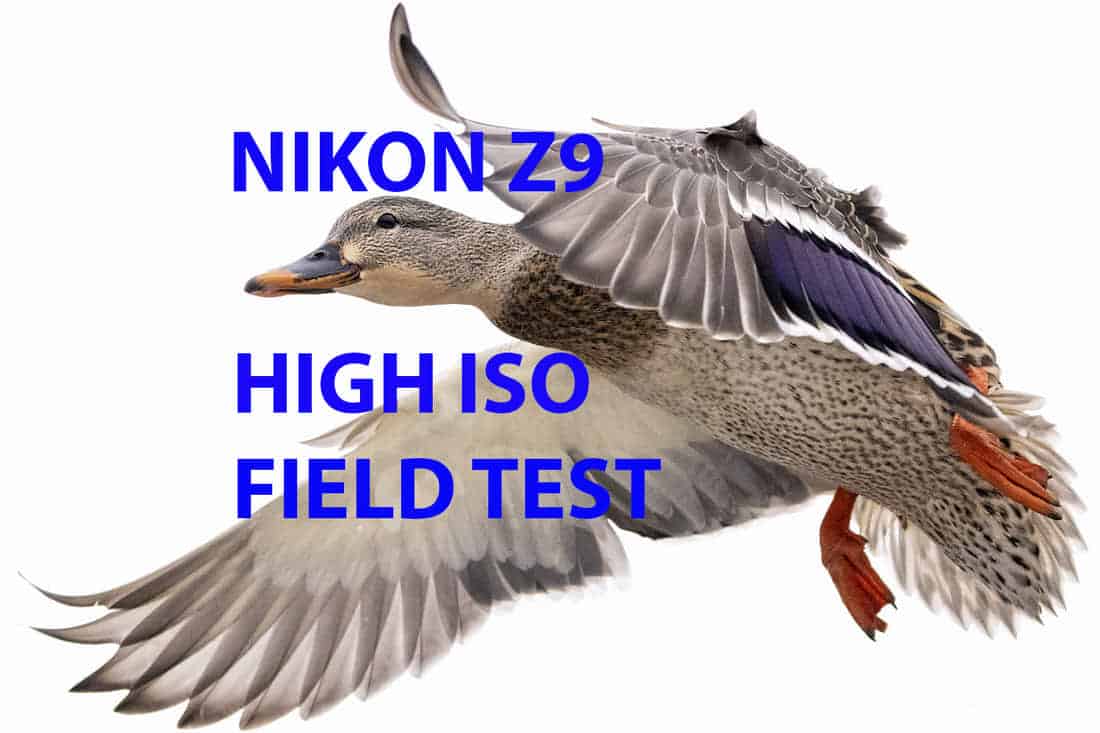
What is the highest usable ISO on the Nikon Z9?
The Nikon Z9 is capable of ISO 25,600 natively. Based on my initial field tests, the highest ISO that is usable for printing is ISO to 12,800.
In what follows are sample images from a production Nikon Z9 at high ISO ranges so you can judge for yourself just how far you want to push the upper end of the ISO range with your Nikon Z9.
For those of you thinking about a gear purchase, please consider using one of my affiliate links to either B&H or Amazon Canada. I receive a small commission to support my content creation efforts and there is no extra cost to you.
Thank you for your support.
If you’re now the proud owner of a Nikon Z9 or expecting one soon you will want to get it set up properly for best results. I highly recommend Matt Granger’s Nikon Z Camera Expert Setup Guide. You’ve likely come across the hours of free Nikon Z9 content Matt created on YouTube.
I spent hours watching his content prior to getting my Nikon Z9 and it was so helpful that I wanted to support his continued efforts by purchasing his guide. After watching all of Matt’s Nikon Z9 video content, I can confidently say that it is a must-have resource for Nikon Z9 shooters.
If you follow along with Matt as he dives into each menu and walks you through all of the customizations and settings changes required, you can head out into the field knowing your Z9 is perfectly configured for whatever you’ll be shooting.

When I get a new camera one of the first things that I do is field test it for how well it handles high ISO. As a wildlife photographer who shoots in low light, I need to know how far I can push the ISO before the image becomes unusable. I then set that upper limit in my ISO sensitivity settings for AUTO ISO.
If your not familiar with this concept it is worth mentioning here. I shoot in manual mode. setting my shutter speed and f/stop manually depending on what I am shooting. I let the camera select the appropriate ISO to yield the correct exposure. For the Nikon Z9, you’ll find that setting in the Photo Shooting Menu under ISO Sensitivity Settings. The highest ISO I will allow any camera to go is the upper limit where noise in the image can not be cleaned up to a usable level. In the case of the Nikon Z9 based on these preliminary field tests I have mine set at ISO 12,800.
With most of my DSLR cameras that limit was 3200-6400, beyond that the image was too noisy. I am super excited to let you know that is about to change with the Nikon Z9. Take a look at the two images below.
The first image is at ISO 8000 and the second is at ISO 12,800. I’m hopeful that you can see the noise in the original image and how well it cleaned up in the edited image. You’ll see text on the bottom of each image to let you know which side represents the edited image and which one is the original.
You can move the slider to see how much noise is in each image. As you slide across the image you will see what the image looks like after it has been edited with both Topaz Denoise AI and Topaz Sharpen AI applied. What do you think, are they usable? Please feel free to leave a comment and let me know what you think.
[twenty20 img1=”12257″ img2=”12247″ width=”100″ offset=”0.5″ before=”Original Image” after=”Topaz Denoise and Sharpen AI Applied”]
Nikon Z9 100-400 4.5=5.6 VR S With Z TC-1.4X ISO 8000 f/7.1 1/1250
[twenty20 img1=”12295″ img2=”12296″ offset=”0.5″ before=”Original Image @ 10,000 ISO” after=”Topaz Denoise and Sharpen AI Applied”]
Nikon Z9 100-400 4.5=5.6 VR S With Z TC-1.4X ISO 10000 f/9 1/1250
[twenty20 img1=”12244″ img2=”12243″ offset=”0.5″ before=”Original Image” after=”Topaz Denoise and Sharpen AI Applied”]
Nikon Z9 100-400 4.5=5.6 VR S With Z TC-1.4X ISO 12,800 f/10 1/2000
We all have a different tolerance for noise. Only you can decide what an acceptable level of noise is based on what you do with your images. For my use going to large print both of those images are acceptable.
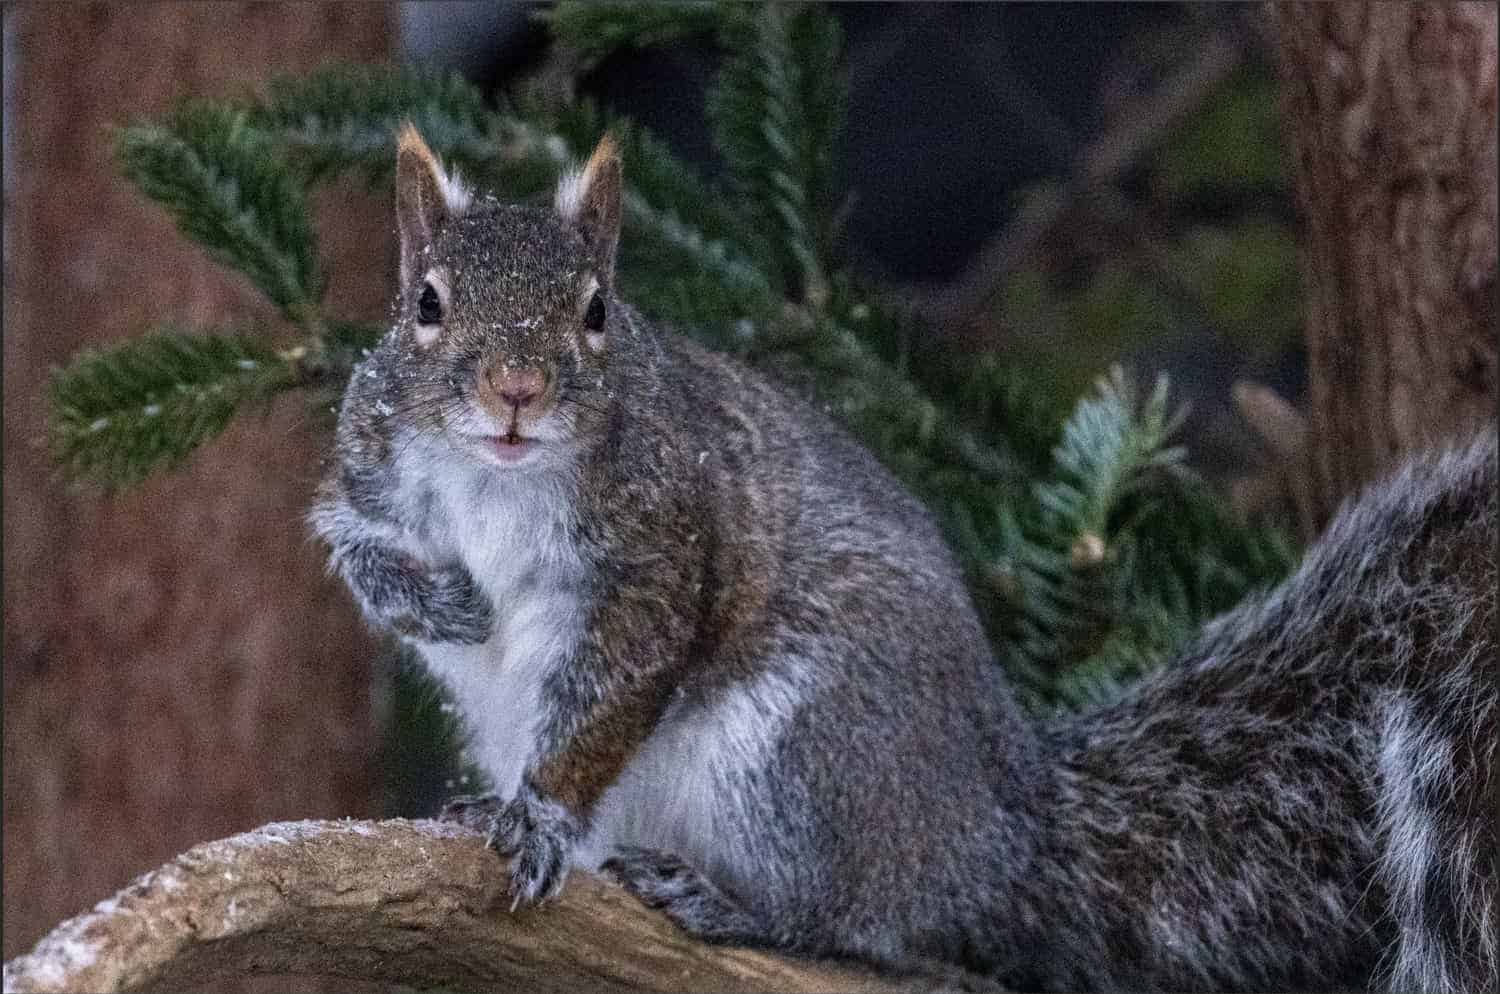
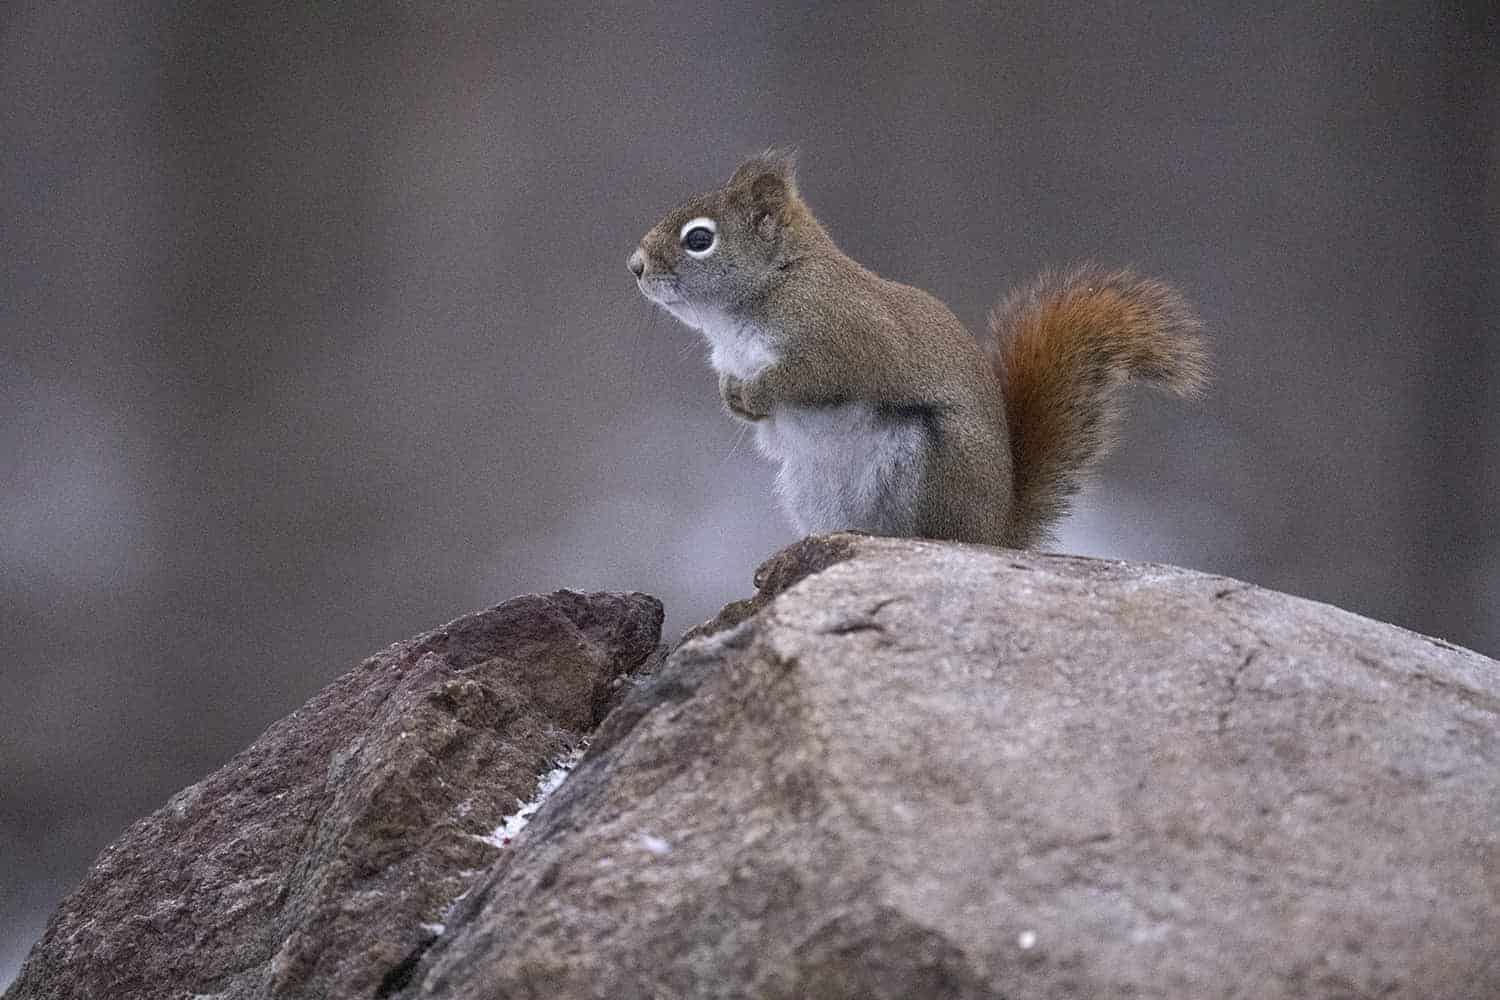
Now here’s where it gets very interesting. Let’s jump all the way up to ISO 20,000. As you can see in the original image of this grey Squirrel @ ISO 20,000 the image is very noisy. However when I apply my edits including Topaz Denoise AI and Topaz Sharpen AI the image cleans up rather nicely.
Is this edited image acceptable for use on the web, absolutely. Can I take it to large print if I enlarge it using Topaz Gigapixel AI to say 400% or 600%? The jury is out on that one for me at the moment. I need to do a lot more field testing before I make that decision. And of course there is also ISO 16,000 that I need to take a closer look at to see if it is a usable ISO. More to follow on this front.
[twenty20 img1=”12298″ img2=”12299″ offset=”0.5″ before=”Original Image @ 20,000ISO” after=”Topaz Denoise and Sharpen AI Applied”]
Nikon Z9 100-400 4.5=5.6 VR S ISO 20,000 f/7.6 1/1000
Nikon Z9 Production 100-400 4.5-5.6 VR S With Z TC-1.4X ISO 20,000 f/7.6 1/1000
Nikon Z9 Production 100-400 4.5-5.6 VR S With Z TC-1.4X ISO 20,000 f/7.6 1/1000
With Topaz Denoise AI and Topaz Sharpen AI Applied
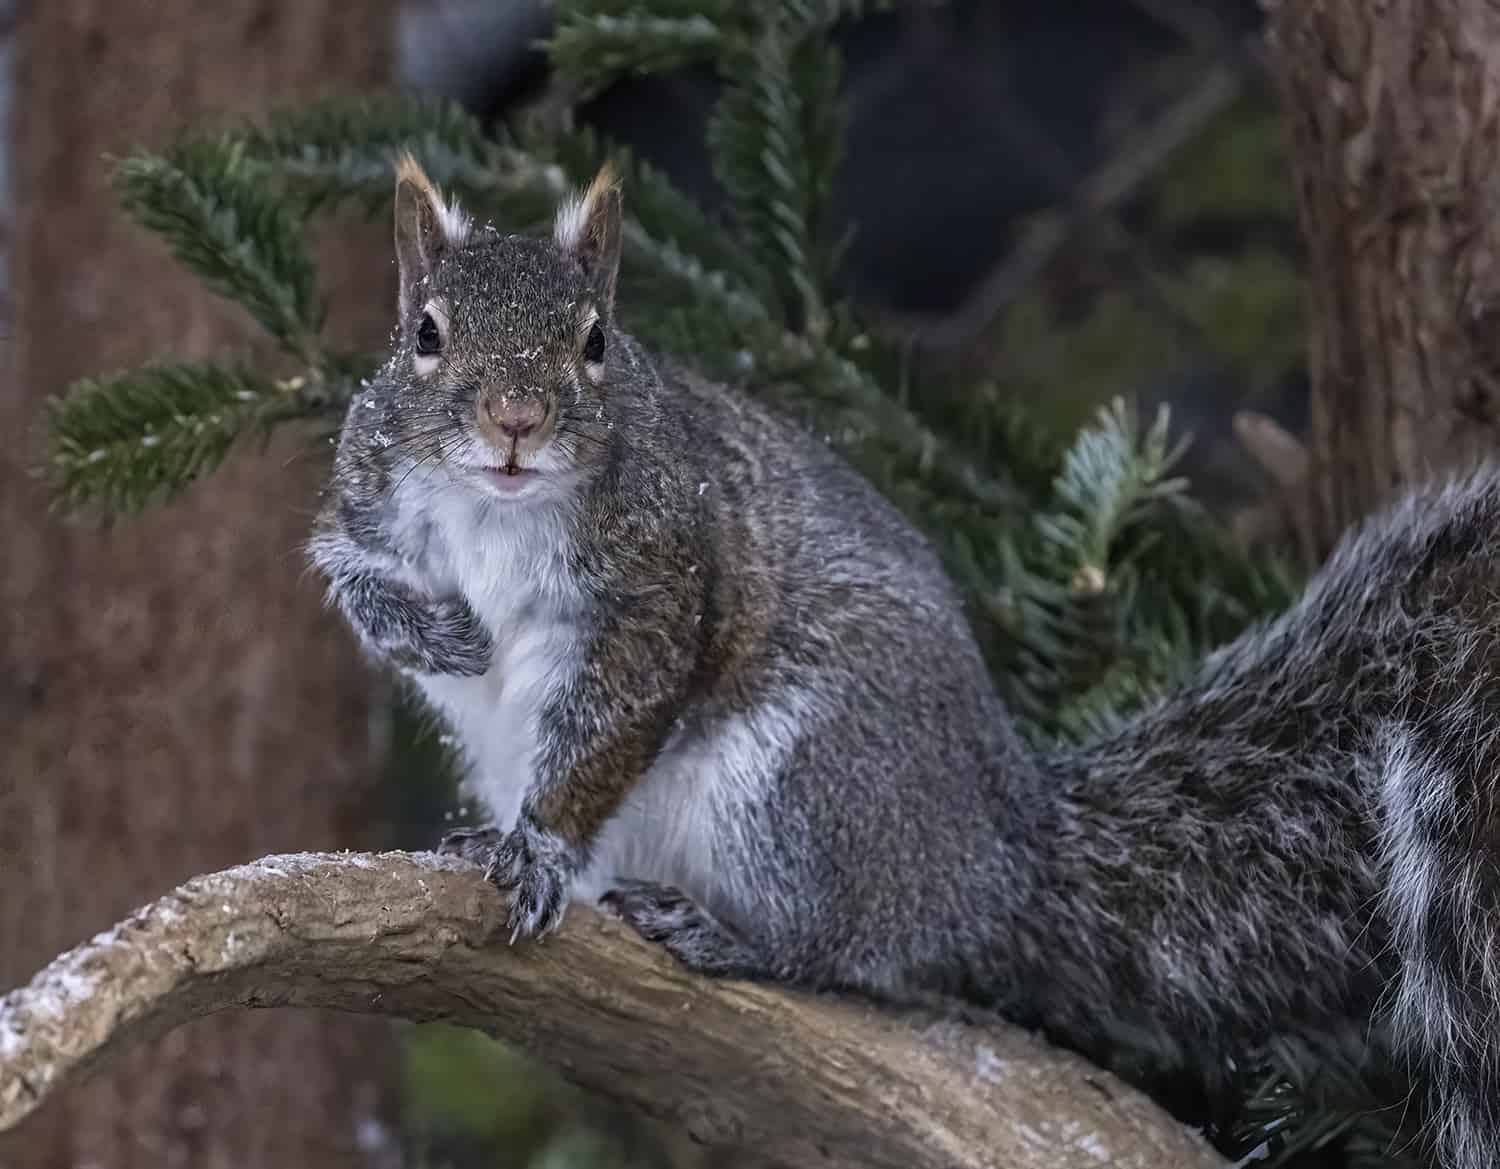
Image Below Enlarged With Topaz Gigapixel AI. Original cropped image was 5857×4564 now enlarged to 23,428×18,256 suitable for large printing.
![]()
Let’s go all out crazy on this next image shot at ISO 25,600. I was really curious to see if the Z9 could pull it off. To be clear, I’ve never shot any of my Nikon cameras, not even my D5 at this high an ISO. I actually never ventured much over ISO 8,000.
[twenty20 img1=”12496″ img2=”12495″ offset=”0.5″ before=”Topaz Denoise and Sharpen AI Applied” after=”Original Image”]
Nikon Z9 Production 100-400 4.5-5.6 VR S With Z TC-1.4X ISO 25,600 f/8 1/500th
With Topaz Denoise AI and Topaz Sharpen AI Applied
To dive in a little closer, this first image is the original image straight out of the Z9. As you can see it is quite noisy. You can click on any of these images for a larger view.
This next image was processed using Topaz Denoise AI utilizing the Severe Noise model. It definitely removed the noise however there is a great deal of artifacting present at an unacceptable level.

This final image was also processed with Topaz Denoise AI. This time I used the RAW model to process the image which is only available if you use Topaz Denoise AI as a stand alone product. In both of the denoised images I also had to apply sharpening in Topaz Sharpen AI as the resulting images were too soft for my liking. Note: The RAW model will be greyed out if you try and access it through Photoshop.
I think you’ll agree this image processed with the RAW model is vastly improved over the previous one. The learning here appears to be that Nikon Z9 High ISO images should be pulled into Topaz’s RAW model in Denoise AI. More testing is required to conclude on that assumption.
If you do not currently own Topaz Denoise AI or Topaz Sharpen AI you can save money buy purchasing the Topaz Image Quality Bundle. You’ll get both Denoise and Sharpen as well as Gigapixel for enlarging your images up to 600% without loss in detail. Perfect for those us wildlife photographers who are forever dropping in on our subjects in post.

I’ve been asked a lot about my image processing workflow, here’s a quick run down of my steps.
Go to any of the links above to start a free 30-day trial.
PRO TIP: Purchasing the Image Quality Bundle with all 3 products saves you $$$ and using coupon code coolwildlife15 saves you 15%. Click on the image below to go directly to the IQ bundle.

I’ve always professed that you should shoot in the lowest possible ISO that you can for any given situation. The reason, less noise equals better image quality. This advice does not change with the Nikon Z9. Most Nikon Z9 testers have compared the ISO performance of the Nikon Z9 to that of the Nikon D850 and Nikon Z7II.
I am not able to perform a side by side comparison having sold my D850 and 7II. That’s fine with me, all I really want to know with the Nikon Z9 is how high I can push the ISO before the image quality is not sufficient to take it to print for a client.
Based on my initial field testing I will be setting my Nikon Z9 ISO Sensitivity Setting to an upper limit of 12,800 for shooting in manual mode. I am confident from what I have seen that a 12,800 image can be denoised and sharpened to a satisfactory level with Topaz Denoise AI and Topaz Sharpen AI. I always use DXO Pure RAW as the first step in my workflow as I find it does an excellent job removing noise. I was not able to test DXO Pure RAW at this time as the Nikon Z9 RAW files are not supported.
If I were just posting to the web at 72 dpi, I would not hesitate to use ISO 25,600. Given my shooting is intended for the possibility of large prints I require a higher quality image.
As I spend a little more time with the Nikon Z9 I will update this post if I feel that upper ISO limit of 12,800 needs to be adjusted.
If you’re interested in receiving more content like this, hit the subscribe button at the bottom of this page and you’ll receive an email every time there is a new post. I’ll have a lot more coming your way in the coming weeks.
Thank you so much for supporting my channel.
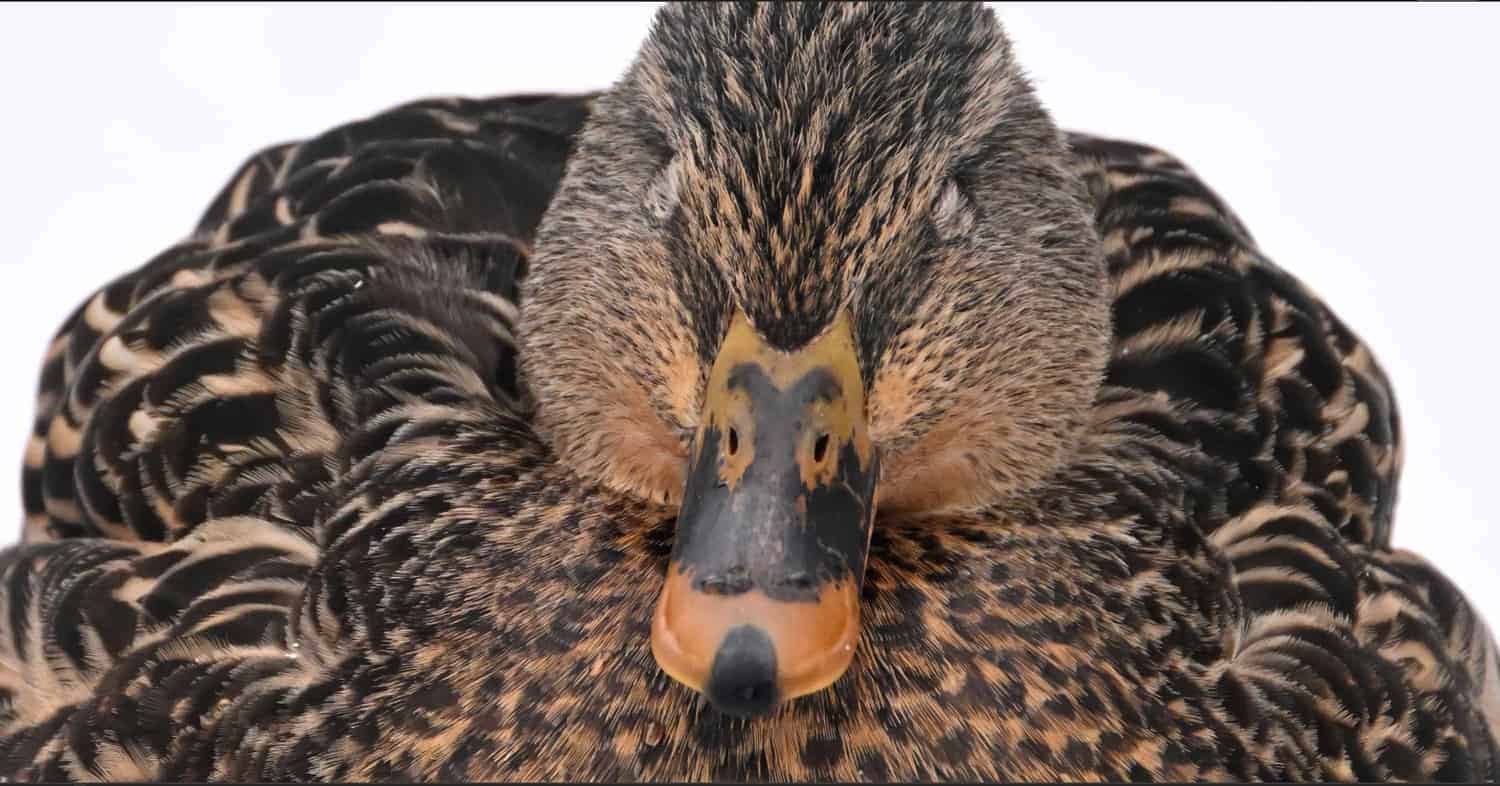
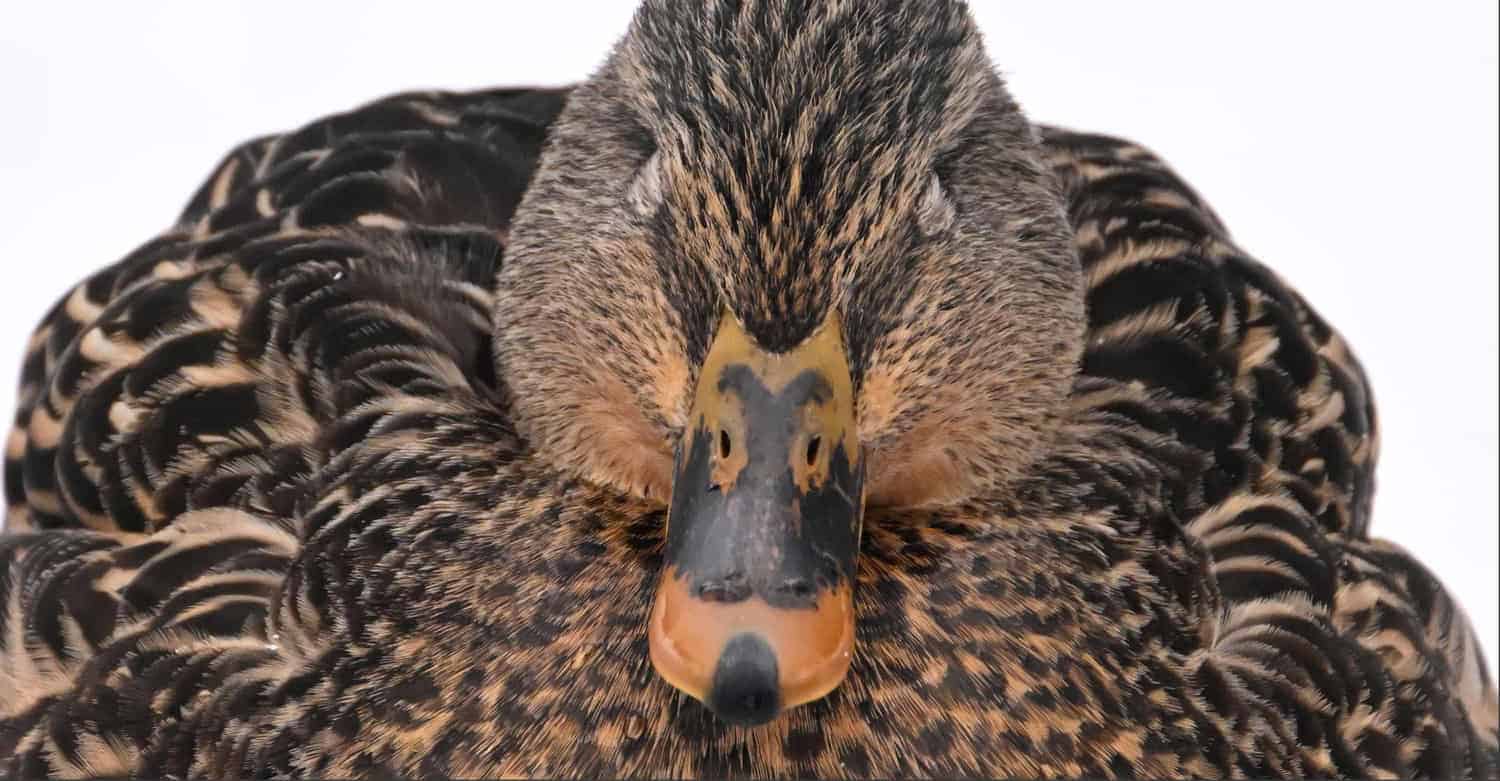
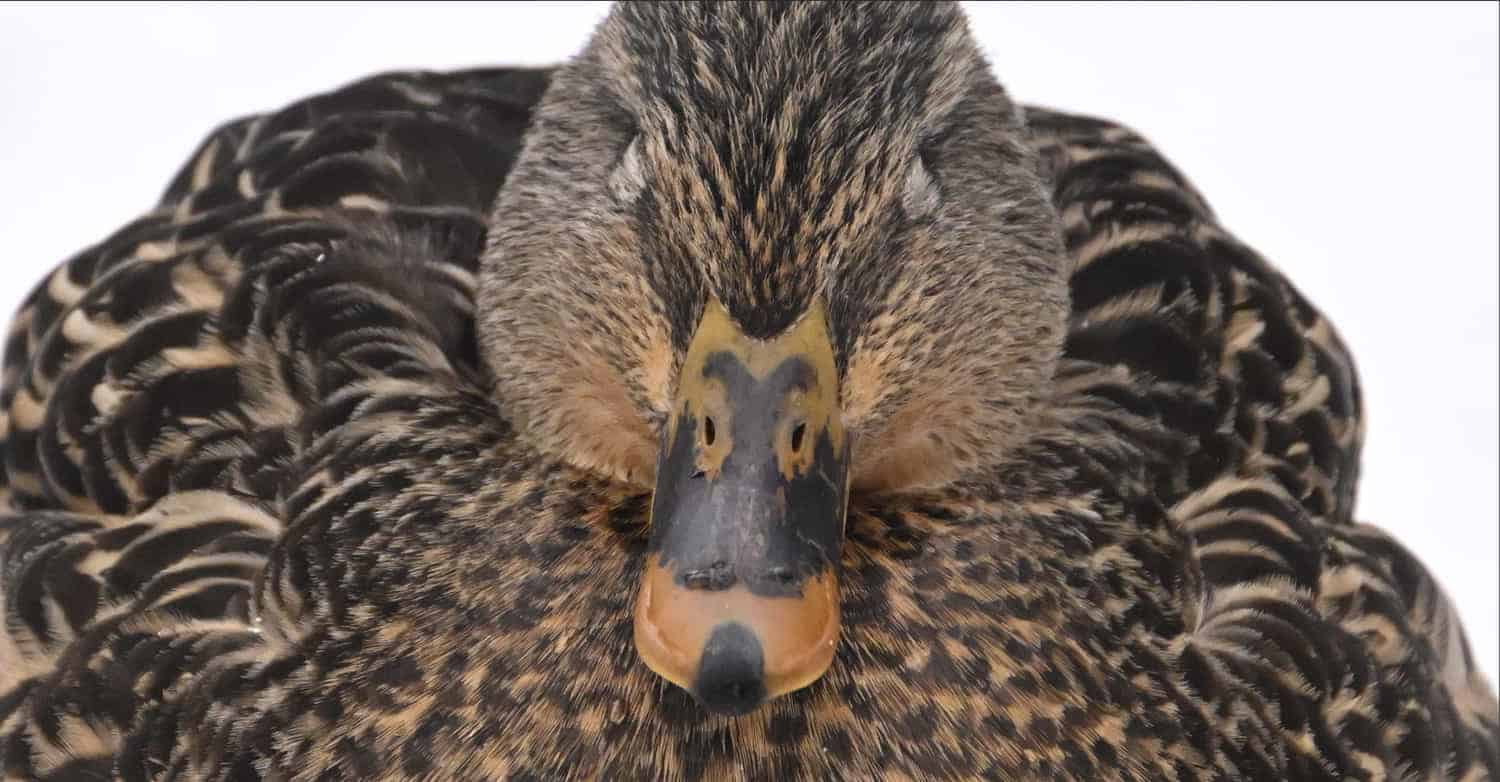
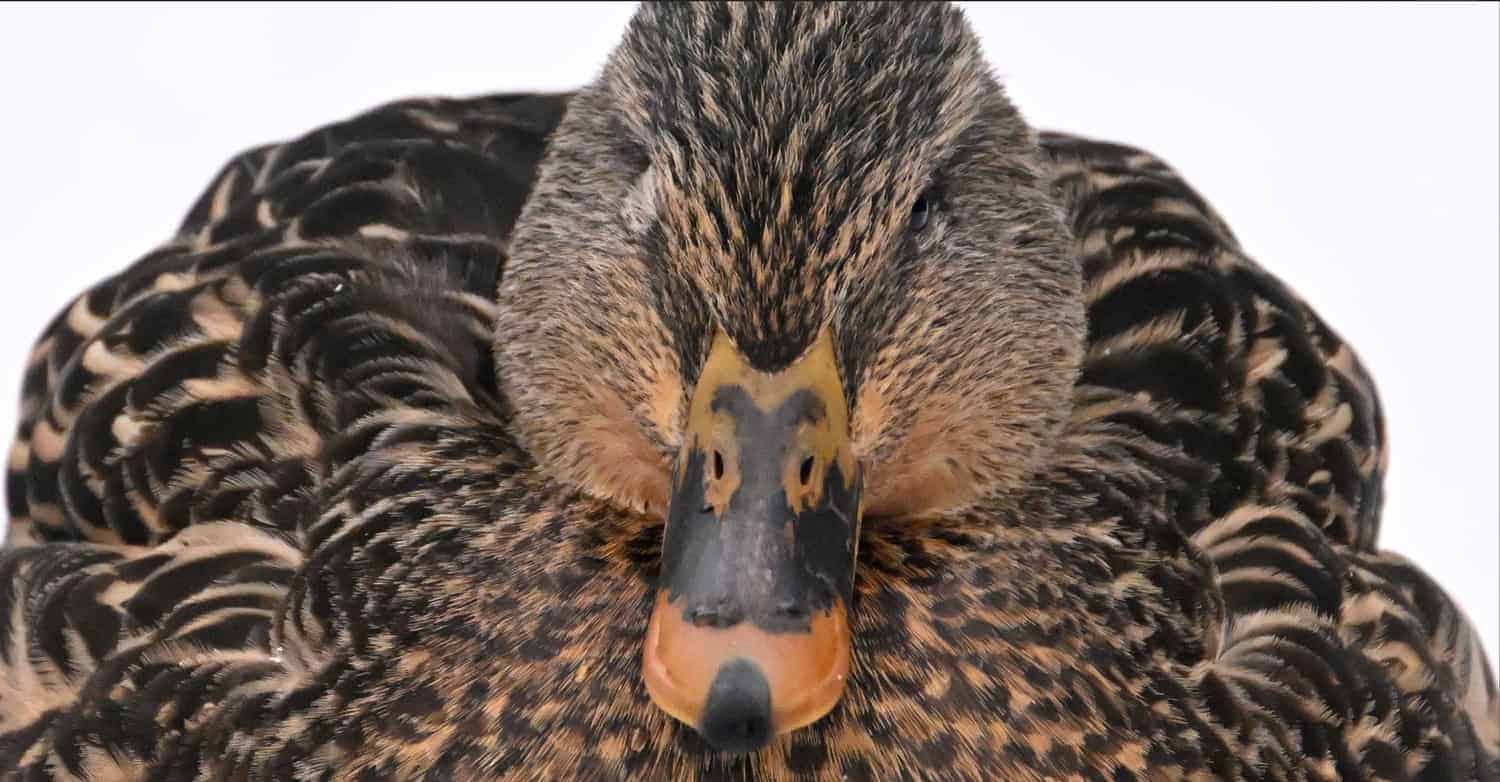
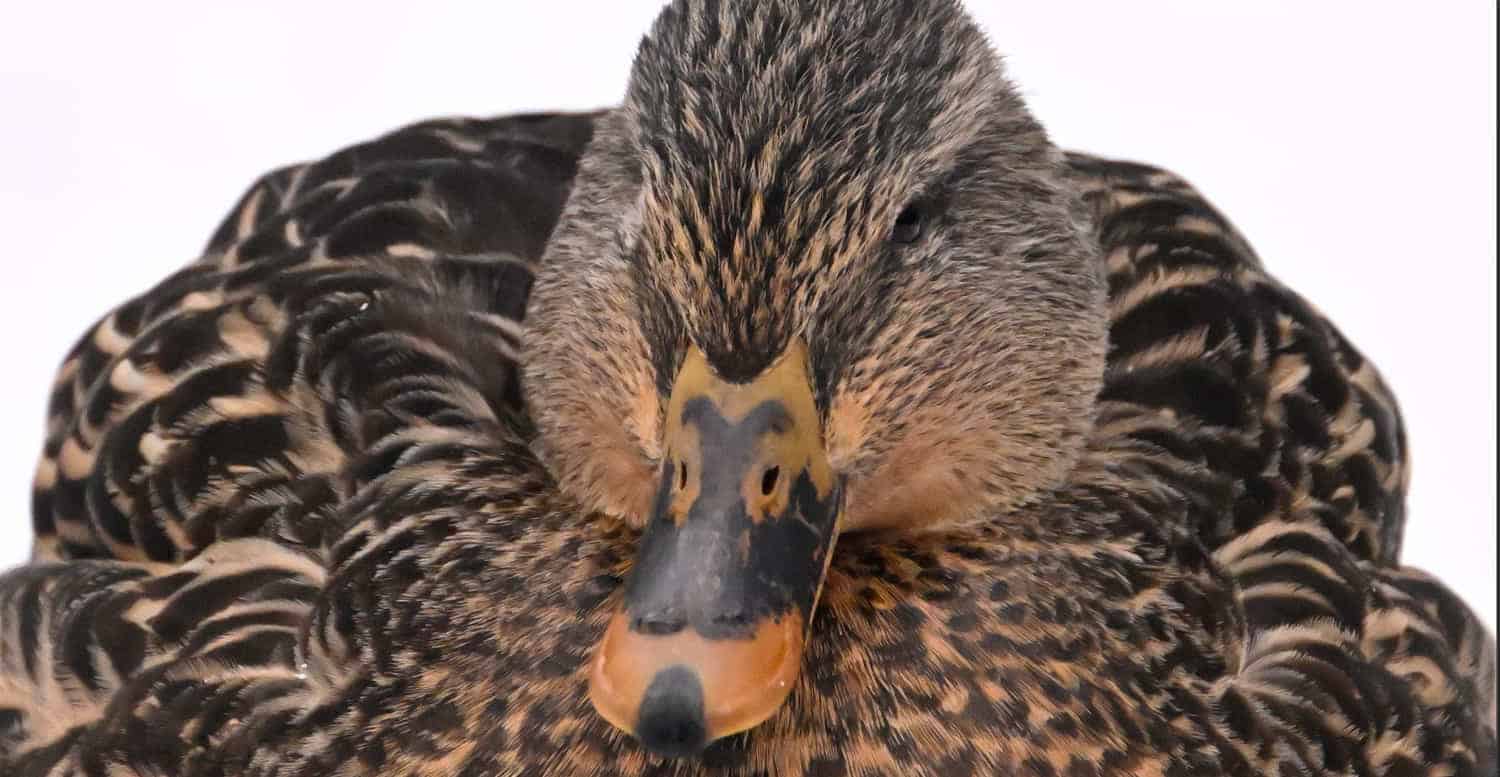
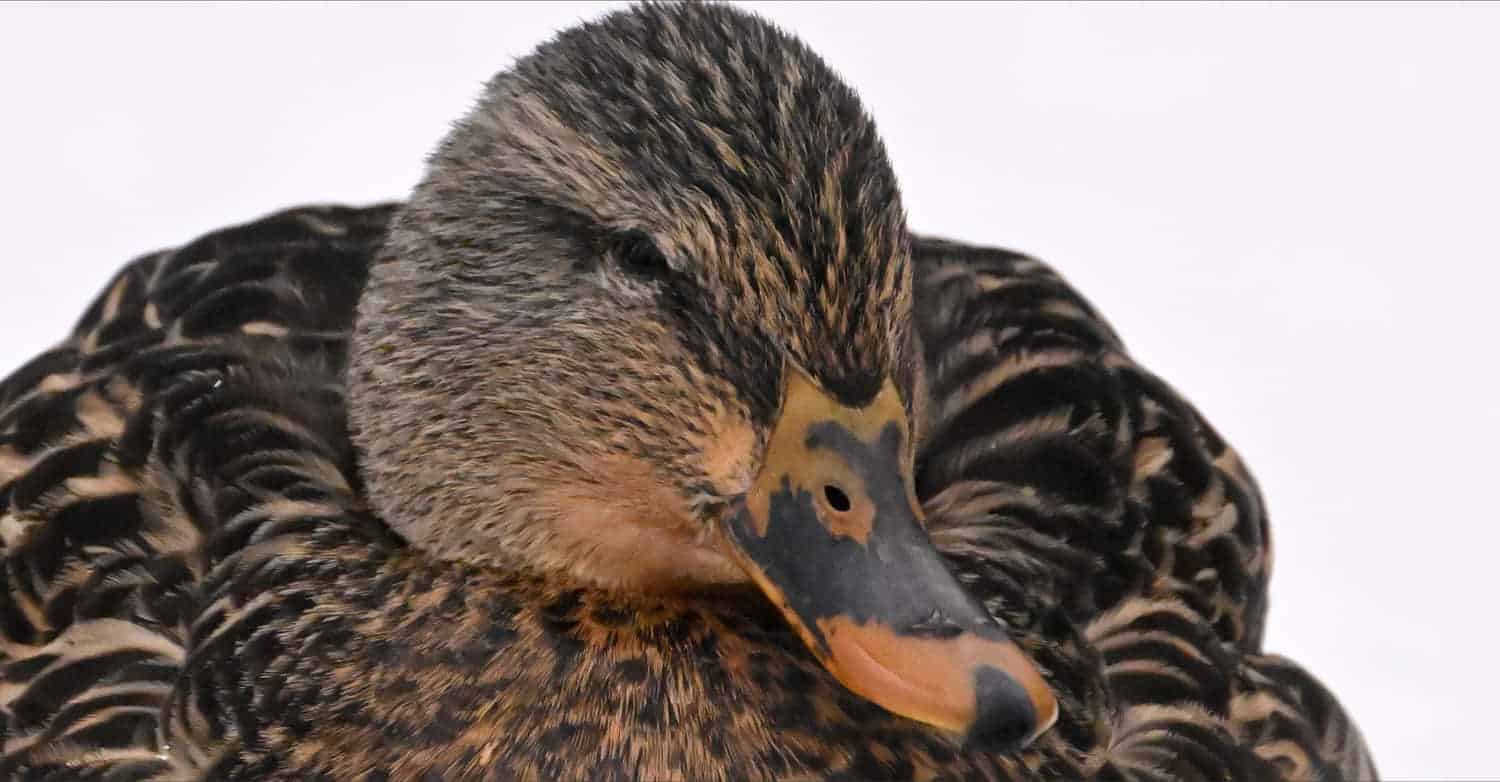
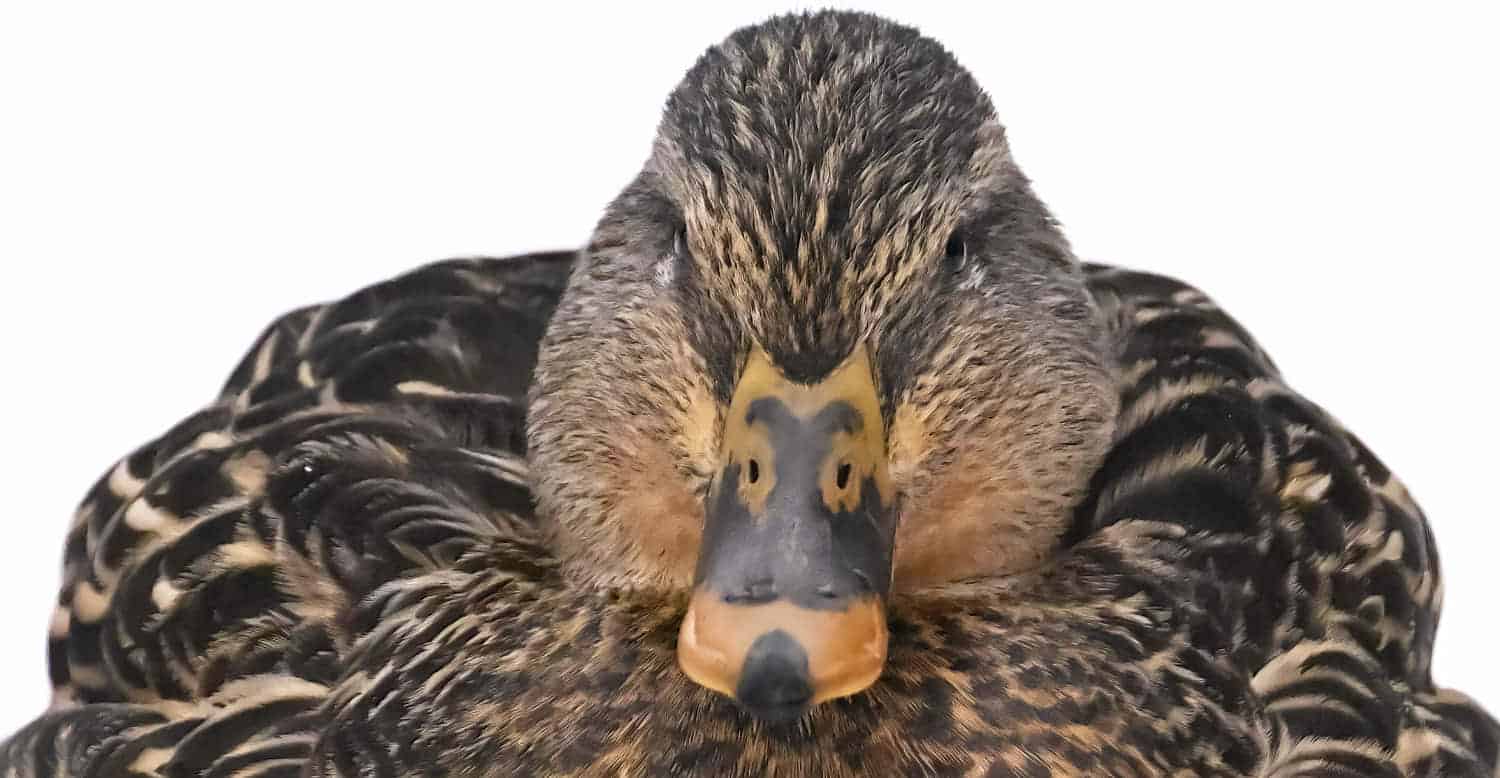
For those of you who want to go a little more granular. I took images of this female mallard duck from ISO 3200 all the way up to ISO 25.600. I increased the shutter speed by 1 stop with each ISO increase to maintain the same exposure for each image. I did not test below ISO 3200 as the Nikon Z9 can easily handle ISO 3200 and below without any issue.
I have cropped in on the beak of the duck. If you click on an image, you’ll be able to make it larger to really get a good look at the level of noise.
Note: I am hopeful that you’ll be able to see the noise in each image as you enlarge them. However, I expect that will be a function of the size and quality of your monitor.

Production Nikon Z9 | ISO 3200 Sample Image

Production Nikon Z9 | ISO 4000 Sample Image
Production Nikon Z9 | ISO 5000 Sample Image
Production Nikon Z9 | ISO 6400 Sample Image
Production Nikon Z9 | ISO 8000 Sample Image

Production Nikon Z9 | ISO 10000 Sample Image
Production Nikon Z9 | ISO 12800 Sample Image
Production Nikon Z9 | ISO 16000 Sample Image
Production Nikon Z9 | ISO 20000 Sample Image

Production Nikon Z9 | ISO 25600 Sample Image
This is the ISO 25,600 image edited with Topaz Denoise AI and Topaz Sharpen AI. Move across the slider to see the noise removed from the image.
Production Nikon Z9 | ISO 25600 Topaz Denoise and Sharpen AI Applied
[twenty20 img1=”12288″ img2=”12287″ offset=”0.5″ before=”Original Image @ 25,600″ after=”Topaz Denoise and Sharpen AI Applied”]
Nikon Z9 step-by-step guide on how to replace the original Z9 eyepiece with a Hoodman HoodEYE eyecup that was made for the Nikon Z6/Z7. The full instructions below will walk[…]
Read the post.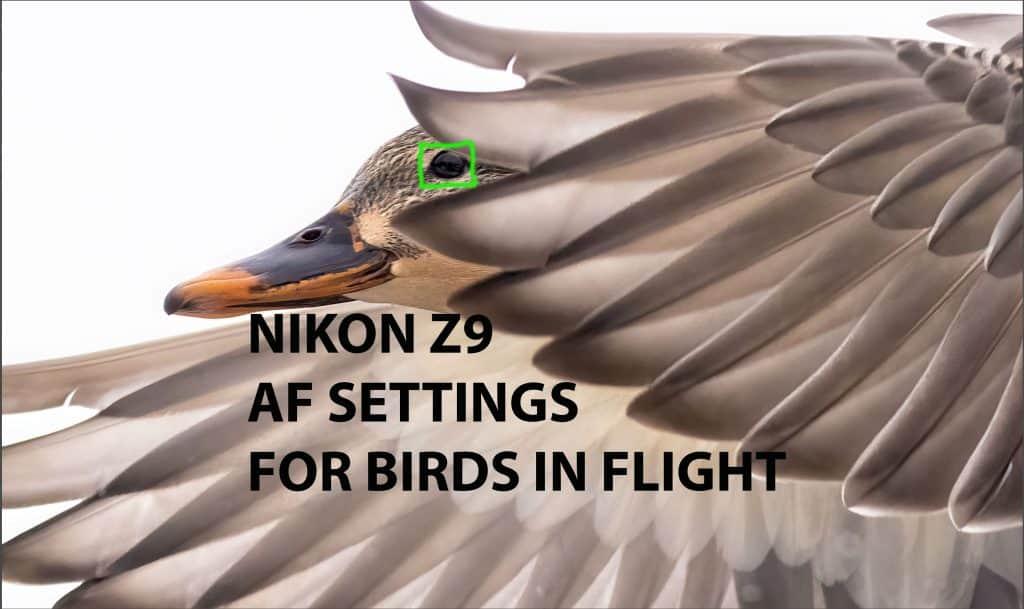
Your guide to field-tested Nikon Z9 autofocus settings for birds in flight. Having been in the field multiple times shooting birds in flight I’ve learned a thing or two. It’s[…]
Read the post.