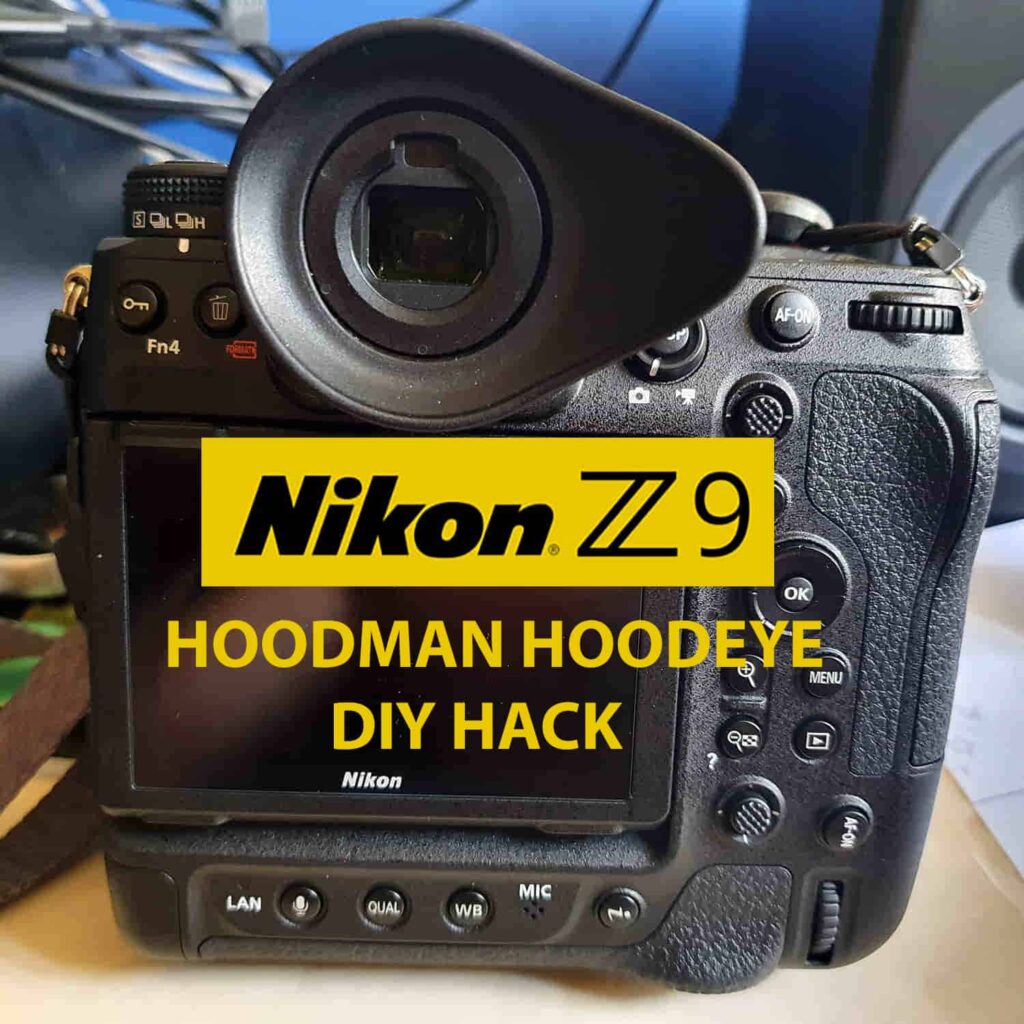
Nikon Z9 Hoodeye Eyecup | Eye Piece Replacement DIY
Nikon Z9 step-by-step guide on how to replace the original Z9 eyepiece with a Hoodman HoodEYE eyecup that was made for the Nikon Z6/Z7. The full instructions below will walk[…]
Read the post.
A step by step complete menu settings quick start guide for the Nikon Z9. How to set every menu setting so it is optimized for shooting birds in flight and other wildlife. The Nikon Z9 user manual is 914 pages long and I recommend you read it cover to cover to understand every facet of this camera. You don’t receive a printed manual with the Nikon Z9 so you’ll need to pull the pdf down online. This link is where you can access the Nikon Z9 full pdf manual.
But let’s face it, when you get your new Z9 all you want to do is charge the battery and get out in the field shooting. If you’ve shot with a Nikon camera before, many of these menu settings will be familiar to you. Many others are new, which is why I wanted to share my settings so you could get off to a fast start.
The best Nikon Z9 menu settings for birds in flight have now been updated to firmware version 5.0. There have been many additions in this latest firmware update.
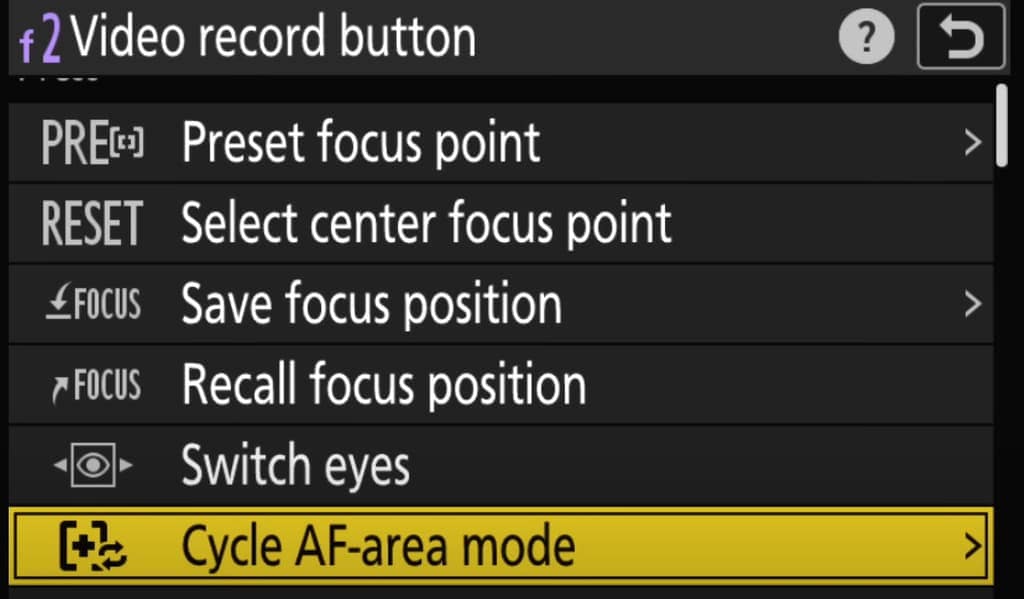
The game-changing feature from the firmware version 5.0 update in my opinion is called Cycle AF Area Setup. You now have the option with the Nikon Z9 to allocate a button that when pressed allows you to cycle through the AF settings that you use most often by repeatedly pressing the button.
This eliminates the need for the rotation of the dial and button press which I have found to be a much faster way of cycling through AF modes. I set mine to the video record button.
I have included instructions on how to complete this Cycle AF Area Setup at the bottom of this post.
For those of you thinking about a gear purchase, please consider using one of my affiliate links to either B&H or Amazon Canada. I receive a small commission to support my content creation efforts and there is no extra cost to you.
Thank you for your support.
Disclaimer: These are the settings that I have found are best for the type of shooting that I do. This is primarily birds in flight. You may find that some of these settings are not best for the type of shooting that you do. Consider this a starting point and make changes along the way.
PRO TIP #1: For birds in flight, I have had the most success with the recent firmware update with Wide Area Large and Eye Detect. Secondarily, I have been using 3D Tracking with Eye Detect.
I set Fn1 and Fn3 to Single Point so I can easily switch from Wide Area or 3D to Single Point Focus for situations when the subject is static and the background is messy. This allows me to quickly focus on the eye whether I am in horizontal or vertical shooting.
I set fn4 to playback for reviewing images, I just can’t get used to hunting for the playback button on the bottom right-hand side. You can’t teach an old dog new tricks:))
PRO TIP #2: You owe it to yourself if you shoot sports or wildlife to read my field test review and pixel peep the sample images taken with the Nikon Z 100-400 f/4.5-5.6 with both the Z TC-1.4 and Z TC-2.0 teleconverters. Spoiler Alert: This lens is AMAZING!!!
If you enjoy this content and wish to receive an email every time I post something new, please hit the subscribe button at the bottom of this page.
My Z9 menu settings as shown below only scratch the surface. If you want to understand everything there is to know about the Nikon Z9 with a high level of detail, I highly recommend Matt Granger’s Nikon Z Camera Expert Setup Guide. Matt has poured his heart and soul into producing free Nikon Z9 content on YouTube.
I spent hours watching his content prior to getting my Nikon Z9 and it was so helpful that I wanted to support his continued efforts by purchasing his guide. As a longtime Nikon shooter including mirrorless, I honestly did not expect to learn much. Boy was I wrong, there were so many nuggets I was not aware of in Matt’s review of the Z9 system.
I watched all of his Nikon Z9 video content and I can confidently say that if you follow along with Matt as he dives into the menus and walks you through how to make all of the customizations and settings changes required, you can head out into the field knowing your Z9 is perfectly configured.
While the content is not specific to birds in flight, once you know where to access things and how to customize the camera you can configure your Z9 the way you want it set up for whatever you’re going to be shooting.

The video below will demonstrate just how well the Nikon Z9 tracks a bird in flight if you have your menu set up correctly and you use the right autofocus mode for the scenario you are shooting.
I will be tracking the Snowy Owl from the time she lifts off all the way to the time she leaves the frame directly in front of my lens. The review will go frame by frame to see how many images are in the sequence are tack-sharp on the owl’s eye. The first sequence is in bright sunlight (55 images) and the second sequence is in low light at sunset. (75 images)
In each scenario, I will be showing you what I look for in an image that I might want to put in the gallery of my website.
Once you have completed all of the menu settings suggested below, head on over to my post called, Nikon Z9 | Autofocus Settings Guide For Birds In Flight. I’ve been testing the various Z9 autofocus settings for weeks now and I think I have landed on the best settings for birds in flight.
Once you’ve completed setting up your menu settings and understand the autofocus modes for birds in flight you’ll be well on your way to filling your card with BIF images that you can be proud of.
Let’s get started on the menu settings. Below are the menu settings I have in my Nikon Z9 from top to bottom. I cover every element that requires your input. Remember, my settings are not necessarily what you should choose. To configure these settings, I had the Nikon Z9 Manual pdf up and used the search function to look up any menu setting that I was not already familiar with. This exercise really helped me to know my way around the camera.
All settings below are for the Nikon Z9 using firmware version 5.0.
Shooting menu bank – A
Extended menu banks – OFF
Storage folder – NCZ_9
File naming – CWL (CoolWildLife) Change For Your Name
Role played by card in Slot 2 – Overflow (I use slot 2 for overflow & video recording)
Image area > FX
Image quality – RAW
Image size – L
RAW recording > ON > Lossless compression (High Efficiency Star if buffer too slow)
ISO sensitivity settings > 100
> Auto ISO sensitivity control – ON (only if you wish to shoot in auto-ISO mode)
Maximum Sensitivity – 12,800 (Go To Z9 High ISO Field Test to see sample images @ 12,800)
White balance > Auto > A Natural light auto
Set Picture Control > Standard
> Standard > Sharpening +5 > Mid-range sharpening +5 > Clarity 0
Manage Picture Control
Color Space > Adobe
Active D-Lighting – OFF
Long exposure NR – OFF
High ISO NR mode – Type A
High ISO NR – OFF
Vignette control – OFF
Diffraction compensation – ON
Auto distortion control – OFF (turning this on reduces shots per burst)
Skin Softening – OFF
Portrait Impression Balance – OFF
Photo flicker reduction – OFF
High-frequency Flicker Reduction – OFF
Metering – Matrix
Flash control (grayed out unless WR-R11a connected) (I do not flash wildlife)
Focus mode AF-C
AF-area mode – Wide Area Large or 3D Tracking
AF subject detection options – Birds
Vibration reduction ON > Sport
Auto bracketing set > AE
Multiple exposure – OFF
HDR overlay – OFF
Interval timer shooting – OFF
Time-lapse video – OFF
Focus shift shooting – OFF
Auto capture – Optional if you want to set this up at a predictable flight area like a feeder
Note: My preferred shooting style is Manual with Auto ISO. That’s why I turn on Auto ISO sensitivity control above. With changing light conditions as birds fly from clear blue skies into dark backgrounds the Auto ISO adjusts to render the correct exposure. I have my max ISO sensitivity set to ISO 12,800.
You can push it further as is evidenced by this image of a grey squirrel at ISO 20,000. I have chosen for most of my shooting to cap it at 12,800 for now. I’ve been running field tests on the Nikon Z9 ISO to see how high I can push it before it is unusable. When you’re done reading this post head over to my post called, Nikon Z9 | High ISO Field Test. I have more sample images all the way up to 25,600 with before and after images applying Topaz Denoise AI and Topaz Sharpen AI. This will provide you with a pretty good idea of how each ISO turns out in post after applying the denoise and sharpening. so you can decide what your maximum tolerance for noise is.

Shooting menu bank – A
Extended menu banks – OFF
Storage folder – NCZ_9
File naming > CWL (CoolWildLife) Change For Your Name
Destination – 2
Video file type – H.265/10 bit
Frame size/frame rate – 4320/30 or 2160/120
Video quality – High
Image area > FX
Extended oversampling – ON
ISO sensitivity settings > Maximum sensitivity > 12,800
> Auto ISO control (mode M) > ON
> ISO sensitivity (mode M) > 100
White balance > Natural light auto
Set Picture Control > Same as photo settings
Manage Picture Control >
HLG quality (grayed out)
Active D-Lighting > OFF
HIGH ISO NR > OFF
Vignette control OFF
Diffraction compensation OFF
Auto distortion control – ON
Skin Softening – OFF
Portrait impression balance – Greyed out
Video flicker reduction > Auto
Metering – Matrix
Focus Mode – AF-F
AF-area mode – Subject-tracking AF
AF subject detection options – Birds
AF when subject not detected – On
Vibration reduction – SPT
Electronic VR – (Grayed out)
Microphone sensitivity > Manual sensitivity > 14
Attenuator > ON
Frequency response > Wide Range
Wind noise reduction > ON
Mic jack plug-in power > ON
Headphone volume > Manual sensitivity >15
Timecode – Record Timecodes > Off
External rec. cntrl (HDMI) – OFF
Auto capture – Optional if you want to set this up at a predictable flight area like a feeder
I was so excited to start recording video with the Z9 in 8K. I expected the quality of the video footage would be incredible and it certainly was. However there was another question I wanted answered.
Could I pull a still image from an 8K video that would have the quality I needed for larger prints. The answer my friends is in the video below.
Custom Settings Bank – A
a1* AF-C priority selection > Release
a2 AF-S priority selection > Focus
a3* Focus tracking with lock-on > Blocked shot AF response > 5 (Changes with what I am shooting. Use 5 to stay on subject longer)
Subject motion > Erratic
a4 Focus points used > ALL
a5 Store by orientation > Focus point
a6* AF activation > OFF (AF ON Only Sets Back Button Focus)
a7 Focus point persistence – AUTO
a8 Limit AF-area mode selection – Choose those AF Area that work best for you, uncheck the rest)
a9 Focus mode restrictions > no restrictions
a10* Focus point wrap-around > ON
a11* Focus point display > Manual focus mode > ON
> Dynamic-area assist > ON
>AF-C in-focus display > ON
a12 Built-in AF-assist illuminator – OFF
a13* Focus peaking > Focus peaking display > ON
> Focus peaking sensitivity > PEAK 2
> Focus peaking highlight color > R
a14 Max. aperture Lv during MF – OFF
a15 Focus point selection speed – HIGH
a16 Manual focus ring in AF mode – ON (only appears in Menu when Z lens with focusing ring is attached)
b1 ISO sensitivity step value > 1
b2 EV steps for exposure cntrl > 1/3
b3 Easy exposure compensation – OFF
b4 Matrix metering face detection – ON
b5 Center-weighted area – STNDRD
b6 Fine-tune optimal exposure > NO
b7 Keep exp. when f/changes > OFF
c1 Shutter-release button AE-L > OFF
c2 Self-timer – –
c3* Power off delay > Playback 20s
> Menus 1m
>Picture Review > 20s
>Image review 10s
>Standby timer > 20 s
d1 Continuous shooting speed > Continuous high-speed > 20
>Continuous low-speed > 5
d2 Maximum shots per burst > infinite
d3 Limit release mode selection > all defaults
d4 Pre-Release Capture options
Pre-release burst – 1s
Post-release burst – Max
d5 Sync. release mode options – (I do not use remote cameras)
d6 Exposure delay mode – OFF
d7 Extended shutter speeds (M) – ON (For long exposures)
d8 Limit selectable image area >FX & DX checked
d9 File number sequence > ON
d10 View mode (photo Lv) > Show effects of settings
d11 Starlight view (photo Lv) – OFF
d12 Warm display colors – OFF
d13 LCD illumination – ON
d14 View all in continuous mode > ON (If OFF display goes blank during bursts)
d15 Release timing indicator > TYPE B
d16 Image frame – ON (Places white border around the shooting display in the EVF)
d17 Grid type – 3×3 (For rule of thirds)
d18 Virtual horizon type – Type B (bottom and side levels NOT line across screen)
d19 Half-press to cancel zoom (MF) – OFF
d20 Custom monitor shooting display > Display 1
> Display 3 histogram view
d21 Custom viewfinder shooting display > Display 1
> Display 3 histogram view
d22High fps viewfinder display – ON
I do NOT FLASH so these settings are left at default values
1*Flash sync speed > 1/200
e2*Flash shutter speed > 1/60
e3* Exposure comp. for flash > Entire Frame
e4* Auto d ISO sensitivity control > Subject and background
e5 Modeling flash > ON
e6 Auto bracketing (mode M) > Flash/speed
e7*Bracketing order > MTR>under>over
e8 Flash burst priority > Prioritize precise flash control
f1 Customize i menu
ROW 1
>AF-area mode/subj. detection>ISO Sensitivity>Silent Mode
>Metering>Vibration Reduction>Focus mode
ROW 2
>View memory card info>White balance>Shooting Menu Bank
>Custom Controls>Choose Image Area>PEAK
f2 Custom controls (shooting)
Fn1 > 3D Tracking
> Fn2 > Auto-area AF
> Fn3 > Single point AF for vertical and horizontal shooting
> Fn button for vertical shooting > Exposure Compensation
>Protect/Fn4 button > Playback
f3 Custom controls (playback) > all the defaults
f4 Control lock > OFF on all three
f5 Reverse dial rotation > Default
f6 Release button to use dial – OFF
f7 Reverse indicators > – 0 +
f8 Reverse ring for focus – OFF
f9 Focus ring rotation range (grayed out)
f10 Control ring response – HIGH
f11 Switch focus/control ring roles – OFF
f12 – Assign power zoom buttons – ON
>Power zoom speed – +3
f13 – Full-frame playback flicks –
>Flick up – OFF
>Flick down – OFF
>Flick advance direction – Left/Right (irrelevent given I turn it off)
f14 Prefer sub-selector center – ON
g1 Customize i menu – defaults
g2* Custom controls > Fn1 > Focus mode/AF Area Mode (front dial required)
> Fn2 > Choose Image Area (FX/DX)
g3 Control lock — OFF on all three
g4 Limit AF-area mode selection – default
g5 Focus mode restrictions – No restrictions
g6 AF speed – 0 ALWAYS (faster settings increase lens noise)
g7 AF tracking sensitivity – 4
g8 – Hi-Res Zoom Speed – +3
g9 – Assign power zoom buttons – ON
>Power zoom speed pre/post recording – +3
During Recording – 0
g10 -Fine ISO control (mode M) – ON (1/6 EV)
g11 – Extended Shutter Speeds (mode M) – OFF
g12 View assist – OFF
g13 Zebra pattern – default
g14 Limit zebra pattern tone range > Highlights
g15 Grid type > 3×3
g16 – Brightness Information Display – HIST
g17 – Half-press to cancel zoom (MF) -OFF
g18 Custom monitor shooting display – Display 1
g19 Custom viewfinder shooting display – Display 1
g20 – Red REC frame indicator – ON
As an aside, I’ve been asked a lot about my image processing workflow, here’s a quick run down of my steps.
Step 1 – Drag RAW file into DxO PureRAW 4 and allow it to remove noise and make corrections.
(Export from PureRAW 4 as a .dng (This retains RAW format.)
Step 2: Use Adobe Camera RAW and Photoshop to correct blacks, whites, shadows, highlights, contrast, exposure.
Step 3 – Open ,dng file in Photoshop and make necessary edits such as cropping, dodging, burning as required.
Step 4 – Use Topaz DeNoise AI to remove any remaining distracting noise while retaining edge detail.
Step 5 – Use Topaz Sharpen AI to add sharpness and edge detail
Step 6 – Use Topaz Gigapixel AI to upscale and increase resolution without losing quality


Delete
Playback folder – ALL
Playback display options > Focus point
Mark first shot in series – unchecked
Additional photo info
Exposure Info – Unchecked
>Highlights – checked
>RGB Histogram – checked
>Shooting data – – not checked
>Overview – not checked
>None (picture Only) – not checked
>File info – not checked
Delete pictures from both slots – OFF
Dual-format recording from both slots – 1
Filtered playback criteria >default
Series playback – default
Picture review – OFF
After delete – Show next
After burst, show – First picture in burst
Auto image rotation – ON
Auto-rotate pictures – OFF
Copy images(s) – Default
Format memory card – –
Language > English
Time zone and date – (set to current location)
Monitor brightness – 0
Monitor color balance – default
Viewfinder brightness – Auto
Viewfinder color balance – default
Finder display size – STNDRD
Limit monitor mode selection
>Automatic Display switch – checked
>Viewfinder only – unchecked
>Monitor only – unchecked
>Prioritize viewfinder(1) – checked
>Prioritize viewfinder(2) – unchecked
Auto rotate info display – ON
AF fine-tuning options – OFF
Non-CPU lens data – No.1
Distance units – Feet(ft)
Save focus position – ON
Save zoom position (PZ lenses) – ON
Auto temperature cutout – STNDRD
Sensor shield behavior at power off – ON (shield closes)
Clean image sensor > Automatic > clean at shutdown
Image Dust Off ref photo – default (used when required)
Pixel mapping – default (used when required)
Image comment – OFF
Copyright information – ON (Enter your name & copyright info here)
IPTC – default
Voice memo options > Press to start/stop
Camera sounds > Greyed Out
If you are turning this on here’s my recommendation
> Beep on/off > OFF
> Volume > 1
> Pitch > Low
Silent mode – ON (change as required)
Touch controls > ON
>Enable/disable touch controls – ON
> Glove mode On
HDMI
> Output resolution > Auto
> Output range > Auto
> Output shooting info – ON
> Mirror camera info display – On
USB connection priority – Shooting
Location data (built-in)
> Record location data > OFF
> Standby timer > OFF
> Set clock from satellite > ON
> Create log
> Log list
> Position
Wireless remote (WR) options – – (grayed out)
Assign remote (WR) Fn button > AF-ON
Conformity marking —
Battery info –
USB power delivery – ON
Energy saving (photo mode) – ON
Slot empty release lock > LOCK
Save/load menu settings – –
Reset all settings – –
Firmware version – Firmware version – – C 5.00 LF 1.10 G 0.07
Since you’re planning to shoot birds in flight, you may be interested to come back to this video. It shows how the Nikon Z9 is capable of tracking a bird through branches without loosing focus on the birds eye.
I provide you with a crucial menu setting and the autofocus mode used to allow your Z9 to capture these images.
All values are defaults as I do not use this functionality.
Airplane mode – OFF
Wired LAN – OFF
Connect to smart device – OFF
Connect to computer – OFF
Connect to FTP server – OFF
Connect to other cameras – OFF
ATOMOS AirGlu BT options – OFF
USB – MTP/PTP
Start via LAN – OFF
Router frequency band – 2.4G/5G
MAC address
My Menu is a great place to place those hard to find or often used settings so that they can be easily found in one spot. To add items in My Menu select “add items”. You can also remove and place those items in order from highest to lowest importance.
Silent mode
ISO sensitivity
Format memory card
RAW recording
Limit release mode selection
Frame size/frame rate
Starlight view (photo Lv)
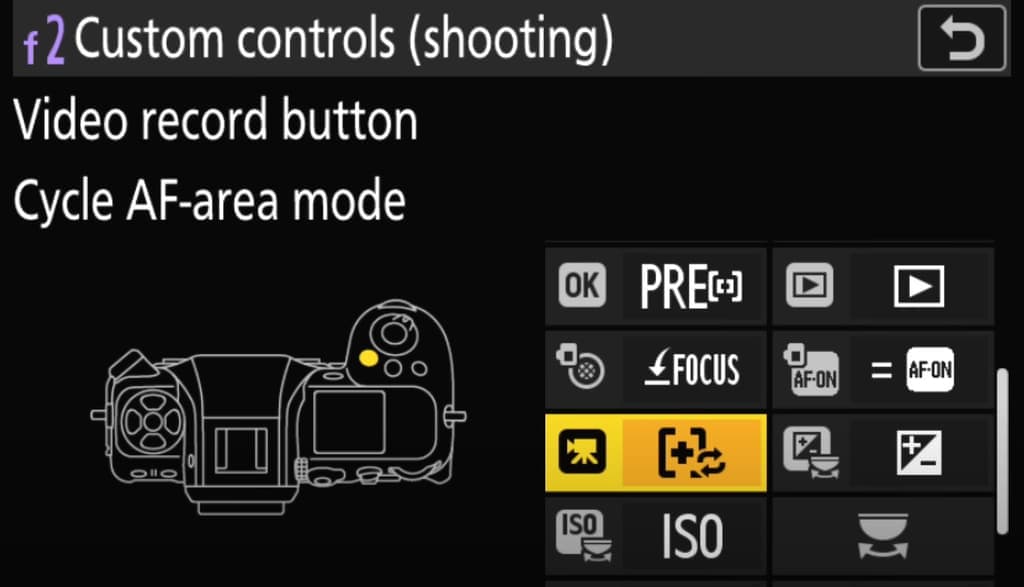 A step by step guide to setting up Cycle AF Area mode on the Nikon Z9. Note, in these instructions I am setting it to the video record button. You will need to change step 3 if you wish to program a different button.
Now when you need to quickly cycle through your AF modes all you need to do is press the video record button repeatedly to cycle through the AF modes.
For those of you who shoot birds in flight or fast-action wildlife scenes you’ll want to check out this video on using the Nikon Z9’s 120 FPS for capturing all of the action.
Nikon Z9 step-by-step guide on how to replace the original Z9 eyepiece with a Hoodman HoodEYE eyecup that was made for the Nikon Z6/Z7. The full instructions below will walk[…]
Read the post.
Your guide to field-tested Nikon Z9 autofocus settings for birds in flight. Having been in the field multiple times shooting birds in flight I’ve learned a thing or two. It’s[…]
Read the post.