A step by step Topaz Labs Sharpen AI workflow guide detailing the entire sharpening process including masking and modes for best results.
Throughout much of this year, I’ve reviewed many wonderful photo editing tools and software. Perhaps some of these names were new to you, or you had heard of them and through my reviews, decided which software was worth using.
The thing about new software though is that there’s always a learning curve. I mention this on the blog a lot because it’s true. If the solution you’re already using is okay, you might stick with that software just because the thought of learning a new one is so unappealing. After all, you want to save time while editing your photos, not lose it.
I don’t want to just throw review after review at you on this blog, but also resources for understanding the programs and software I’m recommending. That’s why today, I’m launching a few workflow tutorials that I hope will help you familiarize yourself with two of the most used software tools by wildlife photographers.
For those of you wishing to trial or purchase Topaz Sharpen AI or any other Topaz Labs products, please consider using my affiliate link. It helps to support my content creation efforts and there is no extra cost to you.
Topaz Labs has now changed its policy regarding discount codes. You will no longer find active discount codes through a Google search. Only Topaz Labs or affiliates running active campaigns will be provided with temporary discount codes going forward.
I invite you to contact me at bmaynard@coolwildlife.com. I will often have a discount code available for one of my campaigns or one from a Topaz campaign and I will happily share it with you.
In this post, I’ll cover how to use the Topaz Sharpen AI standalone version, and in the following post it will be Topaz Denoise AI. These tutorials will provide you with a step-by-step guide on how I use the software to process my wildlife images. Whether you are new to Topaz Sharpen AI or have been using it for a while I hope once you’ve followed my steps you will have learned a thing or two about using the tool.
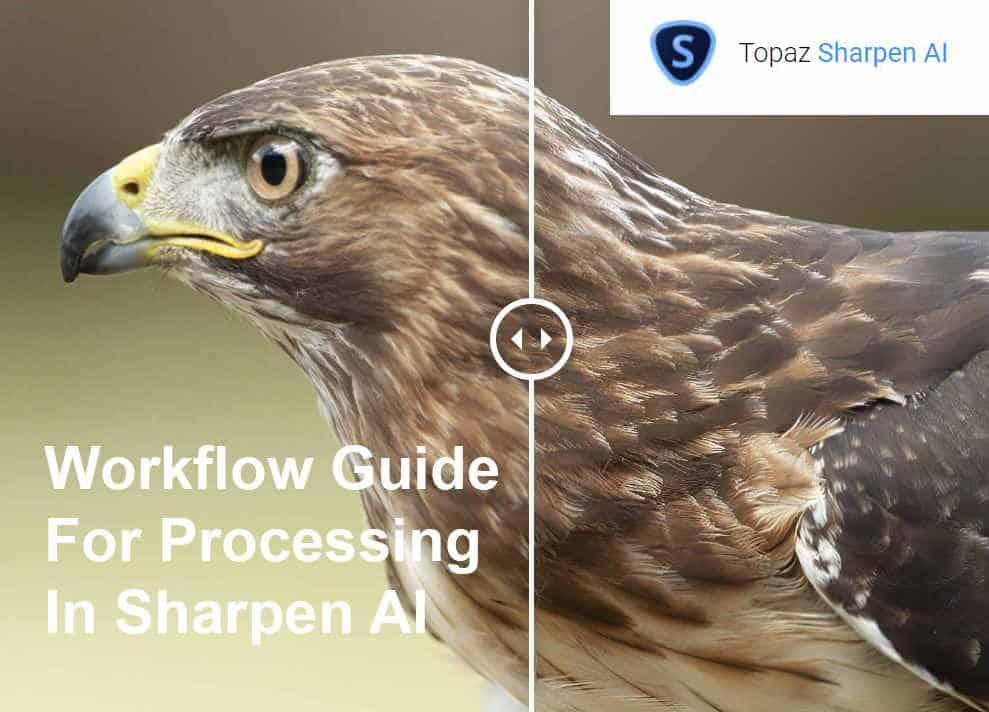
I’ll show you how to get your version of Sharpen AI installed, and then I’ll walk you through how to use the software’s three most prominent modes: Sharpen, Stabilize, and Focus. All along, I’ll share photos of my own wildlife photography with before and after versions so you can see the changes and improvements.
[twenty20 img1=”11412″ img2=”11410″ offset=”0.5″]
By the time you’re finished with this guide, you’ll be seeing the difference Topaz Sharpen AI can make to your own images. I realize not all of you will want to read a lengthy blog post so I’ve provided a quick start guide below. For those of you who want the complete step-by-step keep reading.
Quick Start Guide To Topaz Sharpen AI
How do you use Topaz Sharpen AI?
Open Topaz Sharpen AI Stand Alone or Photoshop
Drag or open your image
Click on the AI Mode Auto button to see the mode the AI selects
Click on view and comparison view. Select the mode you think looks best
Select the masking tool and set zoom to 200%
Check the box for overlay and add
Change the size of your brush with radius
Paint in a mask where you want sharpening applied
Adjust the sharpen and noise suppression sliders and click apply mask
Topaz Sharpen AI comes in a standalone version and support within Adobe Photoshop, Lightroom and Topaz Studio 2. The workflow for each will still be identical, so no matter which version of Topaz Sharpen AI you use you can follow along with the steps coming up.
Getting Started with Topaz Sharpen AI
I do recommend having Topaz Sharpen AI downloaded and open in front of you to make the most of this tutorial. If you’re not quite sure if Sharpen AI is the right photo editing solution for you, then you can always download a free trial from the Topaz Labs’ website. The free trial includes all the features you get in the paid version, albeit for a limited time.
Here’s how to download and install Topaz Sharpen AI.
Download Topaz Sharpen AI
On the Sharpen AI page, you can choose to try the software for free or purchase it. Topaz Sharpen AI costs $79.99 on its own. I always recommend going with the Topaz Utility Bundle to save money. The whole bundle costs $360 and is often on sale for $249.99, so you’re definitely saving money compared to buying each of these products individually and you are going to want Denoise AI and Gigapixel at the very least.
You will need an account to download Topaz Sharpen AI on a free or paid basis. Once you input your email address, the download will instantly start. You’ll then receive an email with your details, including your password and a download link. Click the download link to begin.
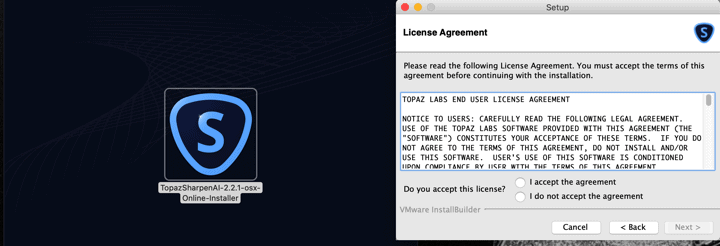
Approve the License Agreement
Once your file is finished downloading, open the Topaz Sharpen AI installer. When you do, you’ll be met with a pop-up showing you the terms of Topaz Lab’s license agreement. You can read through it (which I would recommend), or scroll through and speed-read it.
Click “I accept the agreement” to continue.
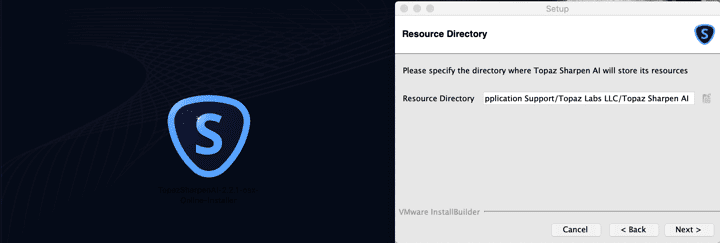
Send Your Files to a Resources Directory
Upon approving the license agreement, you next have to select the resources directory for installing your software. Topaz Labs will suggest a default resources directory, but if you’d prefer for the directory to be somewhere else on your computer, now’s your chance to select it.
Wait for Installation to Complete
The installer wizard will finish on its own from there. Give the files a moment to install, then click through the rest of the steps from the wizard. Sharpen AI will then open.
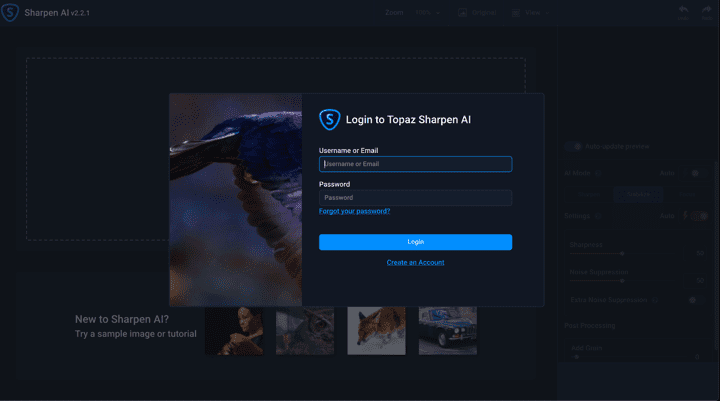
Log In
Before you can begin using Sharpen AI, you need to log in with your email address or username and password. Here’s what the login screen looks like.
Sharpening in Topaz Sharpen AI
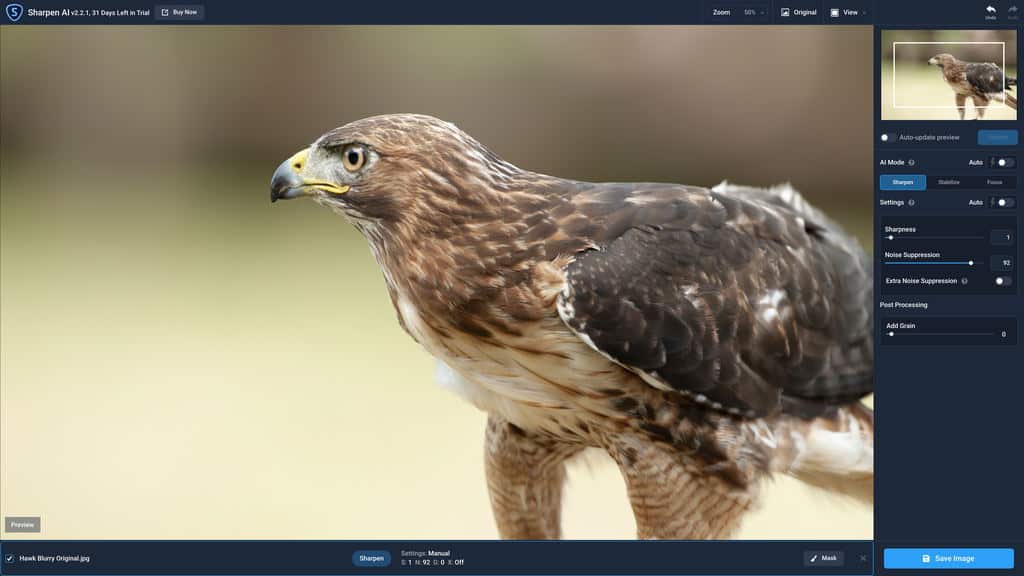
Now that you’re in Topaz Sharpen AI, I can finally show you the features within and how they work step by step. To showcase the abilities of this photo editing software, I’ll be using this less-than-sharp photo of a hawk that I took. Move the slider across the image to get a view of the before and after of this image. This will give you a really good idea as we dive into the software what’s possible.
[twenty20 img1=”11321″ img2=”11325″ offset=”0.5″]
Stabilize Mode with Sharpness Set @ 80 and Noise @ 50
Note: You can click on any of the images below that do not have before/after sliders to get a larger view in a separate tab.
Adding Images
The first thing you’ll need to do is select an image that you wish to sharpen. Adding an image to Sharpen AI is easy, as the software lets you choose where to upload an image from, such as your desktop or a folder on your computer. There are three ways to add your images for processing. You can go to file and choose open images or open recent, drag and drop an image on to the screen or click browse for the main page.
Zoom
Once your photo is in the software, you can adjust the zoom which you will see in the top right of your screen. The default view is 100 percent, however, I take it up to 200% so I can view all of the fine details, especially around the eye and feather detail. Your goal is to make your image sharp but not so baked that it introduces artifacts into the image and that is best viewed at 200%.
Views
Single View: As you may have guessed this view provides you with one full-screen image. I do not use this view.
Split View: This view is the one I use when I start getting into the settings and applying sharpening and noise reduction. It allows you to move a slider across the image to see a before and after view. You’ll really notice the difference in this view.
Side-by-Side View: As the name implies, this view will give you the original image on the left and the preview on the right. It’s also
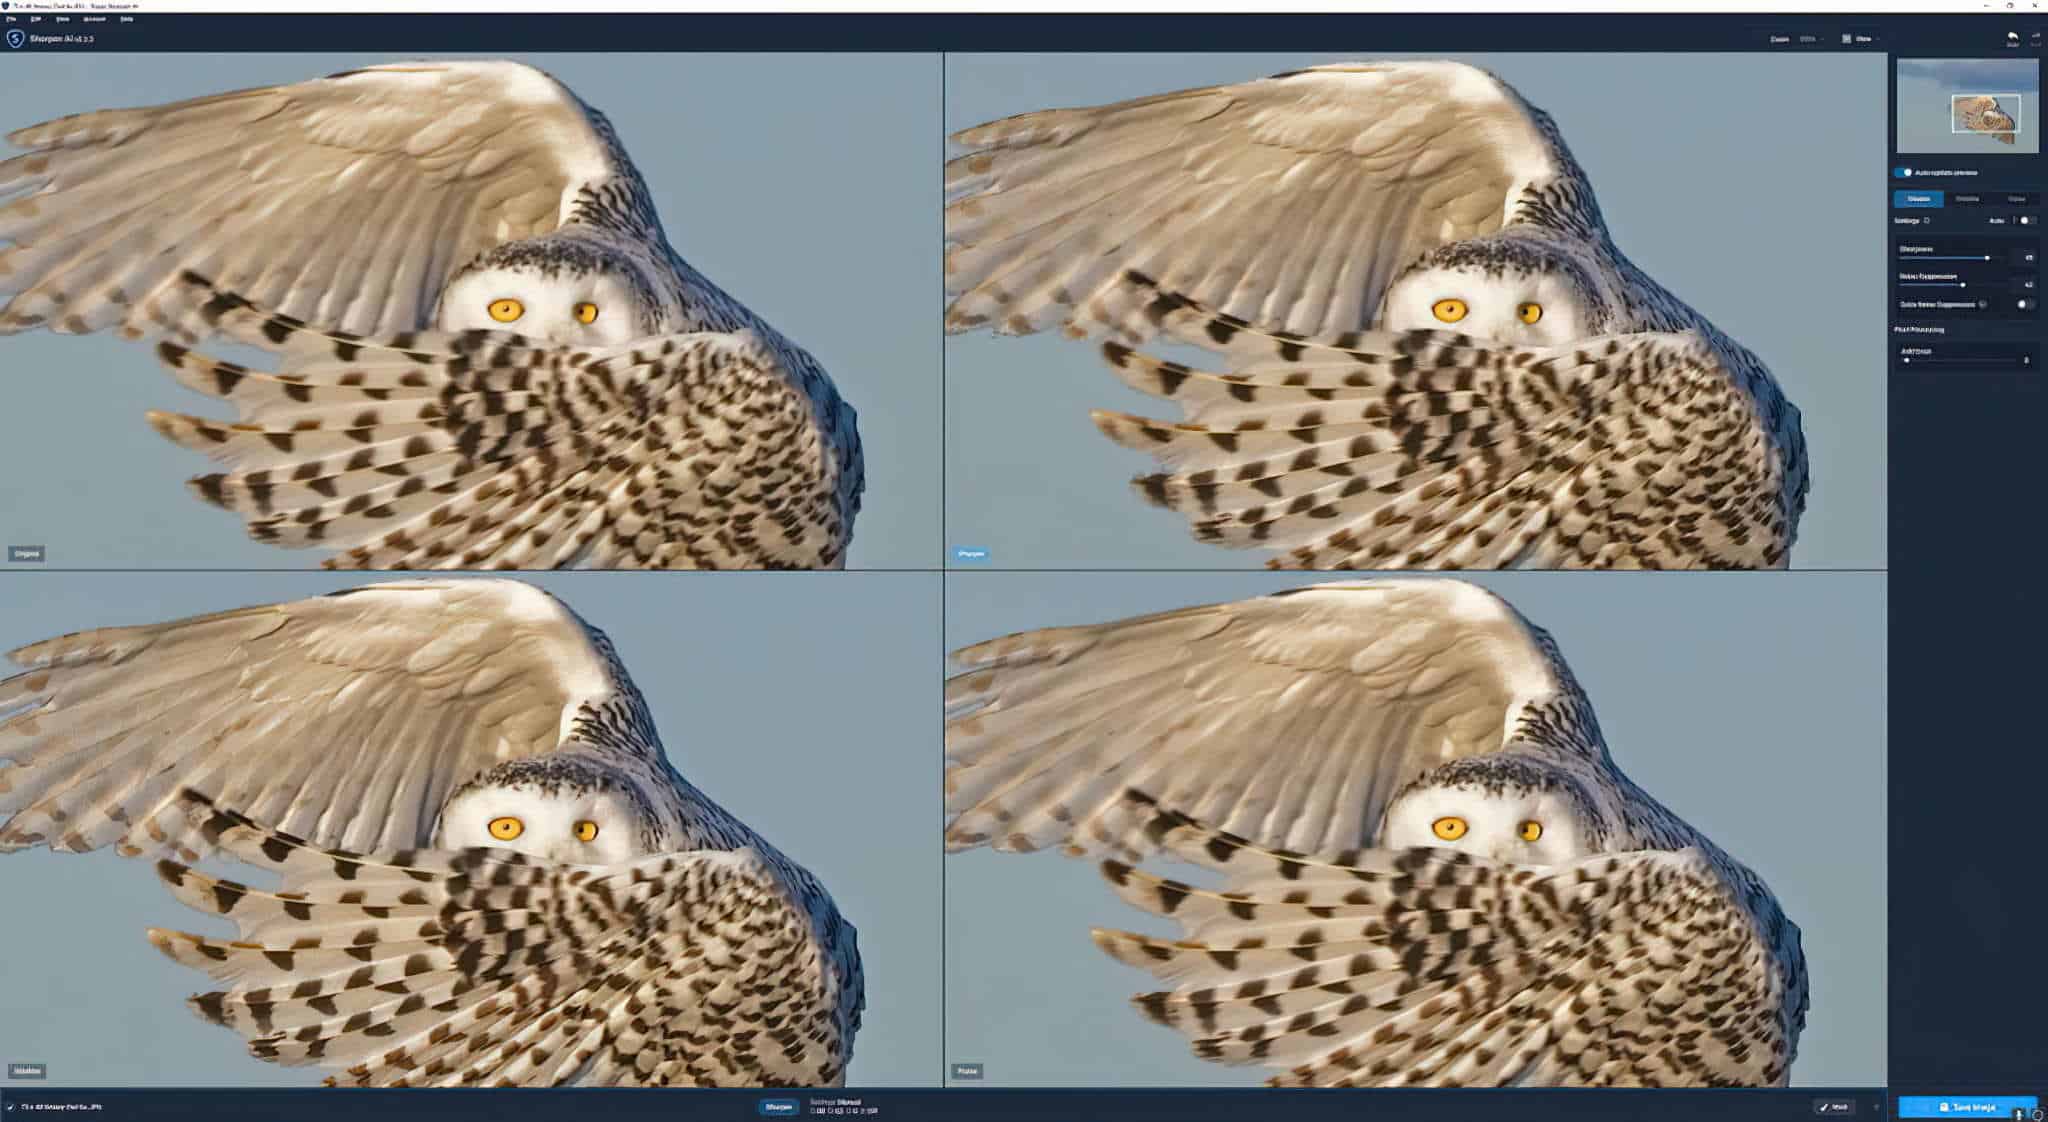
Comparison View: There’s a great new time-saving feature in Sharpen AI that not many people are aware of and I think you’re going to love it. This new comparison view allows you to view the original image along with a view for each of the other three AI modes in one view. The software has to render all four images so it takes a little more time but it saves you from having to go into each AI mode separately. More on that in the AI modes section below.
Auto-update Preview
The first selection button you’ll notice on the right-hand panel underneath the small preview image is auto-update preview. I leave this turned on and what it does is update the larger image on your screen in real-time as you make your adjustments. The downside is that it will take time to cycle those adjustments each time. If you have a fast computer this is no big deal but on slower systems you may wish to turn it off until you make a few adjustments and then turn it on.
Three Sharpening AI Modes
Using Sharpen AI is very simple, which I like. Underneath the auto-update preview is where you’ll find the AI modes. You have three basic image sharpening options: Sharpen, Stabilize, and Focus. Each will have a different impact on the image you are processing depending on how it was shot. Here’s a brief description of the three modes, understanding what each one does will help you in selecting the appropriate one to apply to your image.
Sharpen – used for images that are mostly in focus and stable. This is the standard image sharpening mode most of us have used for years to add a little sharpening to our images except now it is AI based and the software can recommend the optimal settings as a starting point.
Stabilize – employ this method of image sharpening when you have camera shake or blur from reduced shutter speed. This is very common, especially when using long lenses or hand holding and it is the mode that I get the best results from 95% of the time. Not surprising as the majority of my wildlife images are shot with a 600 mm lens so camera shake or blur presents itself, especially with high megapixel cameras like my Nikon D850.
Focus – recovery for images that are out of focus. Worth trying if Stabilize does not do the trick.
The first thing I do is turn on the auto switch beside the AI Mode. This allows the AI within the software to take its best guess on how to optimally sharpen the image. It will select one of the three AI modes Sharpen, Stabilize, or Focus for the specific image you are processing. It’s often a great starting point but I rarely leave things as set by the software.
I always want to see what the other two modes that were not selected look like and this is where the comparison view comes in handy. Set your zoom to 200% and turn on the comparison view mode to get a view of all three AI modes at once per the snowy owl image above. Pay special attention to not only the clarity of the image but note whether or not it introduced unwanted artifacts into the image. Click on that snowy owl collage above and take a look at the stabilize and sharpen tiles. Hopefully, it is clear enough for you to see the artifacts that have been introduced with those two AI modes that are not present in the focus mode.
Settings
Now that you have selected the best AI mode for your photo it’s time to begin making a few more refinements to your image. Sharpen AI includes two settings sliders. One for sharpness and one for noise suppression. You have the option to move the sliders to make your adjustments or enter a numerical value up to 100. Once again, the first thing I do once I have selected the best AI mode is toggle the Auto button on beside settings.
The software will once again use its AI capabilities to select what it feels is the best setting for each of the sharpness and noise reduction sliders. From there I view my image at 200% and begin further refining the image by moving the sliders to either increase or decrease sharpness. In my workflow, I leave noise suppression at zero because I will have already applied denoising within Topaz Denoise AI as a step prior to sharpening the image.
The denoise algorithm in Topaz Denoise AI does a better job than that which is built into the Sharpen AI tool so I apply it first before bringing the image in to be sharpened. If you do not own Topaz Denoise AI you should consider it, otherwise use the noise suppression option within Sharpen AI to reduce the noise.
Extra Noise Suppression
While we are on the subject of noise suppression. As you can see, there’s a default switch that reads Extra Noise Suppression under the noise suppression slider. That can be used to add additional noise suppression to help sharpen really noisy images.
Adding Grain
Another feature in Sharpen AI that I want to cover is adding grain. You might wonder why, after sharpening, you would want to introduce what could be perceived as imperfections back into your image through grain. Doesn’t that just undo all your progress?
Actually, no. Small amounts of grain can bring out tones, colors, and composition better. You can see how much more distinct the background of my hawk photo is once I applied the grain in Sharpen AI. Personally, I would not use this with my coloured images as I prefer my background bokeh to be silky. However, I do apply grain to some of my black and white images where I feel it adds to the mood of the image. Not unlike various types of film we used to use back in the day to get these grainy effects.
Selective Sharpening
Selective sharpening is something I use on every image and I intentionally saved this discussion towards the end of this guide for good reason. For many of you selecting a mode and then applying the degree of sharpening and noise suppression that you desire will be sufficient. For those of you who want to take things one step further, I want to show you selective sharpening. If you prefer to watch a video step-by-step tutorial here you go. If you wish to continue reading through the steps scroll below the video to get a step-by-step walk-through.
Step By Step Video
How Do You Use the Topaz Labs Sharpen AI Masking Tool?
Fast start video on how to perform your image sharpening with the new Topaz Sharpen AI Masking Tool.
Selective Sharpening Step by Step
With your image loaded into Sharpen AI select the mask button found down on the bottom right corner of your screen, which brings up the mask menu along the bottom of your screen. I’m going to describe each masking option to you however I wanted you at a high level to know what we are going to be doing with selective sharpening. You are going to be brushing a mask onto areas of the image that you feel require sharpening.
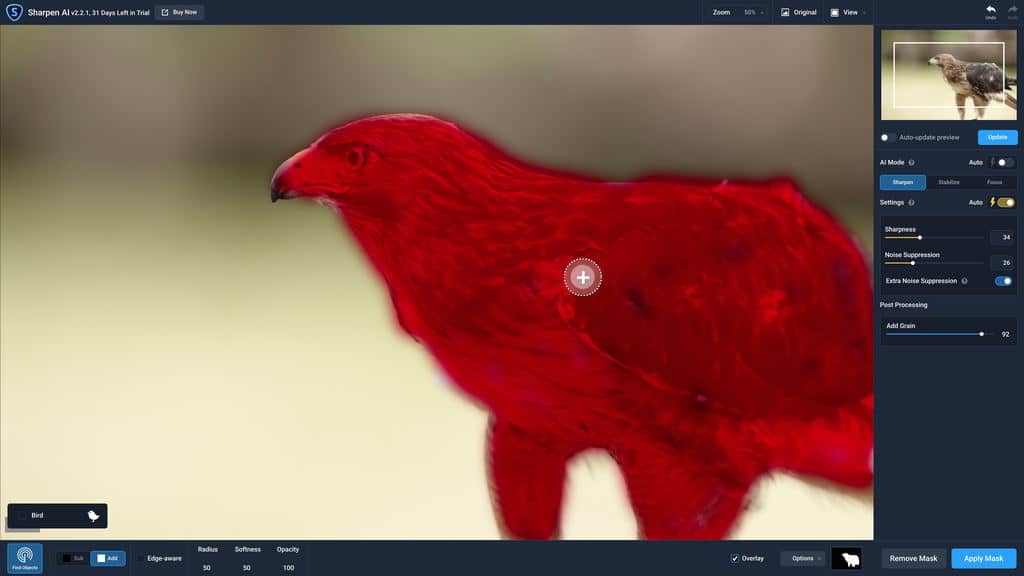
Only the areas you mask will be sharpened and the areas that you did not mask will be left untouched. This is a feature that wildlife photographers especially put to good use as we almost always sharpen the eyes of our subjects. Now you can just sharpen the eyes or select aspects of feathers or fur selectively. The image below demonstrates what a mask will look like once applied. In this case, the mask is applied only to the hawk and in doing so sharpening will be applied only to the hawk and not the background.
Before we begin the masking process I need to give you a detailed explanation of the selective sharpening controls that you will be using. This will help you to define your mask in such a way that you render the sharpening where you want it and at the strength you wish to have it applied.
Understanding Selective Sharpening Controls
Let’s start on the left side and work are way through each option.
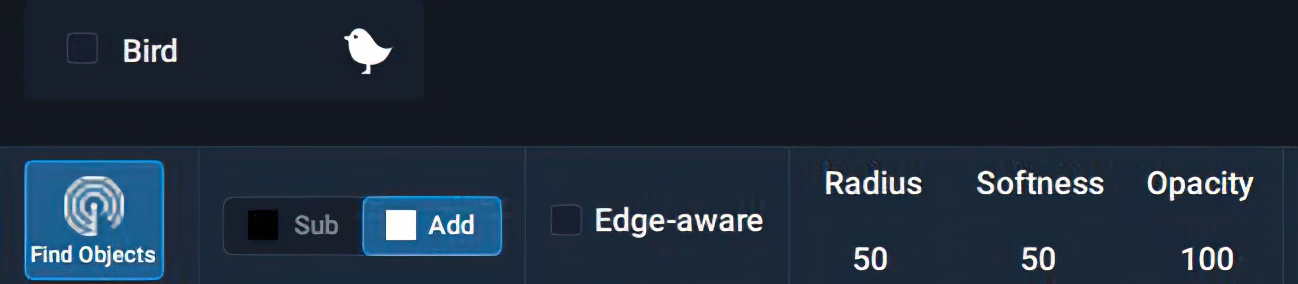
Find Objects – A new auto-detect mask functionality has been added for generating base masks. The tool can detect 20 different types of subjects including people, cars, planes, and various animals including birds as you can see from the image below. The AI built into this tool recognized there was a bird in this image and automatically masked the entire bird for me. I also tried this on a picture of a wolf pack and it cleverly masked every wolf in the scene. The mask may not be as refined as you’d like so some additional brushing may be required.
Sub/Add – Just as the name implies, if you wish to brush away a portion of a mask choose sub (subtract) or if you wish to add to a mask select Add.
Edge Aware – Smart brush here we come. This option allows the brush tool to recognize the edge of what you are selecting and not flow outside of that border, In this case, it would detect the difference between the hawk’s feathers and the background. I turn this functionality on for every mask I create.
Radius – This option adjusts the size of your brush making to smaller or larger.
Softness – Increasing the value of softness allows the brush to create a smoother edge to your mask which is great for a bird’s feathers. For harder edges, you’ll want to lower the value. You’ll want to experiment with this tool to see which value provides you with the best mask for your image.
Opacity – As you change the opacity value higher you’ll notice that the red of the masking gets more solid. That’s because it is going to apply more sharpening than had you chosen a smaller value. You can apply your mask and then move the opacity slider left or right to change the intensity of the sharpening.
Overlay – Moving to the far right of your screen you’ll notice the overlay option. If you check the box you’ll see the red overlay of your mask everywhere you applied it and it will remain on always. Uncheck the box and the red masking goes away. I toggle back and forth as I am selective sharpening as it is impossible to see the effect of your sharpening while the red mask is on the image. Without the red mask you have no idea where you have placed the mask hence the need to toggle back and forth.
Options – Once selected a drop-down will be presented with four options:
Fill – Masks the entire image. I rarely use this function unless my subject fills most of the frame and I want to deselect small portions of the mask before applying my sharpening.
Invert – Takes the mask you just applied and reverts to making the mask the unmasked portion of the image and vice versa.
Clear – Clears the mask entirely so you can start again.
Delete – Removes the mask as clear does and places a split view slider on the image. I must admit this option confuses me as I see sharpening across the entire image when I move the slider and I no longer have the option to apply a mask. It goes without saying I do not use the delete option.
Note: You only have one option for viewing your image while masking and that is single view all other view modes will be grayed out.
Apply Your Mask Selectively
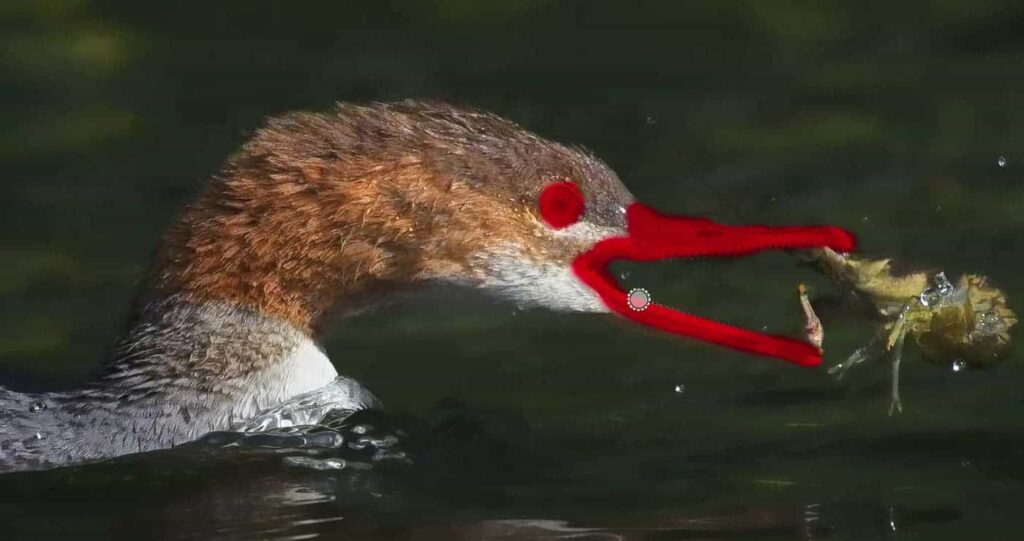
In my typical workflow with my wildlife images, I apply sharpening masks very selectively. In this image of a merganser, I chose only to sharpen the eye and the beak. Let’s walk through the steps to perform this action one more time.
Drag or open your image
Click on the AI Mode Auto button to see the mode the AI selects
Click on view and comparison view. Select the mode you think looks best
Click on the Mask button
Set the zoom to 200%
Check the box for overlay and add
Select Edge aware, Change the size of your brush with radius to the appropriate size of the area you wish to mask
Start with softness set to 50 and opacity set to 50
Paint in a mask where you want sharpening applied
Adjust the sharpen and noise suppression sliders
Once you are satisfied with your sharpening click on apply mask
To draw a mask, you simply click your left mouse button or touchpad, hold it down and brush over the areas of the image where you want the sharpening to be applied. You must hold down the mouse button each time you wish to brush and have the mask applied.
AI Modes Before & After
As we wrap things up I wanted to give you a comparison of before and after images using each of the three AI modes so you can see for yourself the differences between the three modes. As you review each image keep in mind what I stated earlier in this guide, this image of a hawk was shot with a 600mm lens and with a slower shutter speed.
Notice how subtle the change in sharpness is in the first image where I used the sharpen mode and the third image where I used the focus mode. The image with the best result is the second image where I applied the stabilize mode. That’s because camera shake was introduced from the lower shutter speed on my long lens. Notice the fine detail being brought out in the feathers and how much sharper the eye is from the original in the stabilize version.
That is not to say stabilize will be best for your images. You will soon learn which AI mode yields the best results most of the time based on the type of shooting you do and the gear you use.
Stabilize AI Mode – Sharpness Set @ 80 and Noise @ 31
[twenty20 img1=”11415″ img2=”11412″ offset=”0.5″]
Focus AI Mode – Sharpness Set @ 80 and Noise @ 31
My best advice is to use the comparison view to see each mode and how much sharpness and noise is applied. Once you’ve determined the mode you can adjust the sharpen and noise suppression sliders to get the best result for your image.
Conclusion
Topaz Sharpen AI is loaded with three awesome features for fine-tuning your photos: Sharpen, Stabilize, and Focus. Each is intended for different purposes, but of the three, it’s Stabilize that I usually find tends to deliver the best results between the original version of the photo and the edited one. That has to do with the fact that I am shooting with a 600mm lens 95% of the time so camera shake is introduced into my images.
I love how this software gives you the option to use a mask for editing small details and features like the eye or how you can otherwise apply whole-image edits. You can also preview original versus edited versions of your photo to determine which one is your favorite.
Of all the software and tools I’ve reviewed lately, I’d call Topaz Sharpen AI among the easiest and most user-friendly for photo editors. I hope this guide has shown you some of what this awesome software can do and gets you interested in trying it for yourself!
Topaz Labs does offer a free 30-day trial and you can follow this link to go to Topaz Sharpen AI directly.
If you’re interested in receiving more content like this, hit the subscribe button below and you’ll receive an email every time there is a new post.
Thank you so much for supporting my channel.
Related Posts
There’s more to discover — explore these related posts.
Best AI Image Background Remover: Hands-On Review 2025
Explore why Aiarty Image Matting is the best AI Image background remover for clean, precise masking of wildlife even in complex natural scenes. As a wildlife photographer, capturing the essence[…]
Topaz Denoise AI allows you to shoot at high ISO’s in low light with the confidence of knowing you can eliminate that noise while retaining crisp detail in your images[…]