Nikon Mirrorless Camera Slow to Turn On – Fix It Now
Nikon mirrorless camera’s are slow to turn on by default but that can fixed in a few ways. Fix it now and never miss another shot. So let’s answer the[…]
Read the post.
Your guide to field tested Nikon Z6II autofocus settings for birds in flight. Never miss another shot. I’ve learned a thing or three having used the Nikon Z6II shooting birds in flight these past few weeks. I feel like I can finally provide you with what I’ve learned so far in hopes that it will help you to dial things in a little quicker and come away with some killer images.
If you’re interested to know why I thought the time was right now to make the move to mirrorless you’ll want to head on over to my post called, “8 Reasons To Use A Mirrorless Camera For Wildlife Photography“.
This is my first mirrorless camera so the learning curve was a little steeper than it would have been moving from a Nikon D5 to D6 for example. It’s a quantum mind shift getting used to the electronic view finder and a few other aspects of the mirrorless system that are different than the DSLR’s. Not the least of which are all of the different autofocus settings that are available and what each does.
That’s the basis for this post, I’m going to review each of the autofocus settings that I have used and how they performed. Before we get to that I wanted to introduce you to a great resource that I discovered that I believe will be a great help to you.
Your success with the Nikon Z6II will be directly correlated to how you have it set up. That’s why I highly recommend Matt Granger’s Nikon Z Camera Expert Setup Guide. Whether you’re a longtime Nikon shooter like me or relatively new to the Nikon mirrorless system you will benefit from Matt’s expert guide. There were so many nuggets I was not aware of in Matt’s review of the Z6II system. I can confidently say that if you follow along with Matt as he dives into the menus and walks you through how to make all of the customizations and settings changes required, you can head out into the field knowing your Z6II is perfectly configured.
While the content is not specific to birds in flight, once you know where to access things and how to customize the camera you can configure your Z6II the way you want it set up for whatever you’re going to be shooting.

Before we dive into autofocus there are two settings that I recommend you switch from their defaults.
1/ POWER OFF DELAY – Go to the Custom Setting Menu > C Timers/AE Lock > C3 Power Off Delay. Change the stand by timer setting from 10s to 1 or 5 minutes.
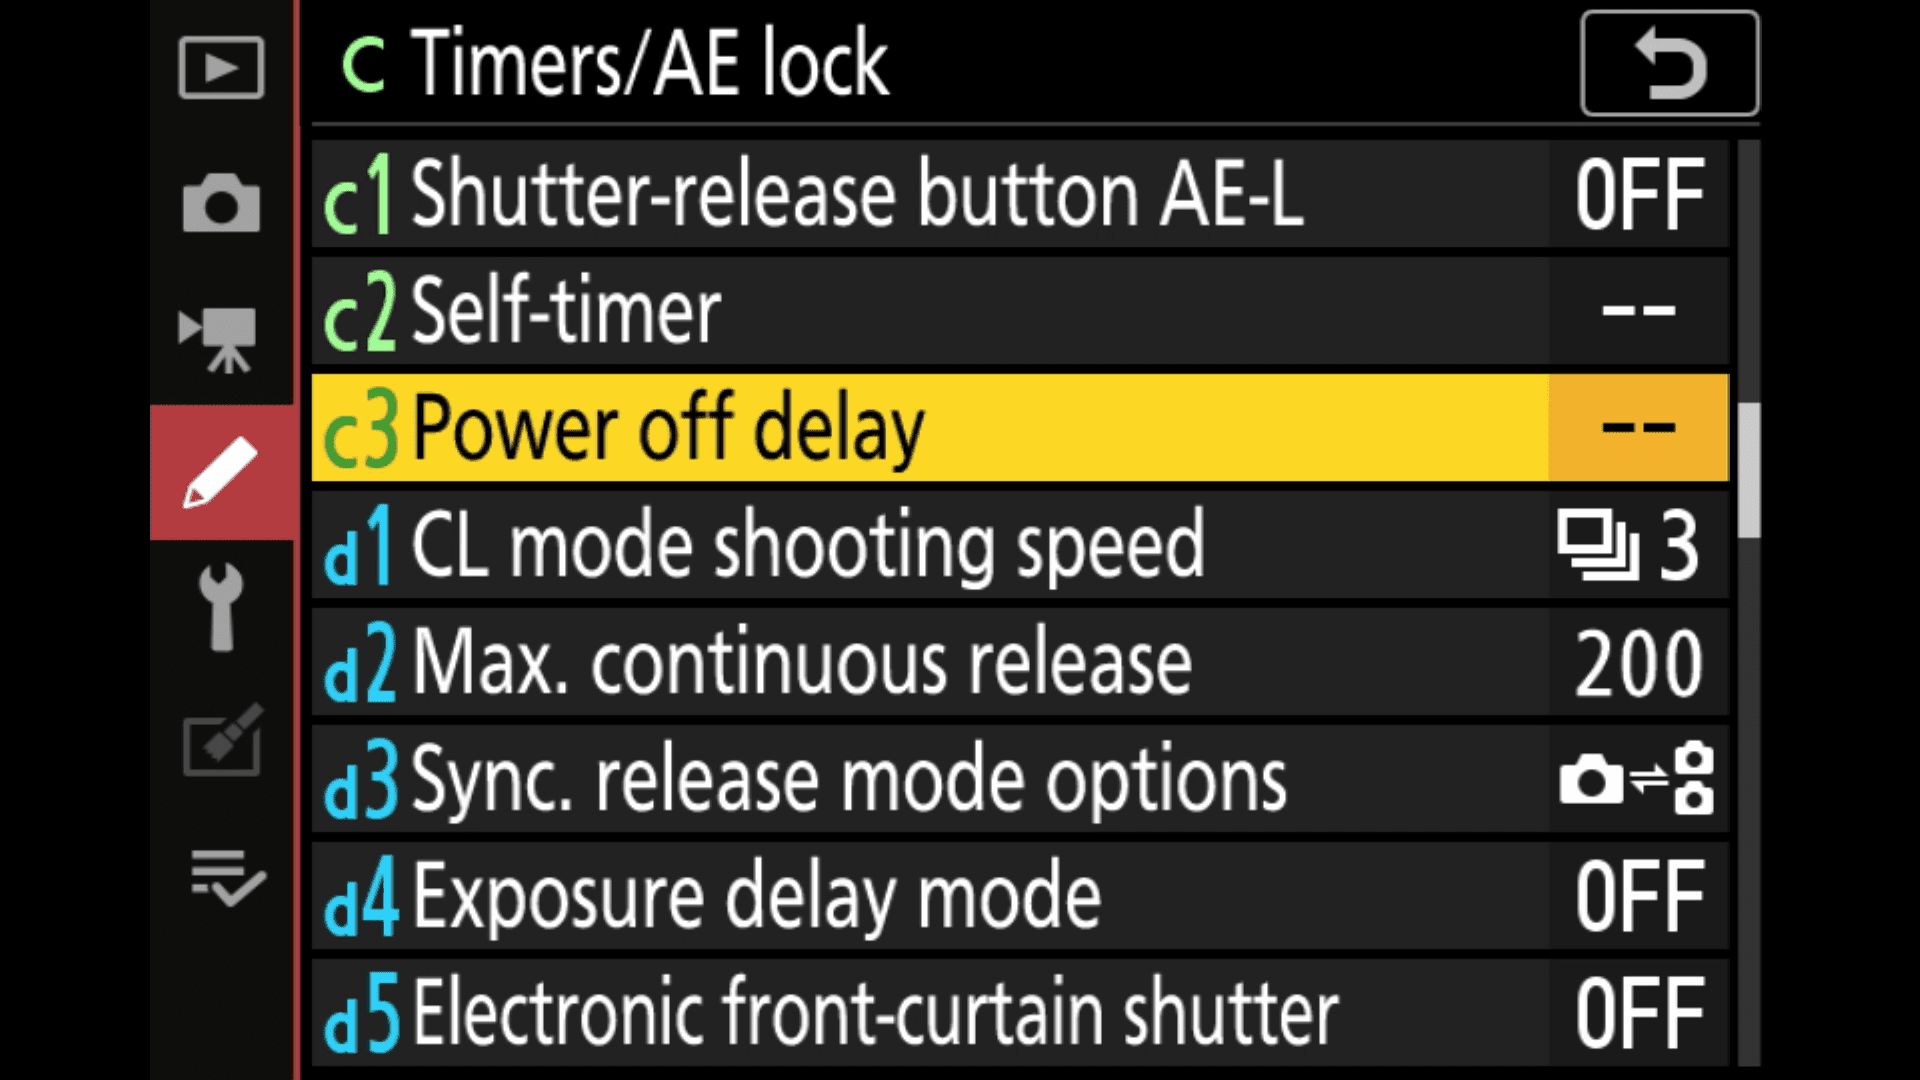
Why? There is a delay in the camera coming on when you bring the camera to your eye. I have missed shots because of this delay so by setting the power off delay to 1,5 or 10 minutes the camera does not go to sleep and you’ll be ready for the action. I expect it eats battery power so if you’re short on batteries there’s another work around. As you are bringing the camera up from your hip to shoot hit the shutter release and by the time you bring the camera to your eye it should be ready to fire.
2/ FOCUS TRACKING WITH LOCK ON – Go to the Custom Setting Menu > a Autofocus > A3 Focus tracking with lock on > Set this to Delayed setting 5.
![]()
Why? When tracking a bird in flight and trying to keep the bird in the frame the wings are going to occasionally block the birds body or eye. This being the case you want the AF to react more slowly to a change in focus so focus does not change to the wing and cause the eye of the bird to be out of focus. I experimented with values of 1-5 and I got the most keepers with a setting of 5.
This is the mode you want for birds in flight or moving animals. I leave my camera in AF-C and never change it. AF-C mode adjusts focus as needed as long as the shutter button is pressed halfway or if your using back button focus you have the AF-On button pressed down. Note: focus-adjustment occurs only if the subject moves closer to or farther from the camera.
If the subject is moving but only shifts a short distance in a horizontal direction, no adjustment is needed because the focusing distance remains the same.
Recommendation: In the custom menu setting a Autofocus set a1 AF-C priority selection to Release. This allows the camera to continue shooting even if the image is out of focus. This increases the odds of getting that split second wing position you wish to capture. The better you get at panning and tracking your subjects the more keepers you’ll get.
SHOOTING TIP: If you are not using back button focus I strongly urge you consider it. More on that in Tip #8 of my post called, “Wildlife Photography | 10 Mistakes Nobody Tells You About”.
This is where the world of choice really begins as there are so many more options for autofocus modes than with DSLR’s. Let’s review each one:
Pinpoint AF: Used when you want pinpoint focus on a selected spot in the frame like a birds eye. Problem is this focus point is only in AF-S and I shoot in AF-C so it’s not an option that is available to me.
Single-point AF: This is a great option to focus on the eye of a bird that is perched in a tree and staying stationary. This AF mode allows you to place one point on the eye and maintain that focus point throughout your shooting. Use the joystick to quickly position that focus point should you need to.
Dynamic-area AF: If you’re coming over from a DSLR you’ll be very familiar with Dynamic area. In the viewfinder of the Nikon Z6II you’re now going to see 9 focus points with a square around the middle focus point. The camera focuses on a point selected by the user but if the selected point loses the subject the camera focuses based on information from the other surrounding points. Think of it as an auto assistant at the ready to help out on moving subjects should you get a little sloppy.
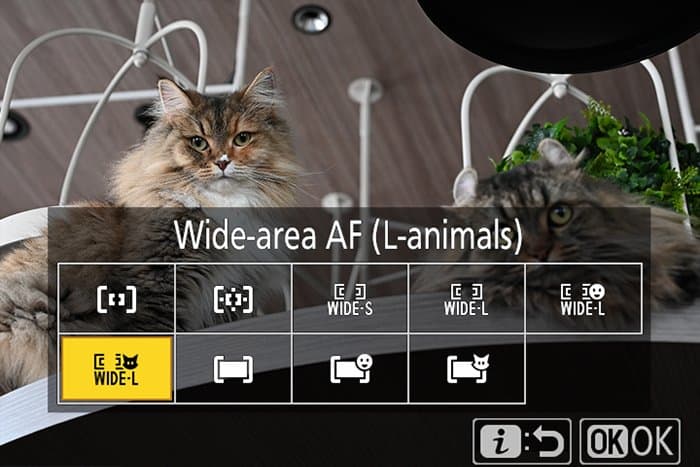
Wide-area AF (S) and (L): This is the option I preferred over all others. In the viewfinder you’re going to see a red box with a dot in the middle. The objective is to keep the bird in box and let the focus point focus on the bird. If you can master panning and keeping the bird within the lines of the box your keeper ratio is going to go way up by using either of these two modes. Note, the focus points for Wide-area AF (L) are wider than those for Wide-area AF (S) so I started with AF (L) and used that most of the time.
Wide-area AF (L-people): Same as Wide-area AF (L) but with Nikon’s human tracking system. (includes face tracking and eye detect) I did not use this option for birds in flight.
Wide-area AF (L-animal): Same as Wide-area AF (L) but with Nikon’s animal tracking system. (includes animal eye detect) I did try this option however with birds I never did see the eye indicator fire up. (That’s the little yellow box that you can see visually when it detects an eye) I did use this option with a white-tailed deer and the eye detect picked up the eye of the deer straight away.
Auto-area AF: The Z6 II automatically detects the subject and selects the focus area. At default settings, the camera gives priority to portrait subjects; if a portrait subject is detected, the selected subject will be indicated by a yellow border (if multiple faces are detected, you can choose your subject using the multi selector). Subject tracking can be activated by pressing the OK button. I gave this a try with birds in flight and quickly gave up. Could be just me but the tracking was all over the place and reacquiring focus if I lost it was next to impossible.
Auto-area AF (people): same as normal Auto-area AF but with people tracking. I did not use this option for birds in flight.
Auto-area AF (animals): same as normal Auto-area AF but with animal tracking. I tried this option and it was erratic. The number of shots I missed focus on was significantly higher than with Wide-area (S) or (L)
When Auto-area AF is selected for AF-area mode, pressing OK enables focus tracking. The focus point will change to a targeting reticule; position the reticule over the target and either press OK again or press the AF-ON button to start tracking. The focus point will track the selected subject as it moves through the frame. To end tracking, press OK a third time. I set this on my F2 function button and gave it a try but I still had better success with the two wide area AF modes.
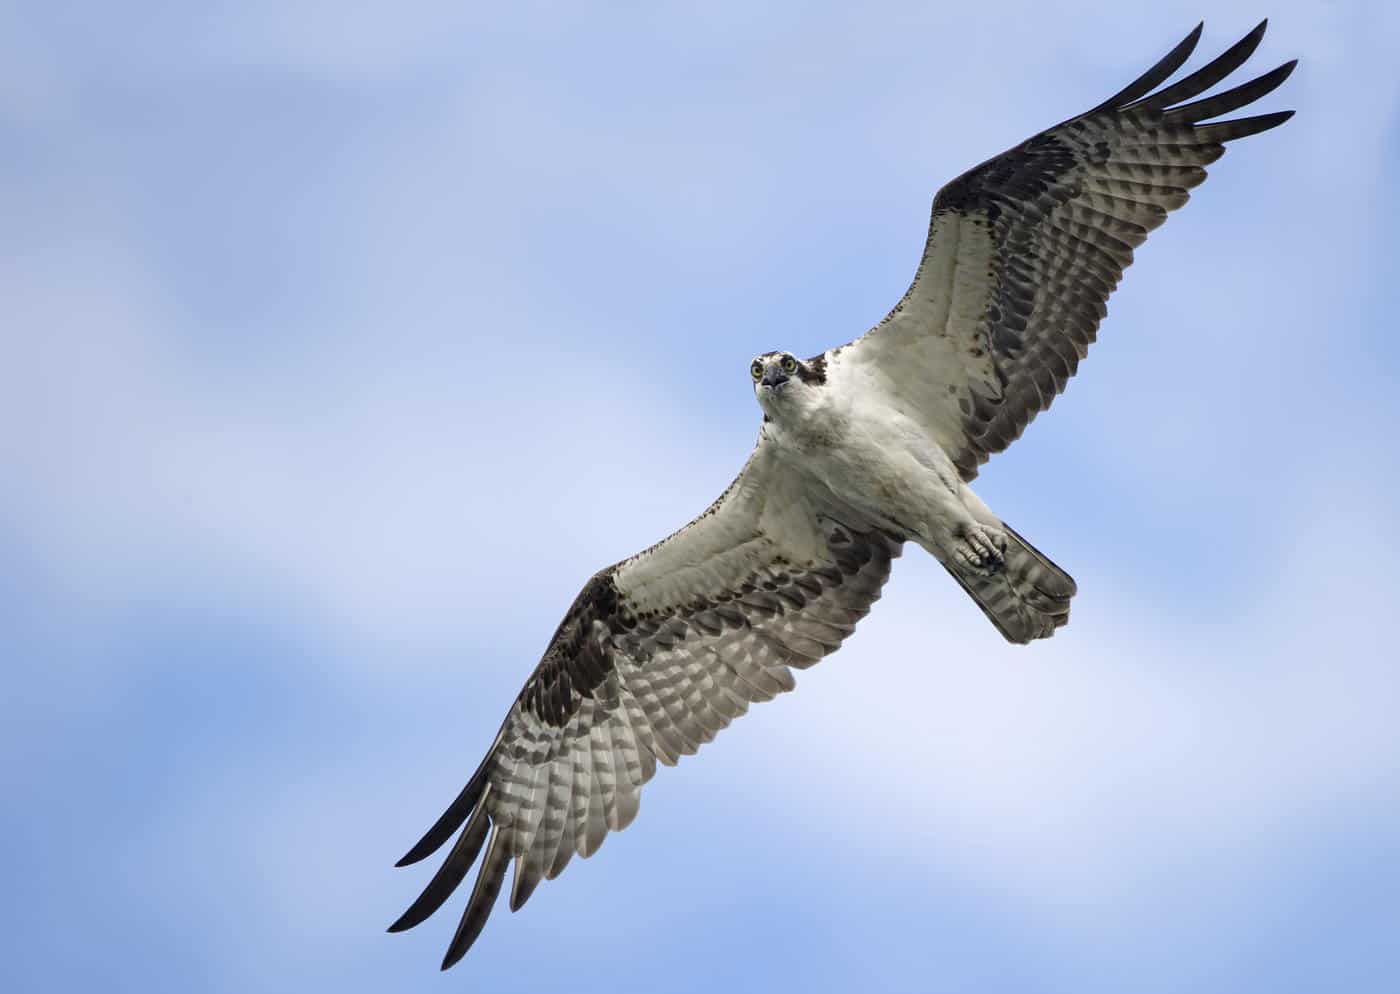
For birds in flight, I recommend testing between both the Wide-Area AF Small or Wide Area AF Large autofocus modes. I have had great success with both. It uses nearest-subject priority so this cuts down on the camera wanting to focus on the background should the bird fly by a wooded area for example.
I tried Auto Area AF and Auto Area AF Animals with little success compared to the other two modes. Of course if you grew up on a DSLR and already have great panning skills there’s no reason you can’t stick with Dynamic Area AF.
I had a good ratio of keepers with that tracking AF as well but that’s what I am used to using on my D5 and D850 so it was in my comfort zone. In the words of Shrek, change is good little donkey. so I am moving to the wide area modes.
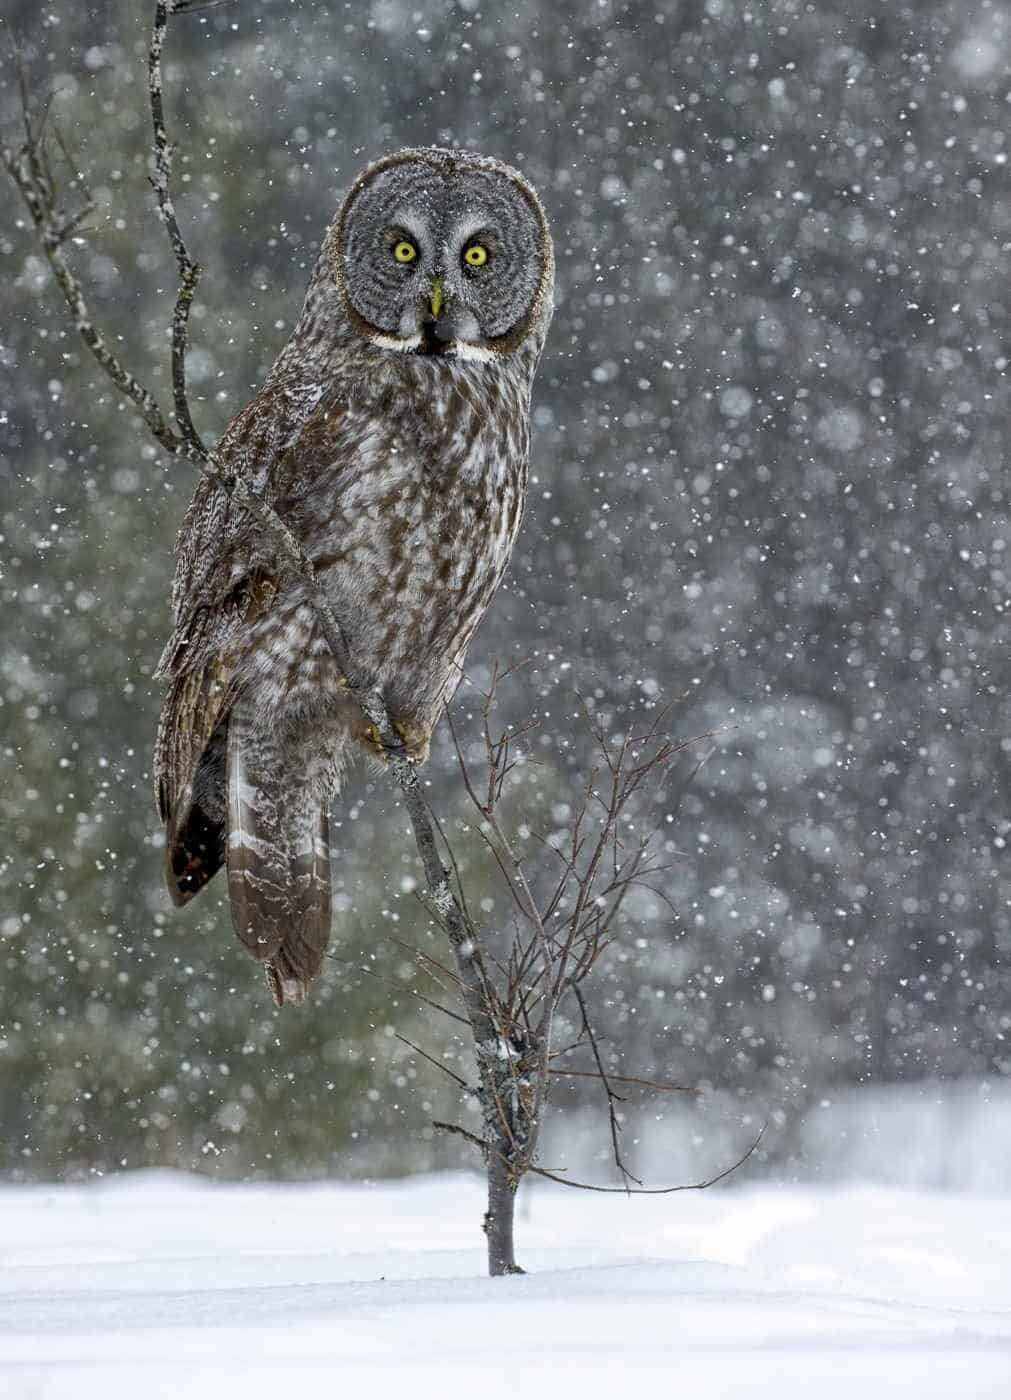
For animals and birds that are not active such as an owl perched in the tree I would use single point AF or Dynamic AF.
I did not use Pinpoint AF as it can not be used in AF-C which is my default but if you shoot in AF-S you may wish to give that a try. Of course if the bird takes off you may miss that shot by the time you switch back to AF-C.

AF Servo Mode: Continuous (AF-C)
If you’re just researching mirrorless camera’s and trying to decide if now is the time to make the move you’ll want to give consideration to the cost. In addition to the cost of the mirrorless camera itself there are a few accessories you may want to budget for but are not necessary depending on what you already own.
Below is my total cost to get up and running with the Nikon Z6II Mirrorless system. Note, the additional accessories were all nice to have’s not required. But I did want to take advantage of the CF Express speeds built into the Nikon Z6II. And the Nikon 500 Pf 5.6 is such a sharp and light weight lens that it just begs to be paired with the Z6II. All prices in USD.
If you’re interested in receiving more content like this, hit the subscribe button below and you’ll receive an email every time there is a new post.
Thank you so much for supporting my channel.
Nikon mirrorless camera’s are slow to turn on by default but that can fixed in a few ways. Fix it now and never miss another shot. So let’s answer the[…]
Read the post.
Simply put ISO in camera is a setting that will help you capture images in low light by making your photo brighter but it has a downside by introducing noise[…]
Read the post.