


The rule of thirds guides photographers in creating visual images with impact but we’ll show you ways to make it and ways to break it. Any photo that follows the rule of thirds will have nine segments, with two lines that are horizontal and two that are vertical. You then set the gridline intersection points around the focal point of your photo.
It doesn’t matter if you’re setting up to take a still photo of a human subject or a bird in flight just as the sun rises. In both instances, as a photographer, the majority of the time you’ll be utilizing what’s known as the rule of thirds. Many budding photographers learn about the rule of thirds before they even get to pick up a camera and shoot much. That’s because this rule is so important in taking photos that are balanced and visually appealing.
If you somehow dodged the part of your photography schooling when you were taught the rule of thirds, it’s okay. In this post, I’ll discuss the rule of thirds in photography, explain how to use it, and even tell you how some software and cameras can pull up gridlines for you so you don’t have to visualize the rule of thirds yourself.
What Is the Rule of Thirds in Photography?
The rule of thirds is used to aid photographers in presenting visually interesting photographic compositions. Using gridlines real or envisioned in your head, any image you’re looking at through your viewfinder can be broken into nine segments or parts. Each segment is the exact same length and width.
These segments are divided by horizontal and vertical lines, of which there are two of each. Here’s what I mean by that.
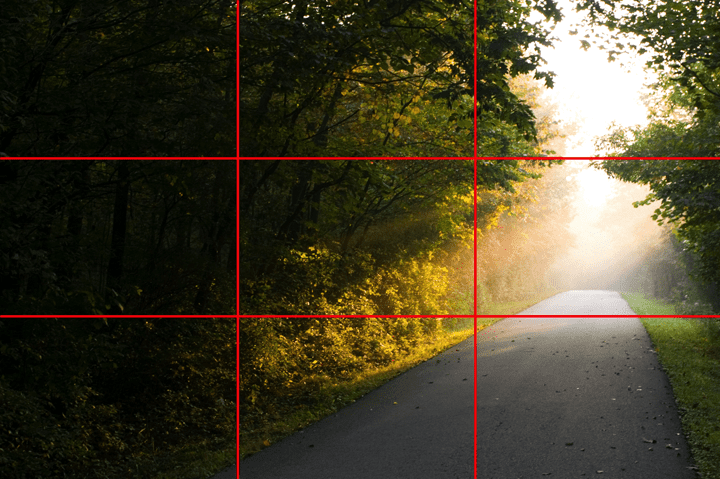 Image courtesy of Wikipedia
Those lines, both horizontal and vertical, are your gridlines. So the next question becomes, what do you do with the gridlines as dictated by the rule of thirds?
Using your gridlines, you can determine where you want the most important visual elements of your photo to go. These elements can sit at the intersection of two lines or against the lines themselves. Take a look at what I mean.
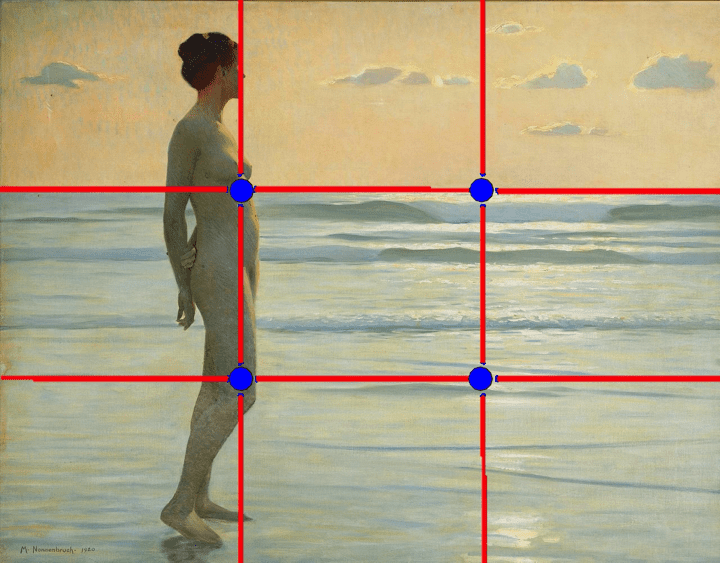
Image courtesy of Wikimedia
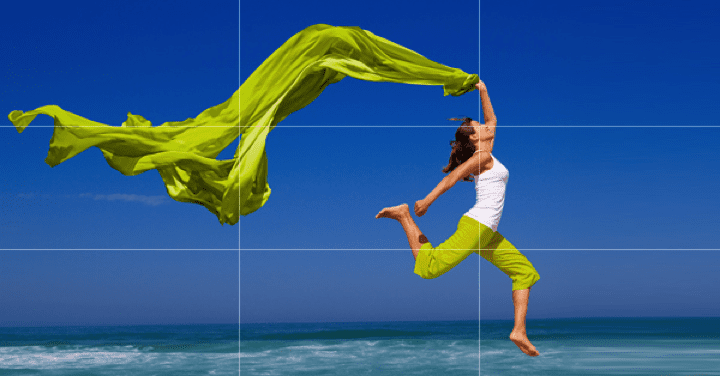
Image courtesy of Company Folders
Let’s focus on the second photo. In the picture is a woman on the beach jumping with a long, billowy green scarf in her hand. You can see where three of the four intersection points feature important elements.
The intersection points would be on the outer sides of the middle square. The first intersection point at the top left is the woman’s scarf front and center. To the right of that at the top is an intersection point that features the woman’s head. The third intersection point at the bottom right is about midway down the woman’s body.
If a photo subject happens to be divided by two lines, this is referred to as a crash point or power point (not to be confused with the computer software). And that will happen sometimes, where your photo subject will be at a crash point or split between the dividing line.
That example of the woman on the beach is a really great one to show the rule of thirds at play, but not all photos will be that perfect. That’s okay. Your focal point or point of interest doesn’t have to be on the line or immediately adjacent to it. As long as it’s close, you’re good.
By following the rule of thirds, your photo is supposed to be more interesting, energetic, and tense than a photo that does not use the same rule. Of course there are always exceptions, more on that further down in this post on breaking the rule of thirds.
Besides its application in photography, painters, filmmakers, and designers also follow the rule of thirds when creating their art.
How to Use the Rule of Thirds
Now that you have a better understanding of how the rule of thirds works, how do you go about using it in your own photography?
Above all else, I would suggest using photo editing software or even a camera with rule of thirds gridlines turned on. I’ll talk about your options in the next sections.
Having the rule of thirds grid clearly in front of you makes it much easier to adjust your camera so you’re aiming it at your subject just right. Expert photographers might have no issue visualizing the gridlines in their head, but you may not be there yet, and that’s alright.
Once you have access to the rule of thirds gridlines on your phone or camera, how do you use them?
Rule of Thirds in Wildlife Photography
As a wildlife photographer, I’m happy to help others trying to get into this area of photography themselves. The biggest problem with photographing animals is that they don’t understand nor care about the rule of thirds.
Unlike people, you can’t ask an animal to scoot a little to the left or right so they’re more within your gridlines. You also don’t necessarily have a lot of time to study those gridlines since animals can move at blink-and-you’ll-miss-it speeds.
I would say that then you should use the gridlines to the best of your ability, but remember that you can always pull up said gridlines in your photo editing software later to crop and otherwise edit your photos provided you left yourself enough space around the photo to allow for cropping.
Here are some examples of the rule of thirds in wildlife photography to inspire you and show you how it’s done.
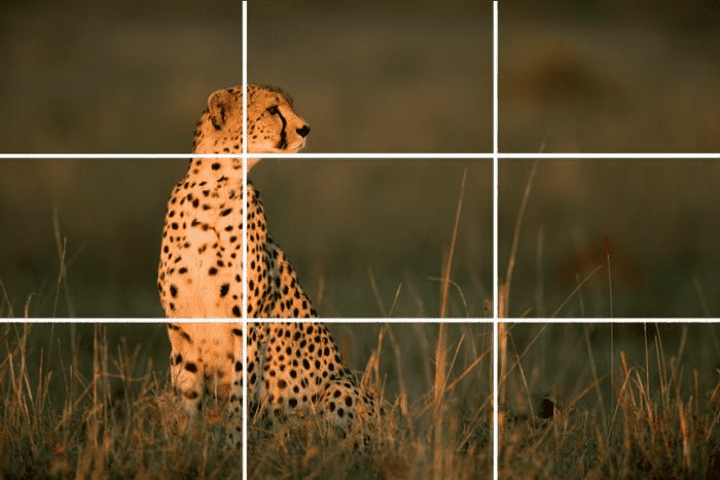 Image courtesy of Photo Video Edu
This first photo of a cheetah isn’t all that different from the examples of human photography using the rule of thirds that I shared earlier. The head of the cheetah has been placed at an intersection point and the predominant blades of grass also hit some of the intersection points incredibly well, which is another nice touch but not necessary. This image is all about the cheetah. Ideally, I might have cropped this image so that the eye of the cheetah fell right onto the upper left intersection point, assuming I had room to do so.
There is one additional very important principle to keep in mind when applying the rule of thirds. You need to give consideration for the direction that the subject is looking. In the image above, if the Cheetah were looking left the face of the Cheetah would still fall on an intersection point. However the composition would be out of balance. Do your best to leave two thirds of the space in the direction that the subject is looking. Shifting that intersection point to the eye of the cheetah would have given even more room in the direction the cheetah is looking which appeals to me.

Next, we’ve got this photo of an osprey with a fish in flight. The background is dramatically blurry, so you can’t really use that as a gauge of where your gridlines should go. Instead, the lines follow the osprey, with several crash points through the bird and ample space in the direction that the bird is flying.
Photos courtesy of Secrets of Digital Bird Photography
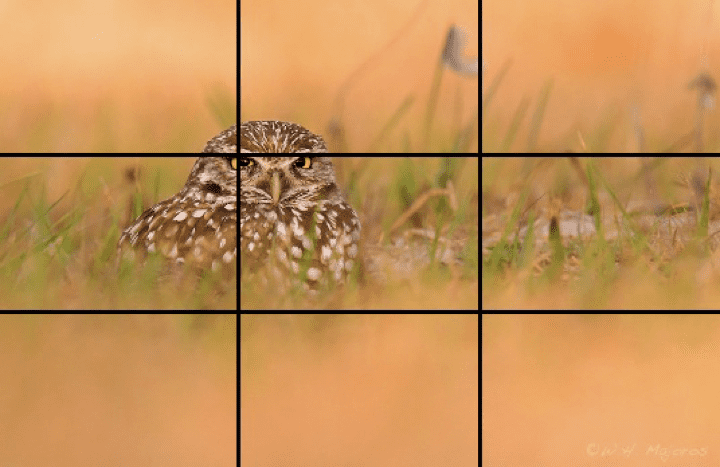
Here’s another example of a bird photo that abides by the rule of thirds. This time, it’s a stationary bird, an owl. Although there’s a lot of blurring in the background, the horizontal lines follow where the grass would give way to the ground. You also have several crash points near the owl, who sits between the center two squares of the grid.
With these examples and other images that you view on social media, etc, begin to look at those images with a critical eye. Ask yourself the question, would I have cropped this image differently to gain greater impact within the image? Take the owl image above, I love the bokeh in the surrounding landscape however there’s a lot of it. What would this image look like if the owl took up more of the frame?
The beauty is that there is no right or wrong, you have full license to decide how you wish to present your images, The goal from this post is to get you thinking while you’re shooting and during the edit process about the best way to capture and display your wildlife images.
Photographing Landscapes
Let’s say you’re taking a photo of a landscape, such as the trees in the example above. In that image is a path of trees and a concrete trail. How do you determine what the point of interest is? There are no people nor animals, no sunlight or any unique visual elements besides the concrete trail.
Maybe not, but what that photo does have is alignment with the grid lines. Look at the top horizontal lines of the grid and follow along the trees to where they clear. The trees nearly sit on the gridline.
The artwork Madchen am Strand by Max Nonnenbruch, which is also pictured above, follows the same rule. The outermost part of the ocean sits right on one of the gridlines. Yes, it’s not a photo but a painting, but it’s a cool example nonetheless.
Of course, when you have the opportunity to introduce focal points, such as a rising or setting sun, a tree, or a lone wolf running across the hills, then you’d frame your gridline to focus around that subject.
Photographing People
Although mine is a wildlife photography blog, I know there are all sorts of photographers out there. If you’re someone who captures the beauty of human life through portraits, then you’ll need some pointers on using the rule of thirds. Let me help you out.
In an ideal world, your photo subject will be right in the middle of the lens to the point where the gridlines are on or near them. Of course, the world is not ideal. What do you do if your photo subject is a little off to the left or right?
You need to adjust your camera so the gridlines follow them.
To remind you, the rule of thirds is all about highlighting the focal points in your photography. When taking pictures of people especially, the person or people in your image are the focal point(s). Are there exceptions? Sure. If you have a photo of a person pulling a sled on an icy tundra, then both the sled and the person are the focal points and maybe the sun too if it’s dramatic enough.
In standard portrait photography though, a single person is the subject. Thus, if your subject is not necessarily centered, your gridlines need to follow the subject, not the background.
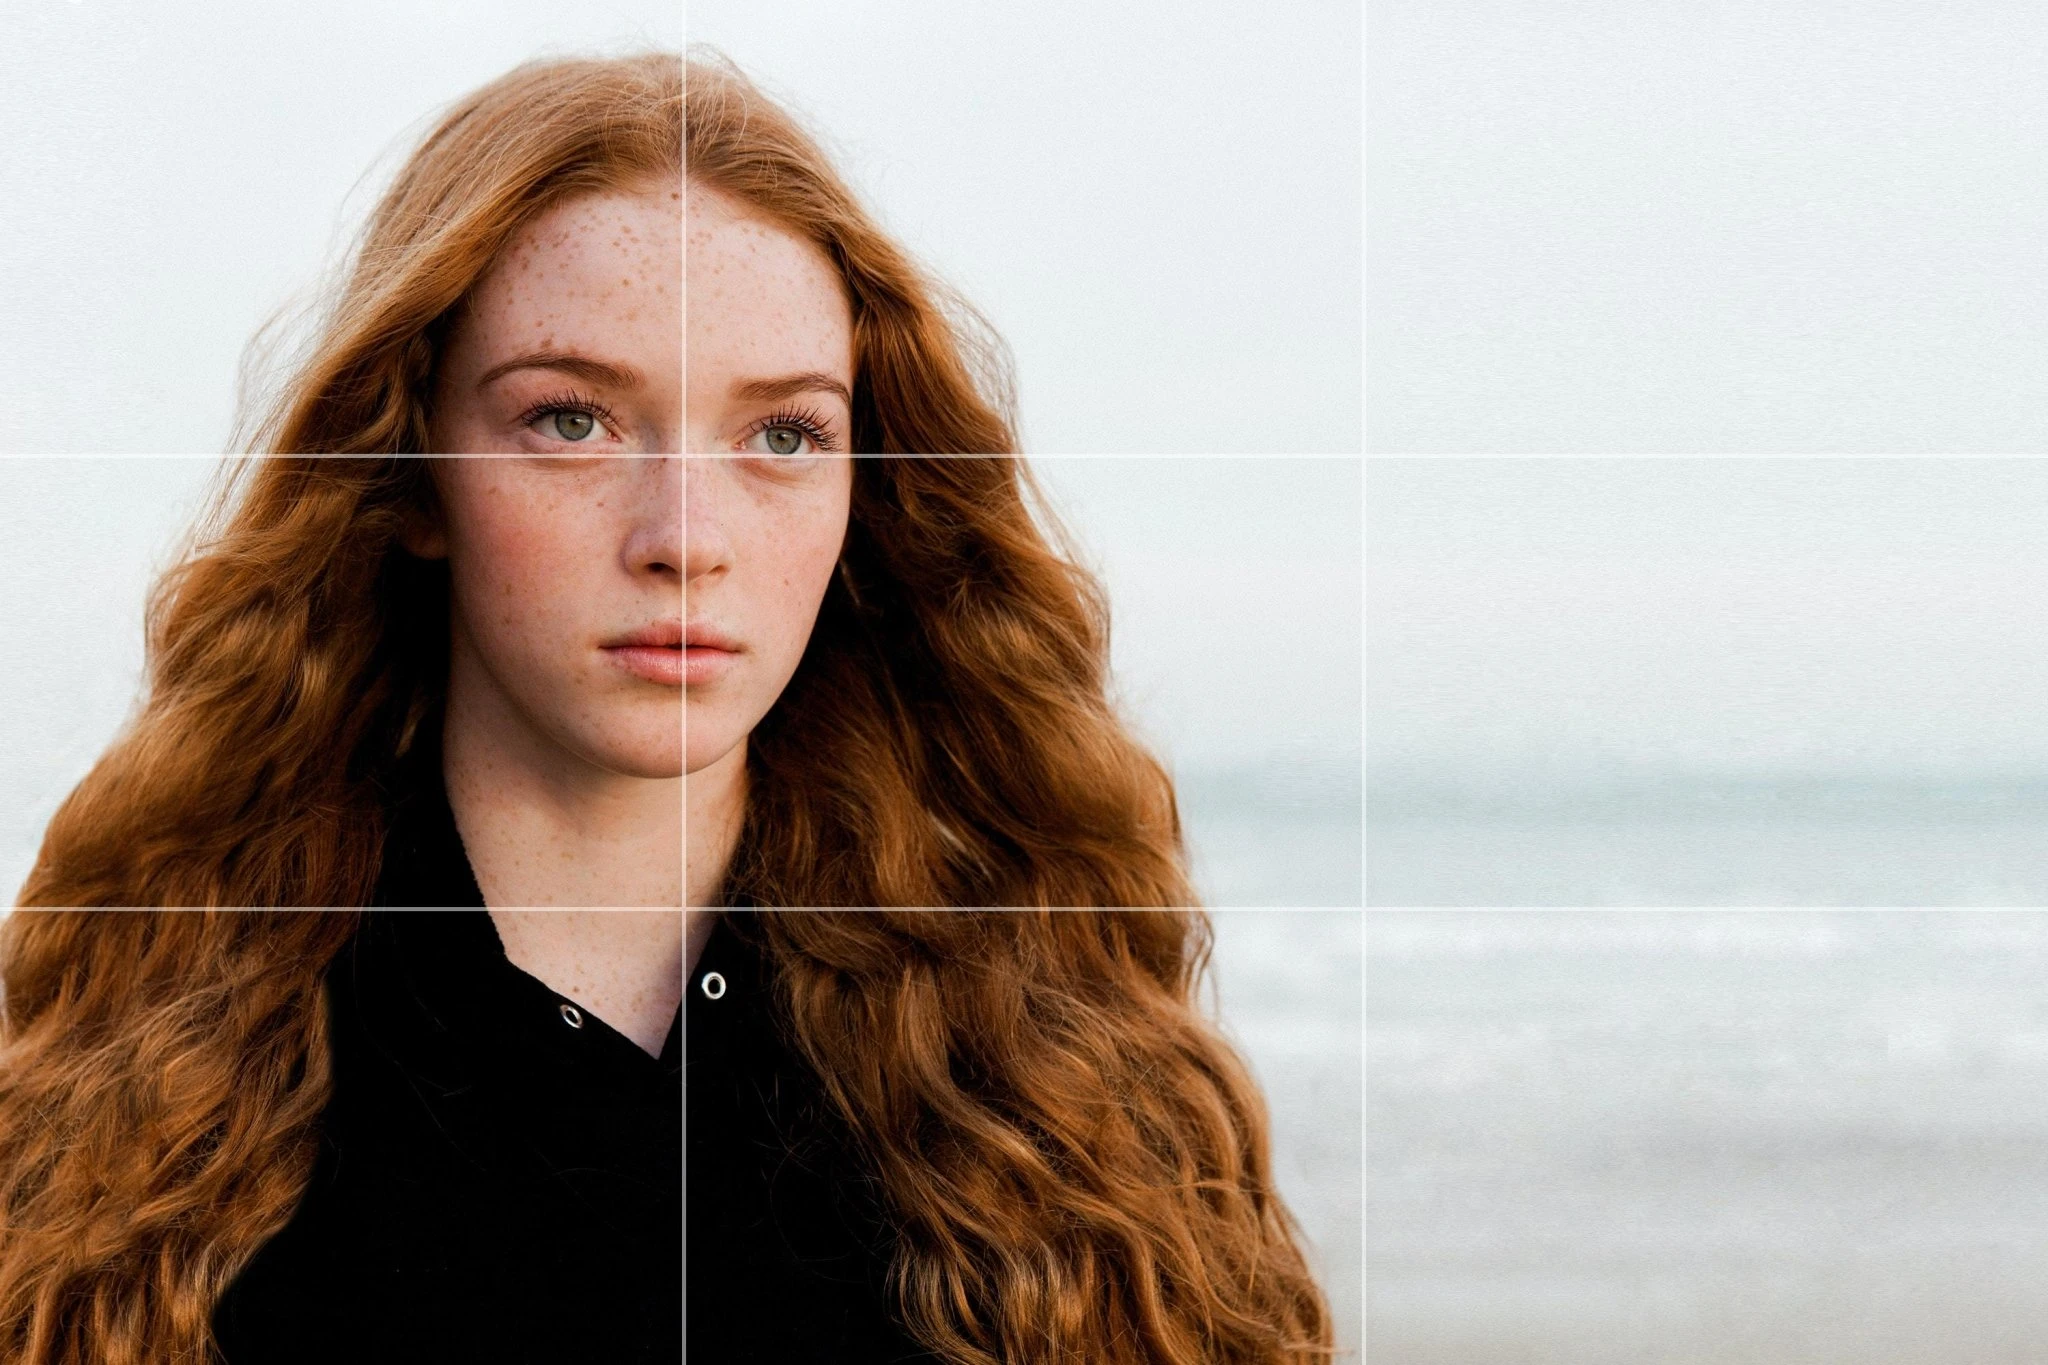 Photo courtesy of Mastin Labs
Here is a great example of what I mean. This image of a woman in front of the ocean (different than the last example of a woman at the beach) has the focal points off to the left where the woman is standing. Since the ocean is not clear from this vantage point, you want your gridlines focused more on the woman than what’s in her background.
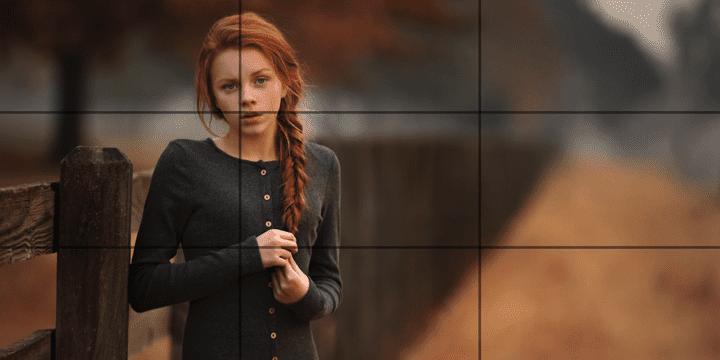
Photo courtesy of Bidun Art
This is another example. The woman in this photo is leaning against a wooden fence at what looks like a ranch. You have some crash points at her face and body, but that’s okay. For the most part, the intersections of the gridlines match up with the woman.
Again, does photographing people like this sometimes mean your subject will be off towards one side instead of perfectly centered? Absolutely. You could always crop the photo, although the balance of the rule of thirds might be a little wonky if you’re not careful. You can also use a blur effect in your favorite photo editing software to keep the viewer’s attention on your human subject rather than the background.
For additional information on the rule of thirds including portraiture and photojournalism you can read this beginner’s guide.
Rule of Thirds Editing Software
If you’ve been taking photos for a while now without being aware of the rule of thirds, then you may want to go back and see how your old work stacks up. You might even feel inclined to crop your photos so you can now better focus on the focal point.
Using two popular photo editing software options, Adobe Photoshop and Corel PaintShop Pro, here’s how you turn on the rule of thirds grid.
Photoshop
You can do just about anything in Photoshop, creating gridlines included. Just follow these steps.
Step 1: Open the Preferences menu by pressing Ctrl + K on a Windows computer and Command + K on a Mac.
Step 2: Select Guides, Grid & Slices.
Step 3: Adjust your gridlines by choosing the Subdivisions 3 and every 100 percent settings.
You should now see gridlines that will make editing and otherwise improving your photos in Photoshop according to the rule of thirds far easier.
PaintShop Pro
PaintShop Pro wouldn’t be my first choice to edit your photos, but for a beginner on a budget, it works well enough. Here’s what to do in this program to bring up the rule of thirds gridline.
Step 1: Open the Tools toolbar, then select Crop.
Step 2: You will see a cropped rectangle over your photo, with shading on the rectangle’s outer area. Ignore this for now and go to the Composition Guide. From the drop-down, select rule of thirds.
Step 3: Toggle the edges and handles to determine the size of cropping for your image, dragging where you put your cursor.
Step 4: After editing your image per the rule of thirds, make sure you go to the Tool Options palette and select Apply.
How to Use a Grid on a Smartphone for the Rule of Thirds
Imagine this scenario: you’re a wildlife photographer (like me) who’s out on a stroll one day. You see a family of deer nestled up against a clearing of trees. You so wish you had your camera on you to photograph the magic of the moment, but you don’t. You do have your smartphone handy though.
Smartphones have come a long way, and while a professional camera will always be better, in a pinch, your phone can take some pretty awesome photos. The problem is, you have no rule of thirds gridline as your guide…or do you?
How do you use a grid on a smartphone like an iPhone? To activate grid-like lines on your iPhone, go into your iPhone Settings, then Camera. Next, select Grid.
Yes, it’s really that easy, even if you have a newer iPhone. Anytime you want to turn the grid off, just go back into your Camera settings and deactivate the grid.
What if you’re an Android user? Your Samsung Android can use the rule of thirds grid too. You only have to go into your Camera app, then select Settings and turn on the gridlines. Who knew it was that simple to follow the rule of thirds even when photographing on a smartphone?
Camera Rule of Thirds Made Easy – How to Turn on Gridlines
I said I would cover this, so I want to wrap up by discussing how to turn on the gridlines on popular camera models such as Nikons and Canons. Practice using the gridlines as you take photos. Eventually, you’ll get so used to the gridlines that you should be able to follow the rule of thirds even with the lines turned off!
Nikon
With most Nikon cameras like my D850 you have the ability to turn on the rule of thirds gridlines in the viewfinder. Turning on these gridlines can really help you to compose your images while keeping the rule of thirds in mind.
Custom Settings, Shooting Display and look for Viewfinder Grid Display and turn it on.
On my Nikon D850 it is option d9. Curiously, this was not an option on my pro body Nikon D5, so I expect Nikon figures anyone who is carrying a pro body camera does require a reminder of the rule of thirds.
I can attest to the fact that after a while adhering to the rule of thirds becomes second nature while you shoot. Full transparency, while writing this article I picked up my D850 to find where the viewfinder grid display setting was located and it was already turned on. When I looked in my viewfinder sure enough the gridlines were present but I couldn’t have told that. Point is you will eventually just compose to the rule of thirds without the need for the in camera gridlines.
Canon
Breaking the Rule of Thirds
As much as we’ve discussed the rule of thirds I don’t want you to come away from this post thinking all of your images need to conform to the rule of thirds. Some rules’are meant to be broken. The rule of thirds is not the only way to guarantee a good composition. Just understand why you’re breaking the rules and foregoing the gridlines. It’s usually best to break the rule dramatically so it doesn’t just look like an accident or sloppy composition.
Here are a few examples of ways that I intentionally break the rules.
Dead Center
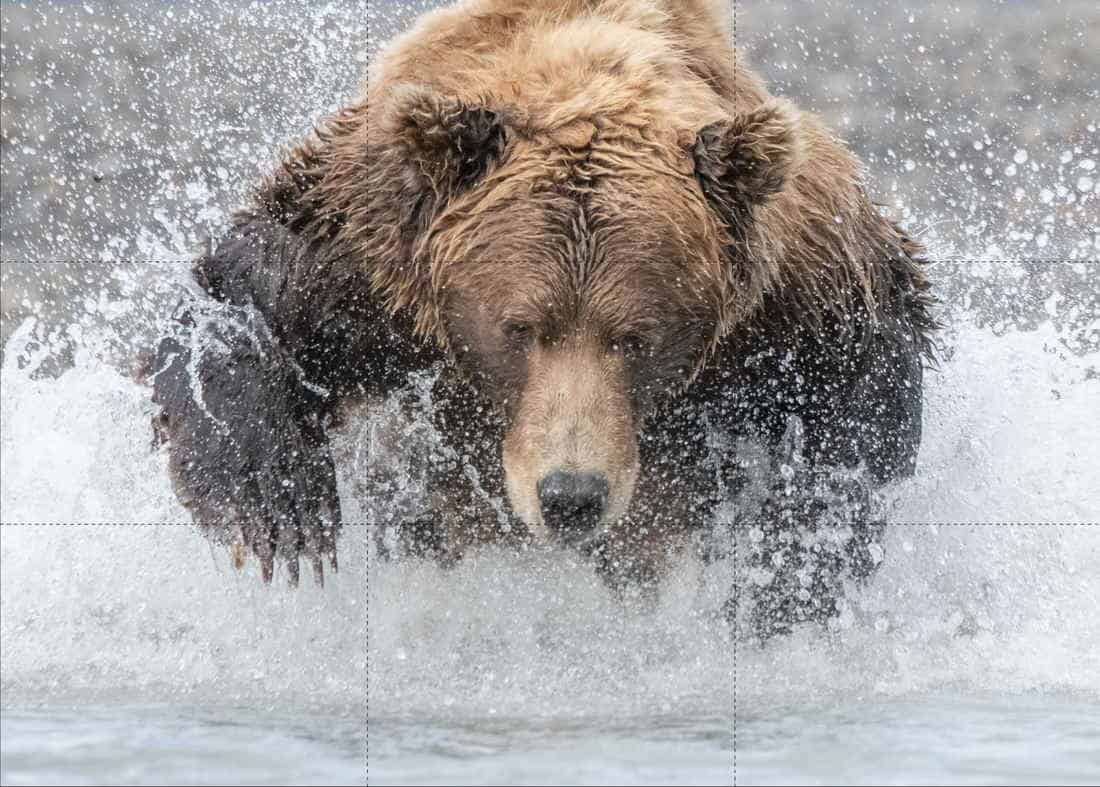
Placing your subject or horizon in the center of the image is probably the most common and obvious way to break the rule of thirds, and works particularly well for many of the wildlife subjects that I shoot. .
In the grizzly bear image below, I intentionally placed the bear dead center in the frame. That made sense because the bear was charging straight at me while chasing a salmon.
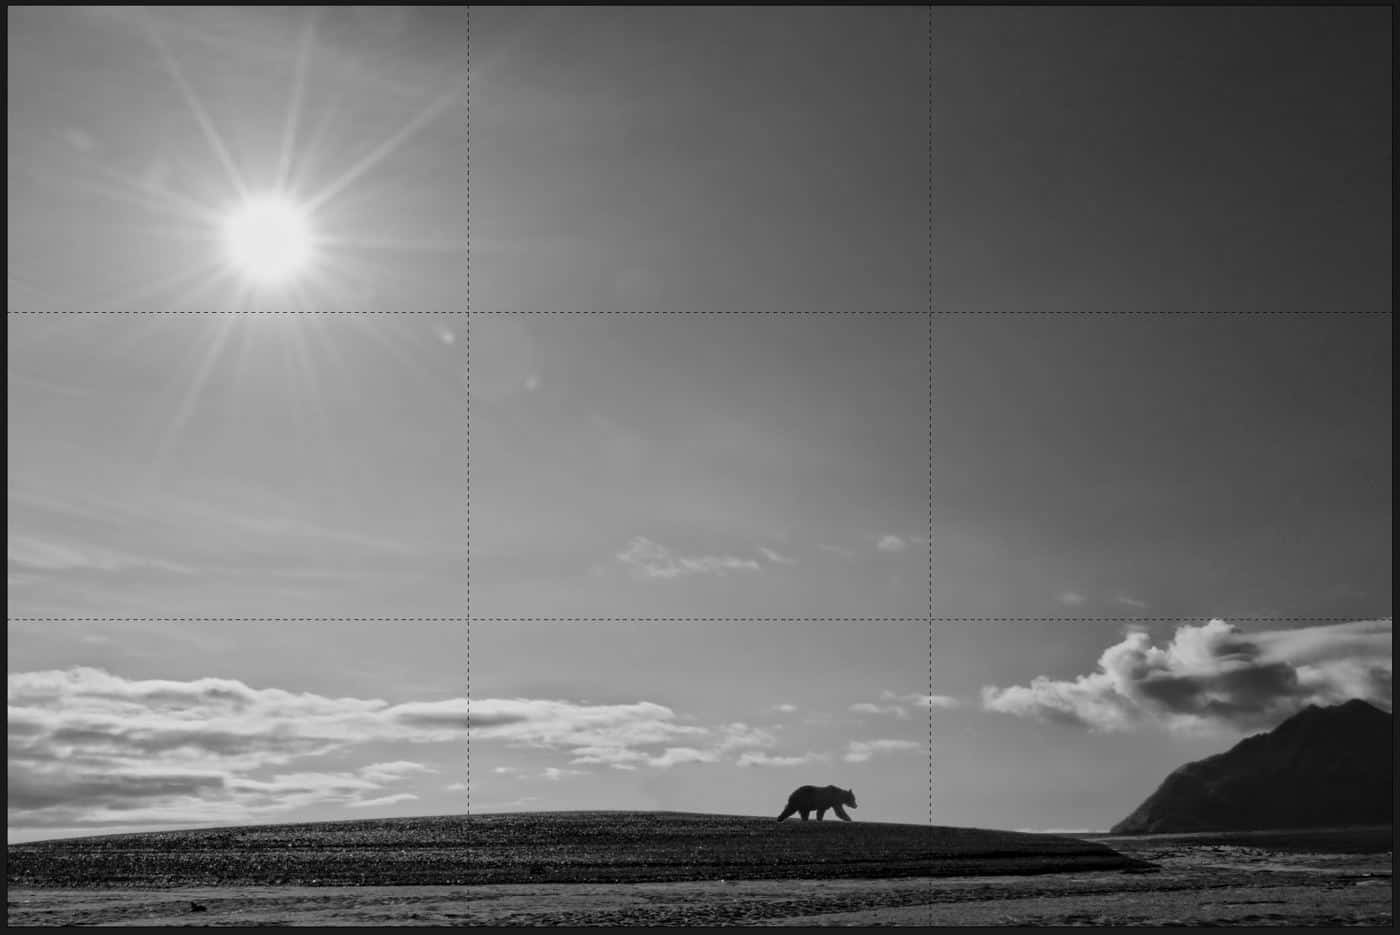
The Edges
It flies in the face of the conventional rule of thirds presentation however it can really work well with the right image Take the grizzly bear walking across the beach image below. I intentionally framed up this photograph placing the bear on the beach along the bottom edge of the frame. While the sky was not all that dramatic, the sun balanced the image by placing it along the top of the frame. Using the edges needs to be done thoughtfully but you can really be rewarded for thinking outside of the rule of thirds box with the edge technique.
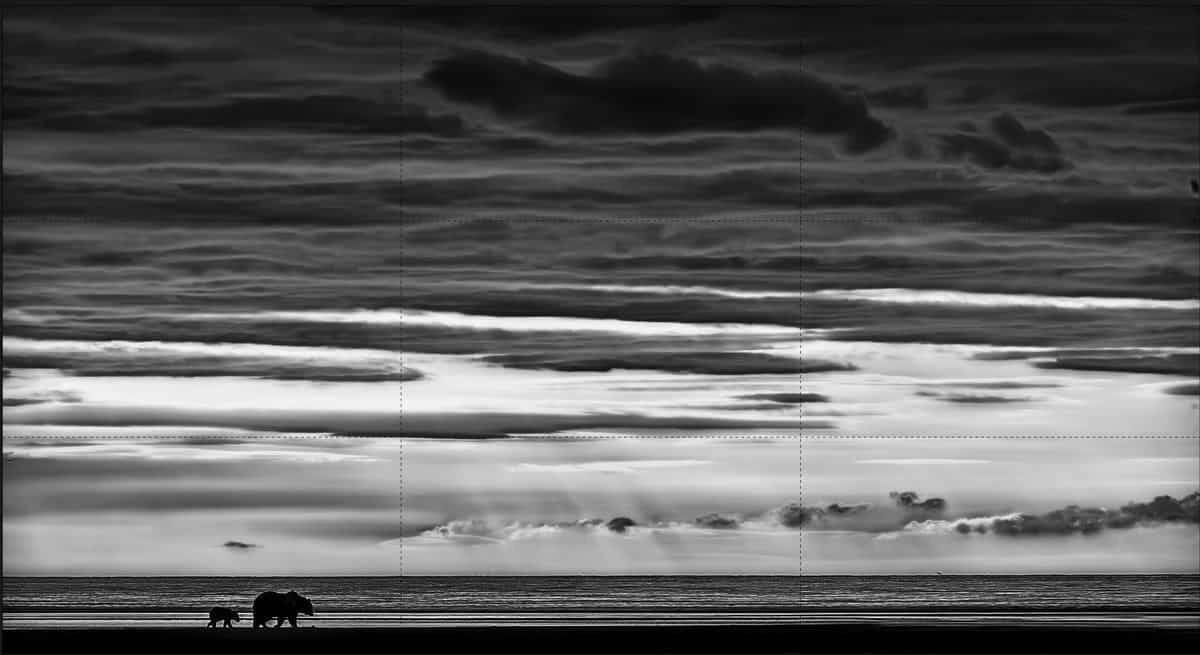
This technique also works very well when you have a very interesting sky, this allows you to drop your subject or landscape to the bottom of the frame as I have done with the grizzly bear and cub to highlight the features in the sky.
Conclusion
The rule of thirds in photography as in visual arts ensures that your focal point is always the starring part of the show, even if it’s not centered. If you’re not already using the rule of thirds, doing so may improve the quality of your photography.
From smartphones to today’s most popular cameras and even photo editing software like Photoshop, you can create gridlines anytime to follow the rule of thirds as you take live photography. Even if everything isn’t just so while you’re shooting, you can always edit your images later. Having said that, don’t be afraid to venture out and break the rules every once in a while when the image allows for it. Best of luck!


Comments
How To Become A Wildlife Photographer | Cool Wildlife
Comments are closed.