Capture One 21 builds upon an already feature rich photo editing toolkit known for its true to life colours tailored to your camera. Capture One 20 was already one of the most preferred photo editing choices of serious amateur and professional photographers and it just got a whole lot better with this latest release. For existing users the big question is, “Is it worth the upgrade?” For new users, Capture One 21 is one of the best software editing tools on the market. You can use coupon code WILD10 to receive a 10% discount on your purchase of any of the perpetual licenses, bundles, prepaid subscriptions, upgrades & style packs.
I’ve reviewed DxO PhotoLab 4 and Luminar AI recently as they are two worthy and competing photo editors for those looking to move away from Adobe’s monthly subscription model. I’ve wanted to discuss Capture One 20, but I decided to hold off because I knew Capture One 21 was was going to be launched in December and it is finally here. Now that it’s here and I’m really excited to dive deeper into it today to find out if it was worth the wait.
Spoiler alert: the colour rendition coming out of Capture One 21 is better than any other photo editor I have used. I’m not exactly sure how Capture One 21 does it back stage but the colours just seem to pop right out of the gate compared to other photo editors that I have used.
What are the new features of Capture One 21?
- Speed Edit
- Dehaze
- Rebuilt Importer
- Revamped Tooltips
- Learn button
- HEIF file support
- ProStandard Profiles
- Leica tethering
- Brush adjusting
Capture One updates its software pretty regularly, with the last update before Capture One 21 being Capture One 20, then Capture One 12 (yes, they jumped from 12 to 20). If you’re still using Capture One 12 or Capture One 20 as your image editing software of choice, is it worth upgrading to Capture One 21?
What if you’ve stuck with a program like Adobe Lightroom because you thought it’s the best photo editing software? Should you keep on keepin’ on or think about making the jump to Capture One 21? That’s what I’m here to do today, help you answer those questions.
In this in-depth review, you’ll see the new features such as Dehaze on display. I’ll also showcase some classic Capture One features such as the Clone Brush, Tool Brush, Before/After Tool, and the Heal Brush and use my own wildlife images where I think it showcases a feature best.
By the time you’re done reading this review, you should have a clear idea of whether Capture One 21 is the right photo editing software for you.
What Is Capture One 21?
This is my first review of Capture One software, so a short introduction is in order. Capture One, also referred to as Capture One Pro, was founded by a company called Phase One, a digital photo software and equipment brand based in Denmark. As of this summer, Capture One has become its own freestanding entity.
As you would expect the Capture One family of software can tackle such photo editing tasks as tethering photos, processing RAW image files, denoising, cataloging images, and much more. And the software supports the usual image files, including JPEG, PSD, TIFF, and so on. That makes it the same as all the other photo editors that I have tried. Where it sets itself apart is with its colour rendering and some of the new features that have just been introduced.
Capture One 21 just came out December 8th, 2020 making it the newest Capture One photo editing software. The previous software, Capture One 20, originally came out in December 2019, but the latest stable release, version 13.1.3, was released in early October 2020.
The New Features of Capture One 21
Okay, now that you know a bit more about Capture One 21, let’s dive right into the new features, as I’m sure you’re quite eager to see what Capture One has done with this latest update of its software.
Speed Edit
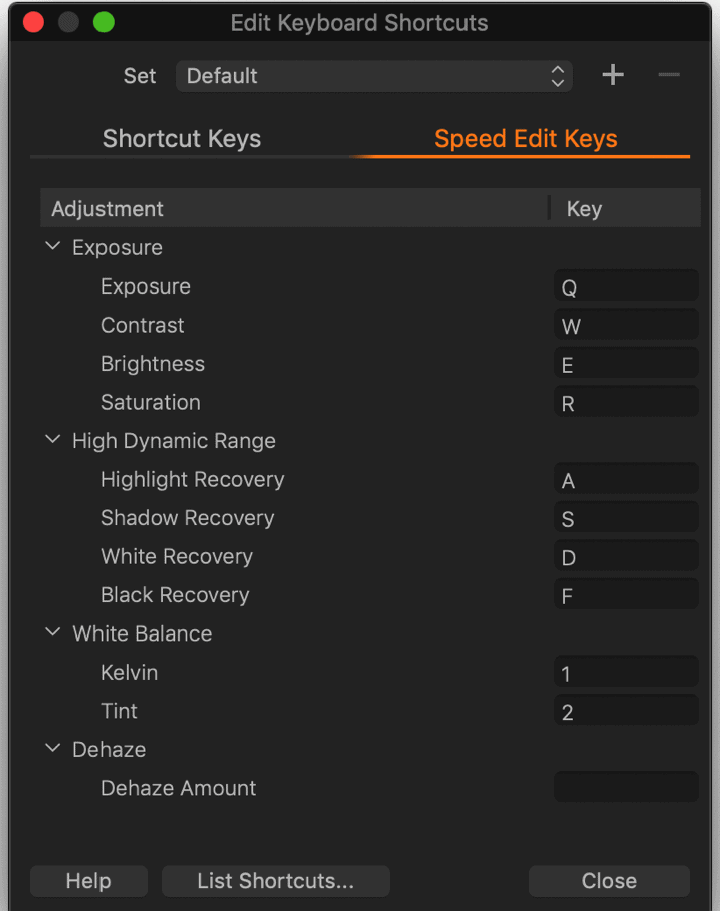
The first new feature in Capture One 21 is known as Speed Edit. If you’re a big fan of keyboard shortcuts in your image editing software, then you may especially appreciate this feature. In Speed Edit, you assign keys on your keyboard for making edits instantly.
Say for instance you wanted to adjust the exposure on your latest photo. You’d press Q on your keyboard like in the example I have here or you could press any key that you most like to use.
Okay, but you’re probably asking, what kind of exposure settings are you applying at the touch of a keyboard button? That’s a good question and something that Capture One already thought of. In Capture One 21, you get to select the sensitivity of any of the settings in Speed Edit. You can adjust sensitivity in one of two ways, by inputting a numerical value of -100 through 100 or by pulling a slider bar.
The sensitivity settings aren’t permanent. This means that if you adjust the exposure of an image one way today but you wanted less exposure when you next sit down and edit your photos tomorrow, you’d get to move the sensitivity slider again. This lets you customize your edits but still work on your photos quickly.
So what kinds of adjustments can you make to your photos besides setting the exposure? Here’s the full list of the available Speed Edit functions in Capture One 21:
- Exposure
- Contrast
- Brightness
- Saturation
- Highlight Recovery
- Shadow Recovery
- White Recovery
- Black Recovery
- Kelvin
- Tint
- Dehaze
Dehaze
Speaking of Dehaze, that’s the next feature in Capture One 21 that I want to talk about. If you’ve used other Capture One software with a Dehaze tool, know that the one included in Capture One 21 is brand-new, so you’d be getting a unique experience.
Capture One says the new Dehaze tool is ideal for flat-contrast images that need saturation and haze adjustments. In Capture One 21, the Dehaze tool has built-in analytical abilities that allow it to assess the elements of your image and determine which parts need more saturation and contrast.
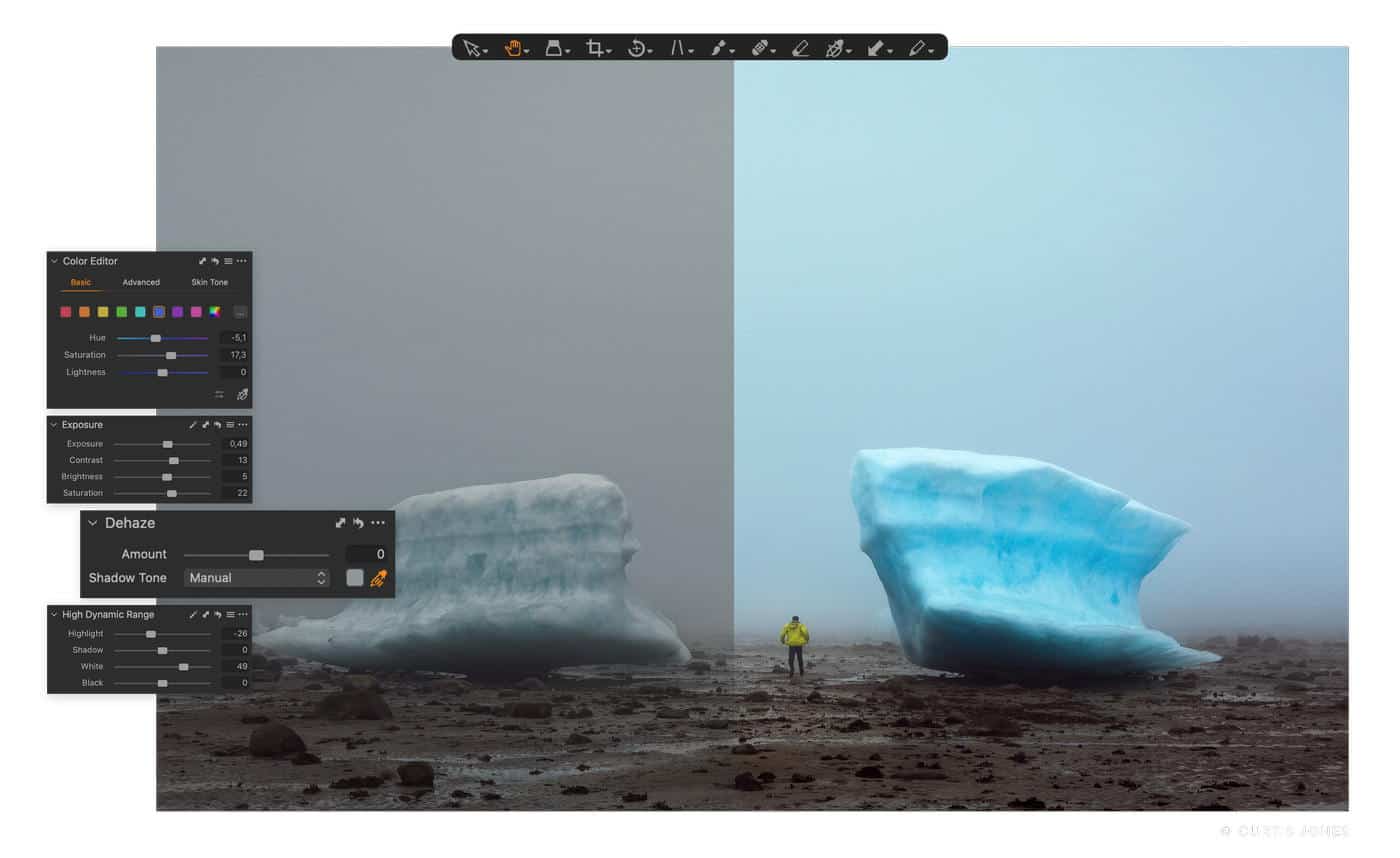
If you’d rather manually make the adjustments yourself, that’s also an option. Like the Speed Edit feature, in the Dehaze tool, you can set the amount of saturation and contrast with a slider or by inputting a number. You also have options for automatic shadow tone adjustments or you can use an eyedropper tool to select a color in your image for shadow tone fine-tuning.
Capture One recommends setting the shadow tone in the darker parts of your photo, especially if you have broken colors or other artifacts. This setting should clear away these unwanted visual elements so your images look clean.
Importer
Capture One 21 also includes a new and improved Importer, which is handier than even the version in Capture One 20. What’s new?
- When importing an image library for the first time, you don’t have to click quite as much, streamlining the process.
- If you’re working in the Folder Browser, you can choose images right from this area, which was not possible before Capture One 21.
- If you want to import more than one folder at the same time, now you finally can.
- The Catalog import destination descriptions and terminology have been updated so everything is easier to understand.
- The resolution of your image library thumbnails is of higher quality so you can more quickly decipher one photo from another.
- The import window is bigger, which is also visually appealing.
- The picker option was added for selecting which files or catalogs to import.
How do you use the picker? By pressing certain keys on the keyboard, of course. As a default, the spacebar will toggle your pick or unpick. Press the P button to pick something and X to unpick it. That goes for individual images in your catalogs, individual folders, or several folders at once.
Tooltips
Capture One 21, like Capture One 20 before it, comes with a lot of tools, brushes, and features. It can be a little overwhelming when you first open your trial version (or paid version; you get all the same features either way) of the software and see everything this photo editor has to offer.
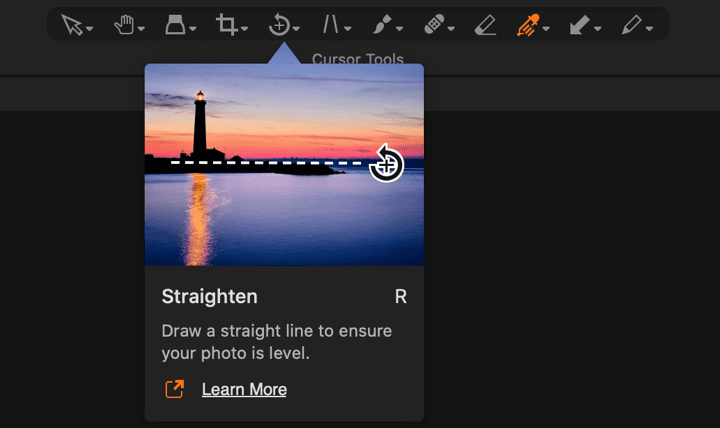
If you need a little help acclimating to Capture One 21, the Tooltips feature can be that assistance for you. When you come across a tool that you don’t quite understand or aren’t sure how to use, don’t try wildly clicking it and possibly wrecking your image. Instead, let your mouse hover over the tool icon.
The Tooltips feature will give you a brief yet succinct explanation of what a tool is and how it works. Considering Capture One 21 uses icons for the tools much like Capture One 20 and other iterations of this software before it, it helps to have this handy bit of info.
Once you learn your way around Capture Pro 21 and feel like you no longer need the Tooltips active, just head to Preferences and then General to turn Tooltips off. You can also reactivate Tooltips at any time.
Learn Button
In the same vein as the Tooltips feature is the Learn Button. All you have to do is press it to begin a series of tutorials that will help you become a master of Capture One 21.
I’d recommend the Getting Started section, which covers such areas as the Capture One 21 interface, how to make basic adjustments to your images, and tips and tricks for importing photo catalogs.
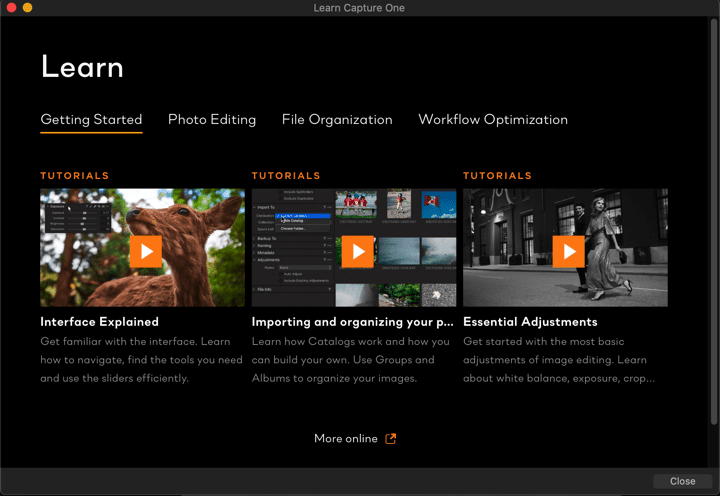
The Photo Editing section includes tutorials on using Capture One Styles, rotating and cropping your photos, and setting contrast and exposure in an appealing way. In the File Organization lessons, you can get tips on how to export your photos and organize your catalog. Finally, in Workflow Optimization, you can check out detailed webinars on improving your workflow.
These in-program lessons are just the tip of the iceberg, by the way. At any point, you can select “more online” and discover the wealth of educational information Capture One offers on its products.
HEIF File Support
Do you work in HEIF files? For the uninitiated, a HEIF file stands for High Efficiency Image File Format. Not only encompassing images, HEIF files can be video, audio, and text as well. Thus, it’s pretty hard to find a photo editing software that supports this file in particular.
Capture One’s products hadn’t before now, but with Capture One 21, you get HEIF file support for 8-bit HEIF files. Your computer’s operating system–be that a Windows or a Mac–must also support the file for Capture One 21 to do the same.
What can you do with HEIF files in Capture One 21? You can import them into the software, edit them like other photo files, and export them into another format of your choosing. However, you cannot take other file formats and export them to HEIF files.
ProStandard Profiles
I’ll talk a little later about the Nikon Profiles feature built into Capture One 21, but for other camera profile types, ProStandard Profiles is really a standout. The new camera profiles have more natural colors, especially standardized colors, from one camera model to the next.
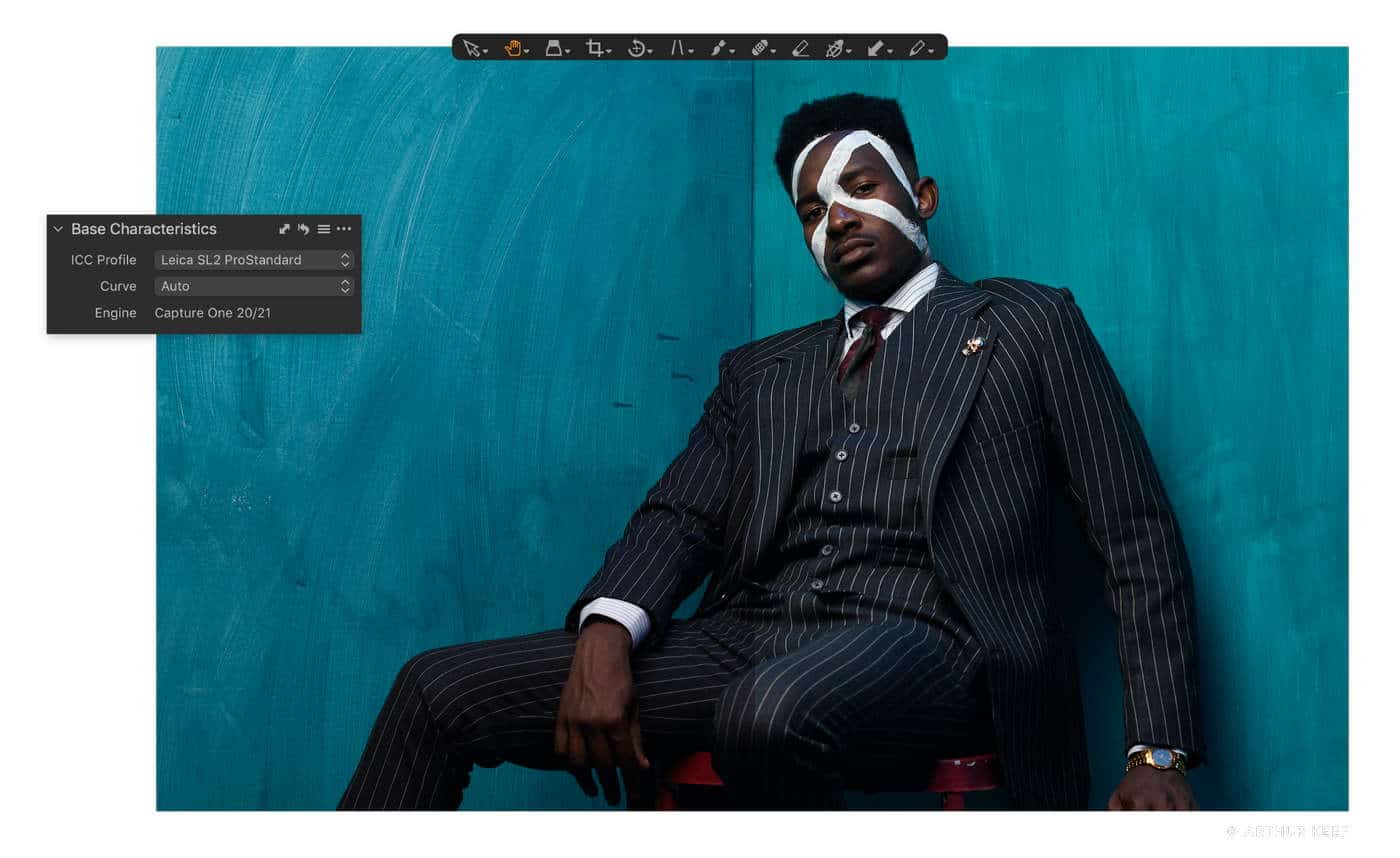
Through ProStandard Profiles, you may find that your color retention stays more consistent when adjusting images in Capture One 21. As you go from one hue to another, the color transition should also hold steady. Further, if you switch contrast gradients, the color preservation should be natural as you go from highlights to shadows.
Capture One recommends ProStandard Profiles especially for product and portrait photographers as well as those who work with neons, oranges, and saturated colors.
Want to select your ProStandard Profile right now? In the Base Characteristics tool, go to the ICC Profile and click the drop-down menu, then choose a new profile. You can then add a ProStandard camera profile. You can even make the profile your default going forward.
Here are the available ProStandard camera profiles in Capture One 21:
- Leica S3 and SL2
- Phase One IQ3 100MP and IQ4 150MP
- Canon 5D II, 5D III, 5D IV, 5DSR, R5, and R6
- Nikon D810, D850, Z6, and Z7
- Sony a7 III, a7R II, a7R III, a7R IV, a7C, a6000, and a6300
As Capture One 21 updates, more camera profiles will be added, says Capture One.
Leica Tethering
Another feature for Leica camera users is Leica tethering for the SL2 and S3 models. Although you can’t use Live-View in this feature, other tethering options are supported in Capture One 21.
Brush Adjusting
The last new feature as part of Capture One 21 is brush adjusting. Like the Speed Edits feature lets you make changes to your photo from your keyboard, so too does this one. Your modifier keys can select the flow, opacity, hardness, and size of your brushes in Capture One 21.
Also cool is how you can make the same changes with a computer pen, trackpad, or mouse if those are more convenient. To begin, you press the modifier key or the above peripherals and then click and drag.
On Windows, here’s how you adjust the brush settings:
- For flow settings, shift and right-click with vertical dragging
- For opacity settings, shift and right-click with horizontal dragging
- For hardness settings, press Alt and right-click with vertical dragging
- For size settings, press Alt and right-click with horizontal dragging
Mac users can use brush adjusting this way:
- For flow settings, press shift plus control plus options plus left-click with vertical dragging
- For opacity settings, press shift plus control plus options plus left-click with horizontal dragging
- For hardness settings, press control plus options plus left-click and vertical dragging
- For size settings, press control plus options plus left-click and horizontal dragging
Returning Features in Capture One 21
Nikon Profiles
Do you never embark on a photoshoot unless you have your trusty Nikon camera by your side? It turns out Capture One is as much of a Nikon lover as you are. In Capture One 21, one of the most talked-about new features is the Nikon Profiles.
These built-in profiles let you take your Nikon photo editing capabilities even further. The profiles, in this case, are like filters that take the colors utilized through your camera and then enhance them.
A whole host of Nikon cameras are supported. The full list is here and includes such names as the Nikon Z5, Z6, and Z7 as well as the Nikon D4, D3X, D810, D800E, D500, D200, D70, D40X, and D5200.
Lightroom Importer
Adobe Lightroom is one of the more popular image editors and catalog organizers around. It might have been the first photo editing software you started with simply because of name recognition alone. As time has gone on, you’ve become curious about other image editing software, but you feel too tied to Lightroom to make a switch.
There’s no need to stick to Lightroom only if you’d rather explore other avenues. Capture One 21 features a comprehensive Lightroom importer that makes transporting all your files and image libraries convenient and uncomplicated.
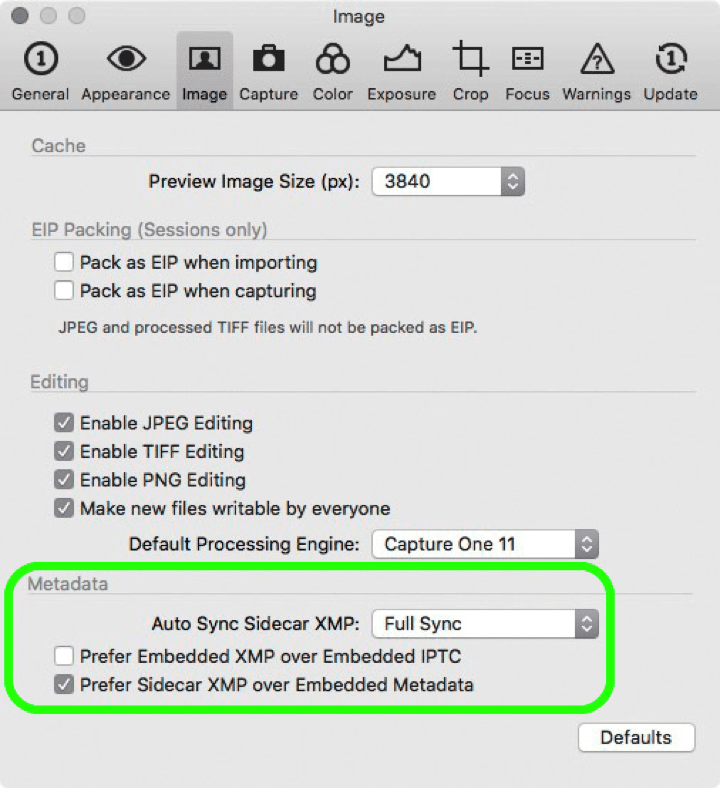
So how do you get started? In Capture One 21, click Import Catalogue, then Lightroom Catalogue. Do check the metadata settings before you confirm the import. You want to keep Sidecar XMP over embedded metadata and set the auto-sync Sidecar XMP settings to full sync, like so.
According to Capture One, your original Lightroom files remain unaltered even as Capture One 21 replicates the folder structures and image adjustments in its own software.
Before/After Tool
One such especially meaty feature of Capture One 21 is the Before/After Tool.
As photographers, we try on different edits to our photos like some people enjoy trying on clothes. Maybe with a bit more saturation, this photo would look better, or ooh, perhaps this preset would make the picture stand out more.
When you’re comparing the final result to the one you started with, you may rely on your memory of the original photo. If that doesn’t work, then you have to open an image viewer to see the original photo, lest you hit backspace in your photo editor and lose all your progress just to see the unedited image.
Not anymore. Capture One 21’s Before/After Tool lets you study the details of both the original unedited image and the photo you edited, and simultaneously at that. You can then compare the two edits side by side.
Take a look to see what I mean. On the left is my original, completely unaltered image of a bullfrog. On the right, I did some adjusting to the brightness, and what a difference.
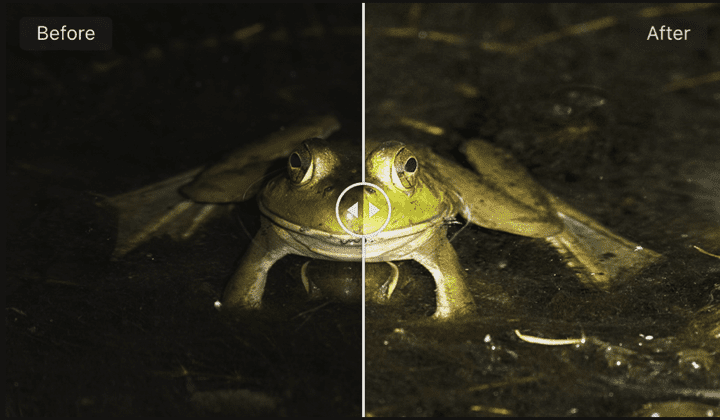
In this instance, it’s clear which image I’d choose between the two, and that’s the edited one. If you’re really stuck between two pictures though, a handy feature like the Before/After Tool makes it a lot easier to decide which edit you’re going to use.
By the way, like any good before and after, you can slide the bar in the middle of the Before/After Tool to reveal more of the before image or more of the after.
Clone Brush
A photo editing software worth its salt should have a means of cloning images, and Capture One 21 doesn’t disappoint. From the Cursor Tools section at the top, you can select the Clone Brush and get right to work replicating parts of your image.
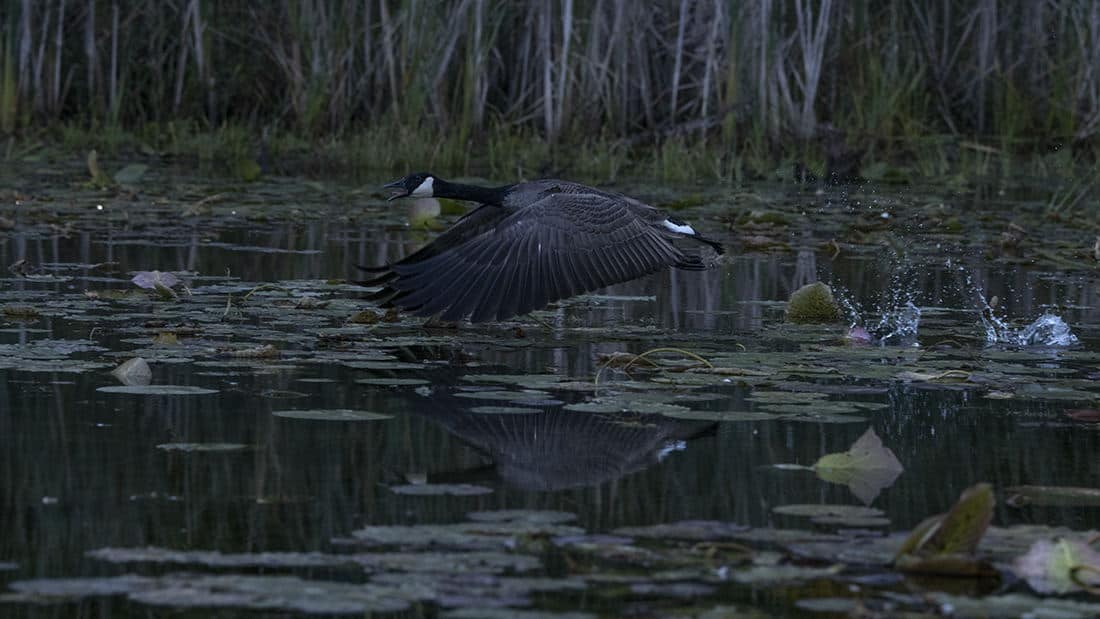
For this example, I decided to use my photo of a goose taking off over a body of water. Take a look here.
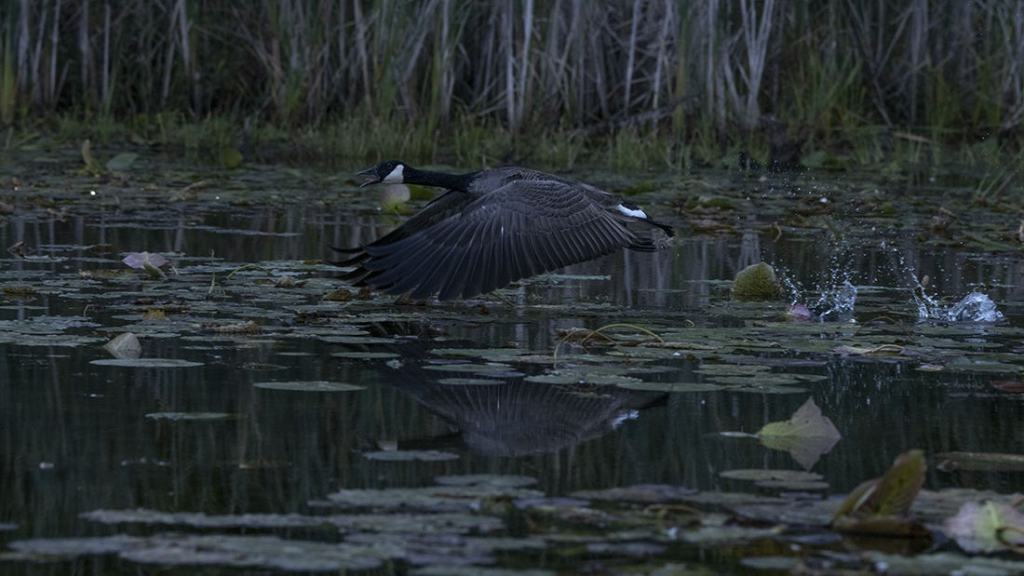
There’s just one goose now, but that’s about to no longer be the case.
To use the Clone Tool, you first have to define a source point by option-clicking. This is important, because where you option-click determines where the clone mask can go. By the way, option-click in this instance literally means you press your option button on your keyboard and then click a source point. This is the case for both Windows and Mac users.
Once you select your source point, you draw your clone mask in an area that you want to replicate the image in. Next, you rotate your source point to replace the part of the image you selected as your clone mask. Thus, I added a second bird to this photo.
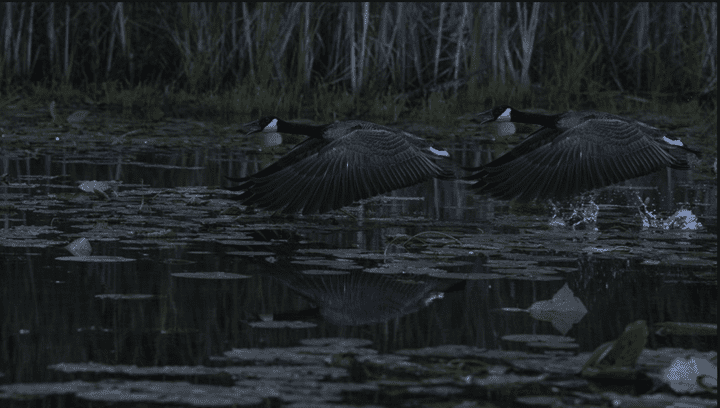
Sure, I’d have to go in and clone another goose reflection as well, but this edit shows you how this feature works just after a few minutes of playing around. The Clone Brush maybe could be a touch more intuitive, but I was impressed with the smoothness of the cloned results. It’s hard to tell I even edited the image, and that’s what you want out of any quality software.
Heal Brush
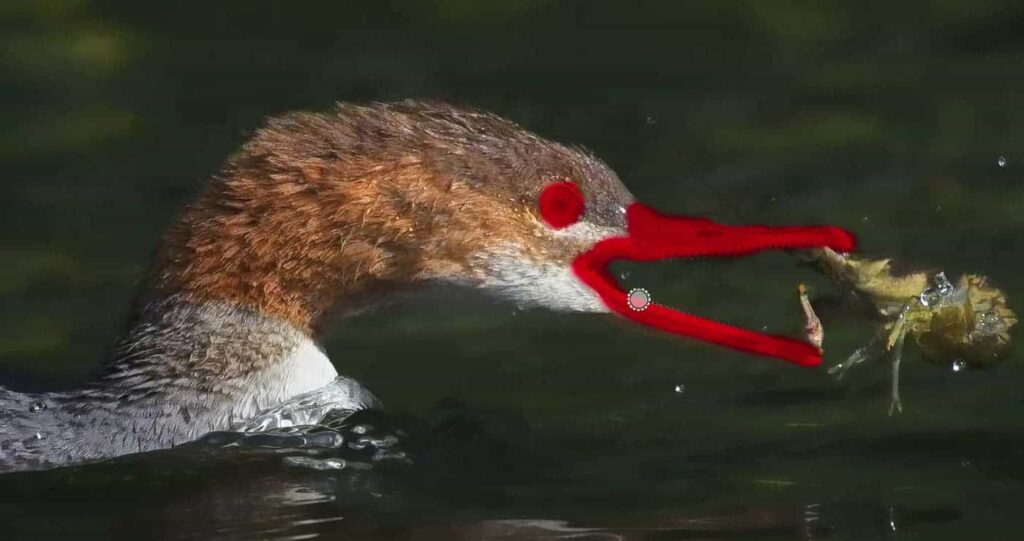
In the same vein as the Clone Brush is the Heal Brush, which you can use to treat blemishes in your image. To show you how the Heal Brush works, I’ll use an unedited photo of a mink that I took.
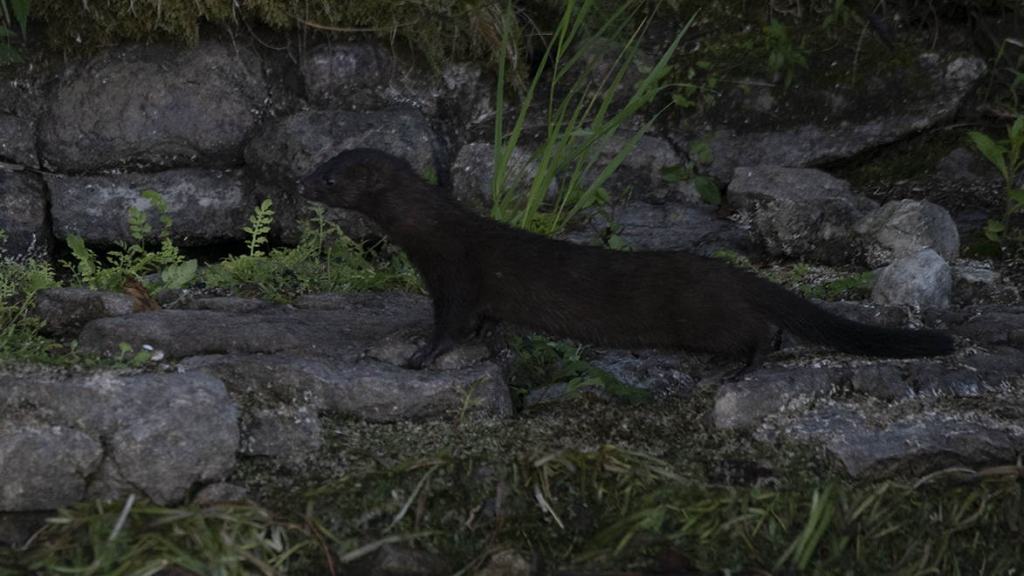
This is a good shot, but I’d like to remove the brown leaf on the left side of the mink on those rocks, as I think it takes away from the overall impact of the image. Using the Heal Brush, I can do that.
The Heal Brush is every bit as intuitive as you’d hope, making up for the lack of that with the Clone Brush. There are no source points to work with. You simply draw a heal mask and then rotate the cursor around to adjust your photo so the original obstruction is gone from your image. Then you end up with something like this.

No more leaf, and even better, you can’t tell that the leaf was ever there.
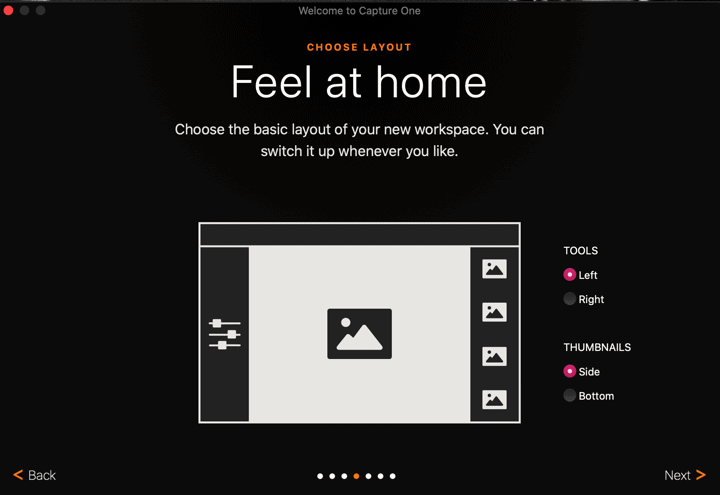
Layout Selection
From the first moment you open Capture One 21, the software wants you to, as they say, “feel at home.” You get to select the layout of your workspace, determining if your collection of tools will be on the left or the right and if your thumbnails will display on the bottom or the side.
You can also move tools once you’re in Capture One 21, putting them front and center, off to the left, the bottom right, or wherever is most useful to you when in your photo-editing flow. If you happen to find that certain tools don’t get that much play, then hide them.
A customizable layout is always handy. You’re not married to any one certain layout setting either. Even once Capture One 21 has long since been installed, you can swap toolbars and thumbnails until your new setup works for you.
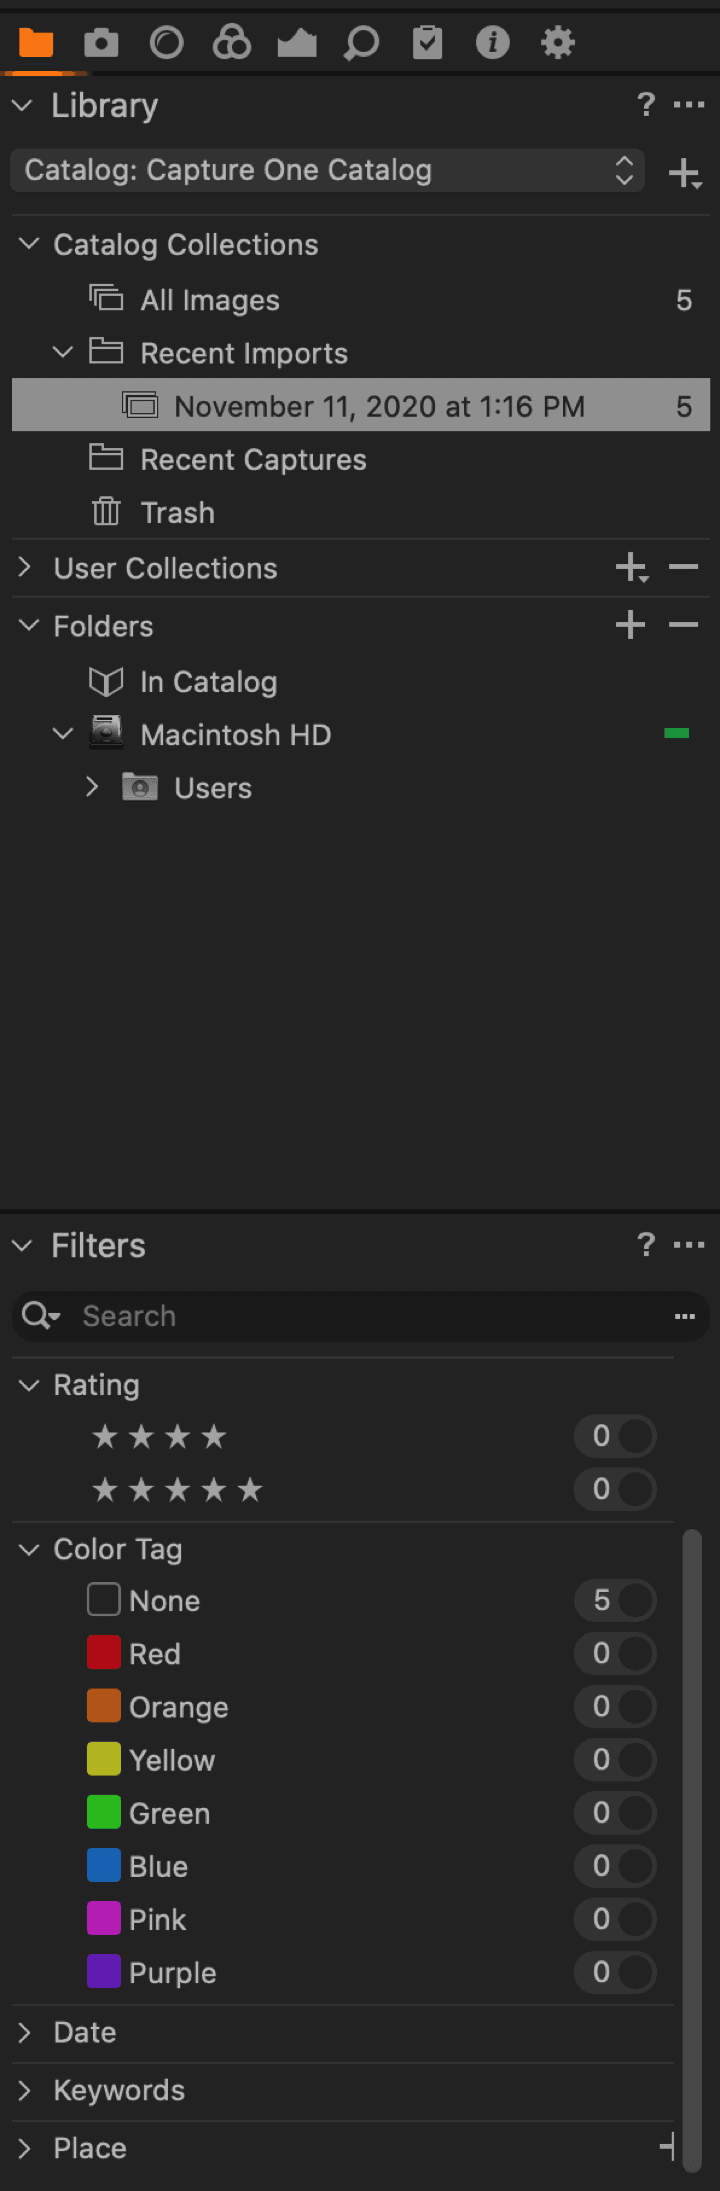
Color Tagging
Keeping your photos organized once you switch from Lightroom to Capture One 21 doesn’t have to be complicated. Right on the sidebar of the program (on the left or right as you chose during setup) is the option to tag your images by color.
You have eight color options to choose from, including purple, pink, blue, green, yellow, orange, and red. How you choose to organize your images is your choice. You might use one color per year or select a color based on images with that color in them. It’s your software, so do it your way.
Capture One 21 does keeps track of how many images are categorized in that tagged color so you can determine if your red color tag is getting a little too full of images and your orange tag could use some more.
By selecting any of the color tags, you can then search images within that tag. This makes it easy to find a particular image even if you do have a color category that’s getting a little bloated.

By the way, if you use Capture One 21 to rank your images, you can search ranked photos in much the same way. As the image above shows, Capture One 21 ranks photos on a one-star to five-star basis.
Luminosity Masking
Editing your masks, even if you have only selected portions of an image masked, is quite precise in Capture One 21. The Luminosity Masking feature allows you to adjust highlights, mid-tones, and shadows in just the masked area.
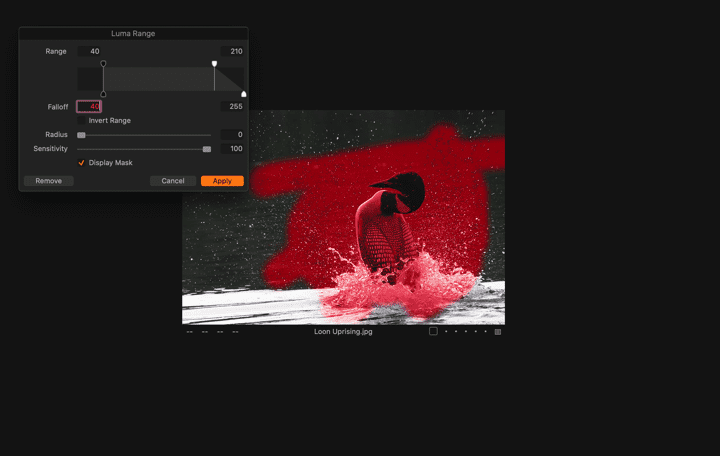
Above is a photo of the Luminosity Masking in action. Capture One 21 has a slew of masking tools, but this one is my favorite for sure.
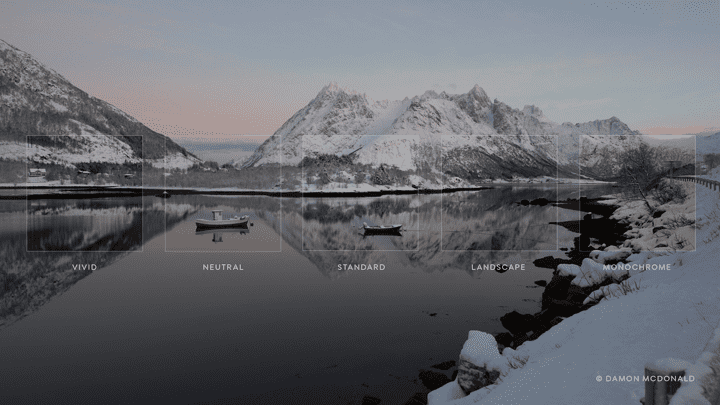
Styles and Presets
If you’re new to Capture One 21, this software admittedly does have a bit of a learning curve. Sure, you can find lots of handy video tutorials on the Capture One website, and the software itself has a tutorials section too, but what if you want to make quick, sweeping edits without learning the ins and outs of the software right this second?
The Styles and Presets feature will be your best friend. According to Capture One, its “leading photographers” created the Styles included with the software. You also get three Style Packs to start with when you buy Capture One 21.
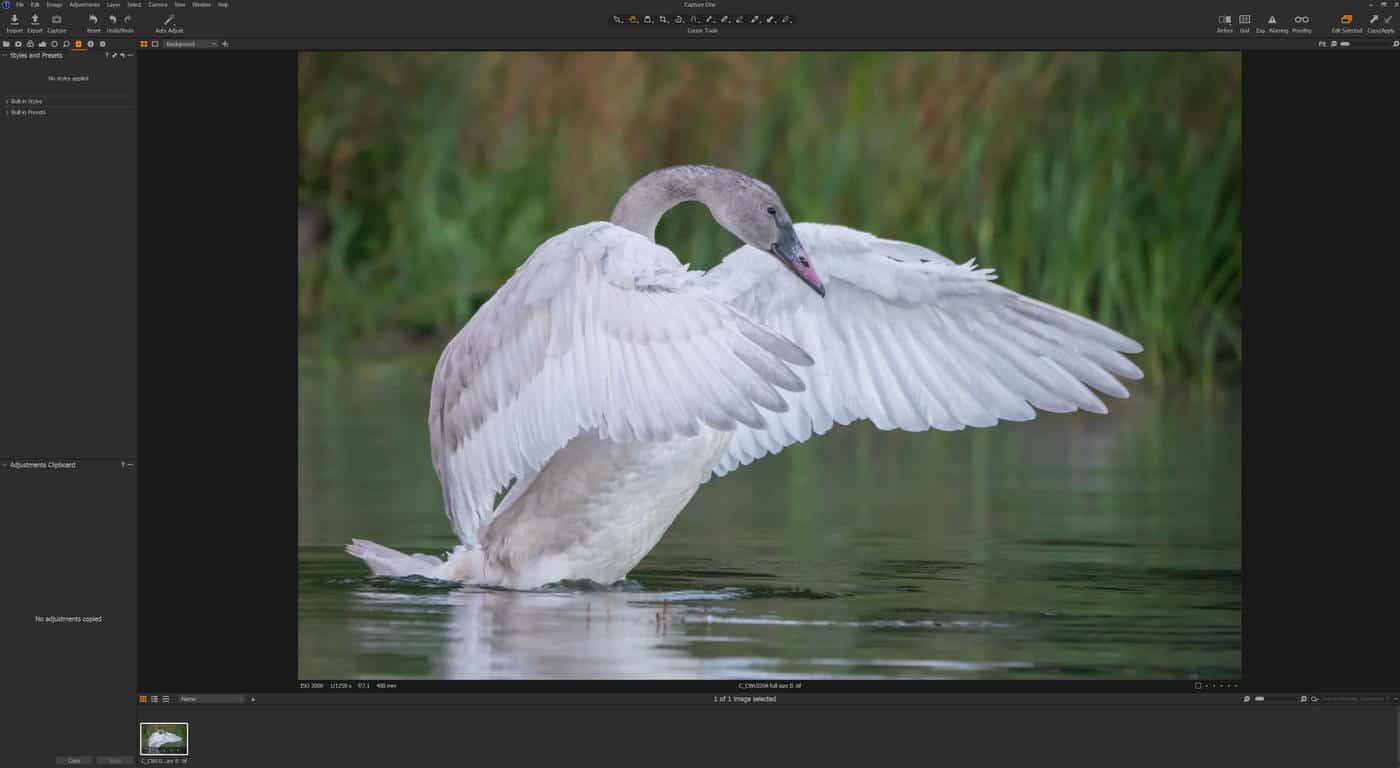
The Styles apply in one click, making editing your photos effortless. Here’s the before image of my swan on the water, which is unedited.
And here’s the image after I applied a style called Spring 02. It’s subtle but you can see that it warmed the image overall and gave a little more pop to the background colours. Best of all, if you don’t like the style you can click the undo and start over scrolling through the available styles to see what they do to your image and land on one you like.
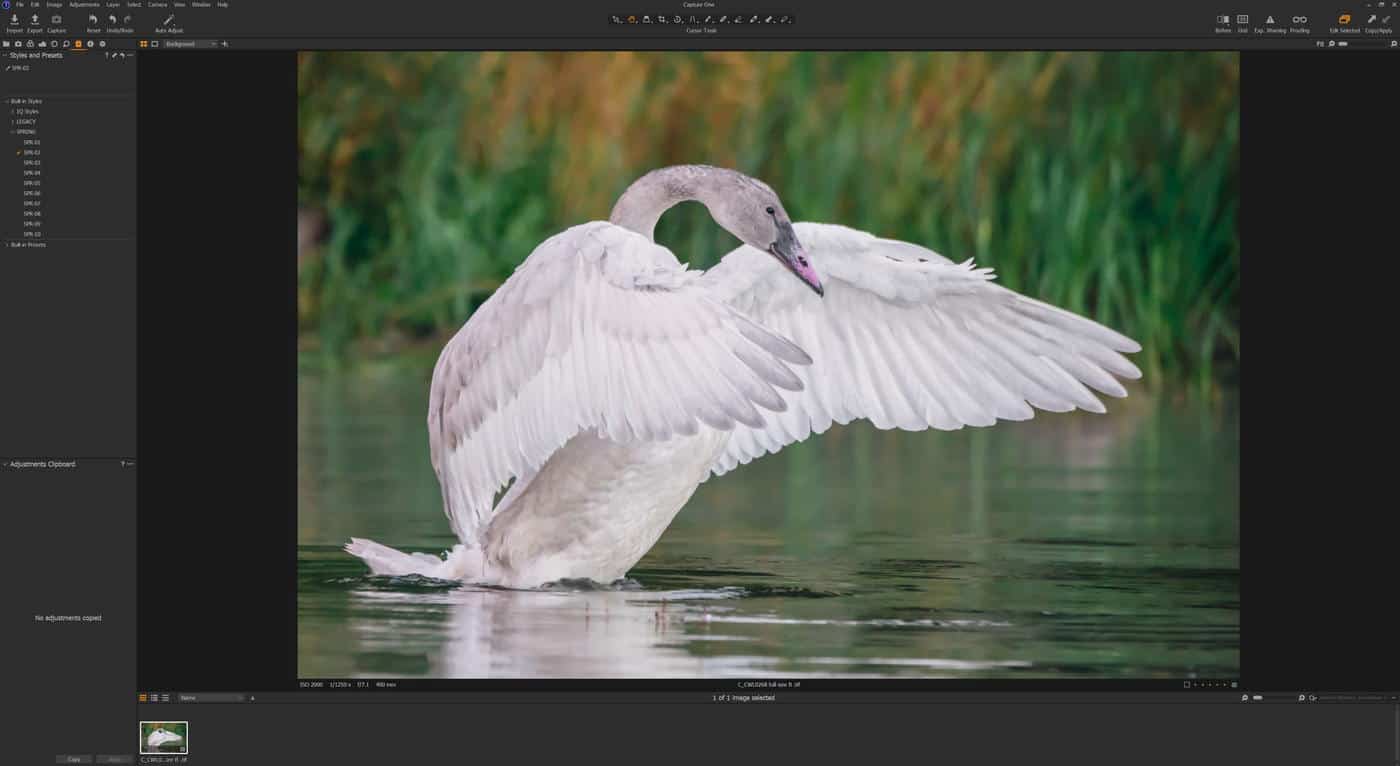
Pretty nice, huh?
Capture One even has a Styles store, where, for an additional fee, you can add dozens or even close to 150 new Styles to make editing your photos an even more encompassing experience. The Styles can admittedly be a bit expensive, but for quick edits, they’re worth considering.
Advanced Color Editor
The last feature I want to highlight in Capture One 21 is the Advanced Color Editor, which is an improved version of the Basic Color Editor (you do have the option to use both). Now you can define color ranges per each hue, setting the lightness, saturation, and the color itself. The spinning color wheel keeps editing colors and you can see the resulting image in real time. I warmed this image and took the saturation over the top for illustration purposes but it was meat to be able to see how the colour changed as I moved the wheels. This will come in very handy in my workflow where I have wildlife images where selectively adding a little vibrancy to one colour or another is warranted.
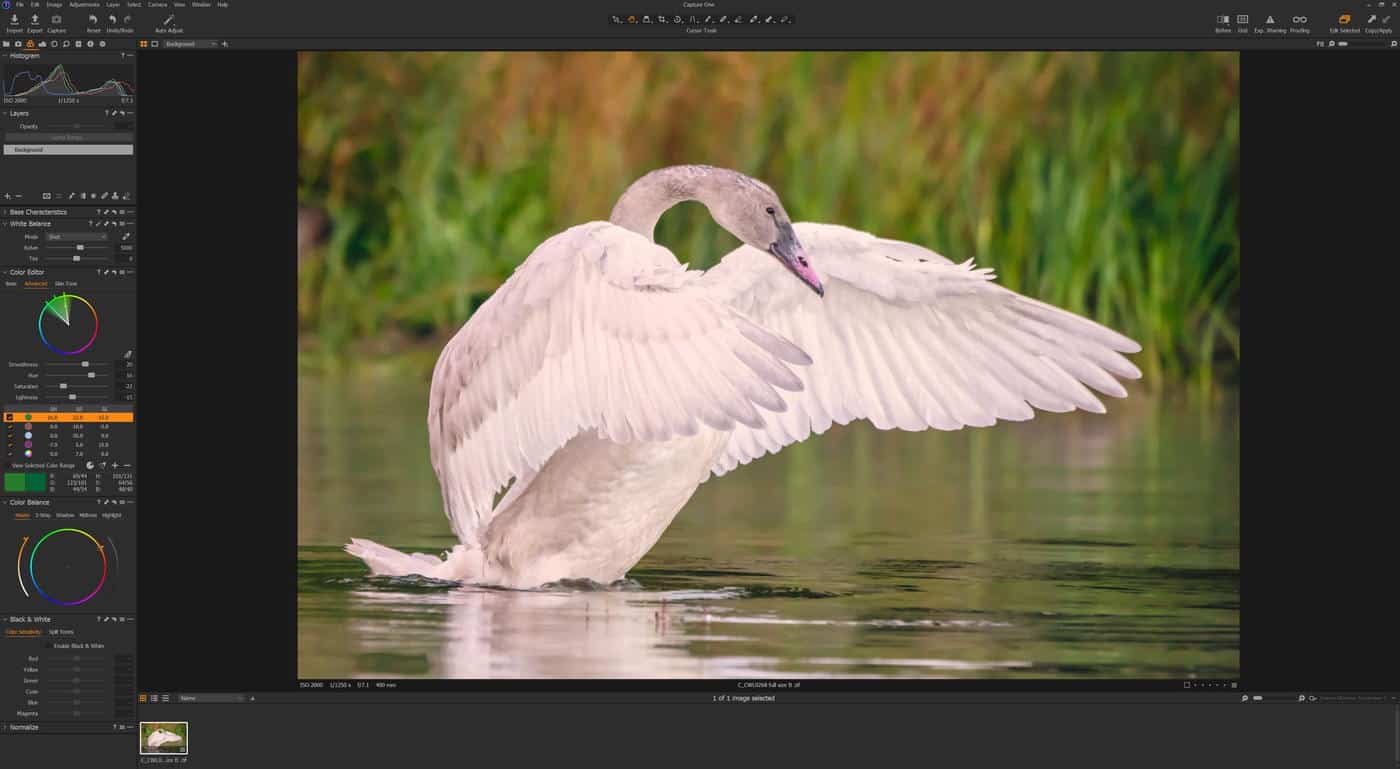
You can see here how I made the colors in my photo of a swan look clear, clean, and bright. The Advanced Color Editor’s color wheel makes for a smooth editing experience.
How Much Does Capture One 21 Cost?
Now that you’ve seen the assortment of features included in Capture One 21, I’m sure you’re wondering about the cost, right? Note all prices below are in USD.
If you’re already using Capture Pro 20, the upgrade cost to Capture One 21 is $159.
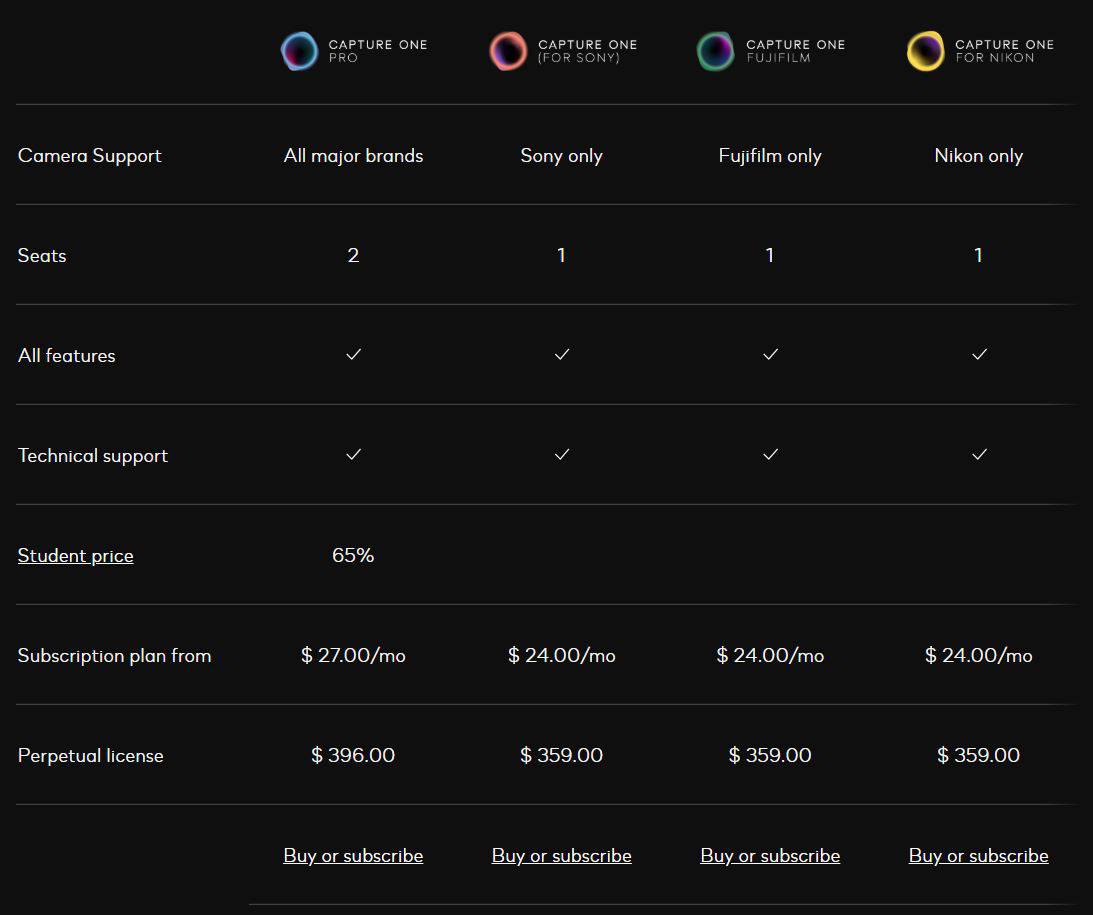
There are four different pricing plans for Capture One 20 Pro. Capture One Pro costs $396 for a perpetual license that supports all major brands or $27 a month if you subscribe. Students can shave 65 percent off the cost of Capture One Pro.
For the cost, you get technical support, every feature covered, three activations, and support for all major cameras.
If you’d rather buy a version of Capture One made for specific camera brands, that’s also possible. A perpetual license of Capture One for Sony, Fujifilm and Nikon costs $359, or you can subscribe and pay $24,00 a month. There is no student discount, but you do get the technical support, features, and activation for two users.
Before you buy any Capture One software, you can download and use Capture One 21 on a free trial basis. You do have to sign up an account through Capture One before you can start the trial and you will then be emailed a temporary license key that grants you access to the trial software.
Is Capture One 21 Pro Worth the Upgrade?
Okay, so you have all the information about Capture One 21, and now it’s decision time. Is this software the right pick for you? If you’re using something like Adobe Lightroom, should you switch to Capture One 21? What if you’re using an older version of Capture One software?
If you’re an Adobe Lightroom user, I’d say changing over to Capture One 21 is definitely something you want to consider. I think Capture One 21 has a lot of features and functionality that mimics and sometimes even eclipses Lightroom. Also, swapping from Lightroom to Capture One 21 is simple, fast, and efficient, and you don’t have to worry about anything happening to your original files in the process.
If you’re someone who uses another photo editing software and you’ve held off on trying Capture One 21, I can understand. You have a flow with how you work, so why change it? Well, mostly for Capture One 21’s new features.
Many, many of the features are made for those who are new to Capture One software. The Speed Edit and brush adjustment features lets you make pro-level edits with just a few keyboard presses. The Importer is more user-friendly than ever, and with tool tips and tutorials at your fingertips, you can fill in the gaps in your knowledge quickly and easily.
You also get cool bonuses like Leica camera tethering, HEIF file support, and the new Dehaze tool.
Conclusion
Capture One 21 is the latest in a long line of Capture One photo editing software. The new features include brush adjustments, Dehaze, Speed Edit, Pro Standard camera profiles, and a slew of beginner features for acclimating to the software. Adding to that all the classic Capture One features that have made a return, including Advanced Color Editor and lots of Styles and Presets, and you get a solid photo editor in Capture One 21.
Editing your images with precision and control is all possible with Capture One 21. It’s a little pricier than some other photo editors but I think you just might find it’s worth it once you give it a try. Try Capture today through their free 30 day full functioning trial so you decide for yourself if this is the right photo editor for you. If you decide to purchase any of the Capture One products remember to apply coupon code WILD10 to receive a 10% discount on your purchase.