Topaz Photo AI Super Focus Review
Topaz Photo AI Super Focus: Can AI Fix Out of Focus Photo’s?
In the ever-evolving world of digital photography and image enhancement, Topaz Photo AI stands out as a powerful tool for refining image quality. One of its features, Super Focus, is in early days and an evolving bit of software but it promises to provide photographers with the capability to fix a blurry out of focus image. Understanding how to effectively use the three sharpen strengths (Low, Medium, and High) and the three focus boost modes (None, Minor, and Major) is key to achieving the best results.
This blog post will explore these three sharpening and focus boost options in detail, providing guidance on when to use each setting and how they can enhance your images.
If you find articles like this one helpful, please consider using my affiliate link for Topaz Labs Photo AI 3 when you make a purchase. It provides a small commission to support my site at no additional cost to you.
FREE TRIAL
To help you decide if Topaz Photo AI is going to meet your needs I would recommend you try before you buy. Topaz Labs offers a free 30-day trial of their software.
Topaz Photo AI 3 offers a free 30-day trial
Understanding Topaz Photo AI Super Focus
What is Topaz AI Super Focus?
Topaz Super Focus is designed to sharpen images intelligently by analyzing textures, edges, and fine details. Unlike traditional sharpening techniques that apply uniform contrast enhancement, Topaz Photo AI uses AI-driven technology to selectively improve focus, minimizing noise and artifacts.
When working with Super Focus, users can adjust two primary settings:
- Sharpen Strength (Low, Medium, High) – Determines how aggressively the sharpening effect is applied.
- Focus Boost (None, Minor, Major) – Provides additional enhancement for recovering out-of-focus areas.
By balancing these settings, users can restore clarity without over-processing the image in many use cases.
Does Topaz Super Focus Actually Work?
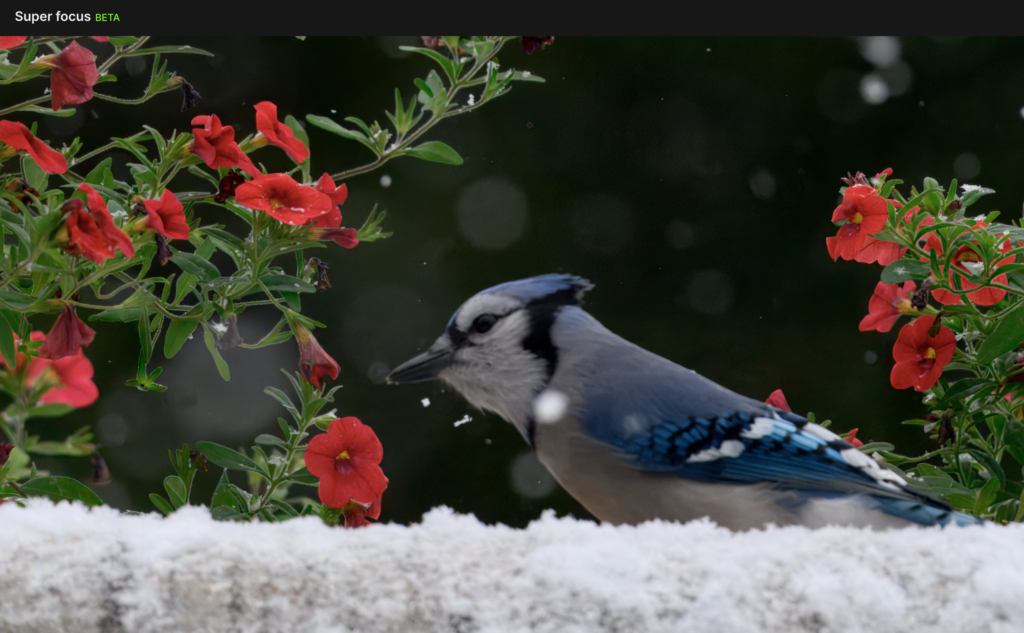
Below is the original full scale version of a Blue Jay image that as you will see when zoomed in is very soft and out of focus.
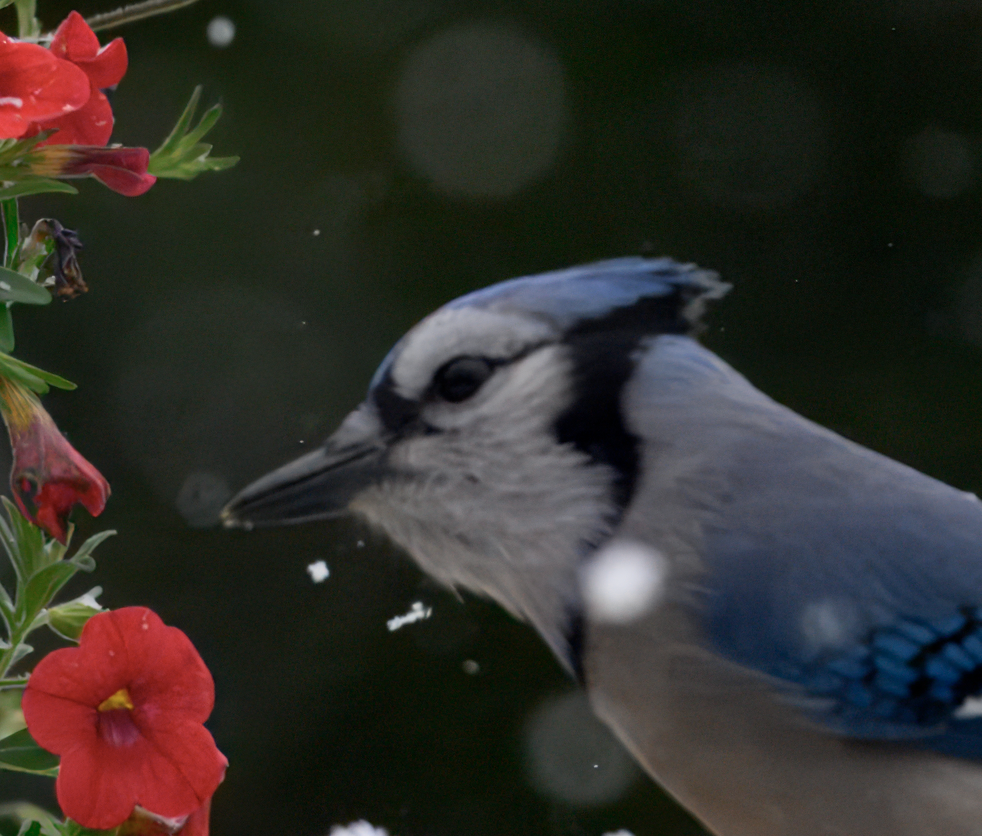
This is a zoomed in version of the same Blue Jay image and you can see just how horribly out of focus it is. I think we can agree this is an image that we would all delete.
Below is that same Blue Jay image after running it through Topaz Super Focus using the Sharpen setting on Low and the Focus Boost on minor.
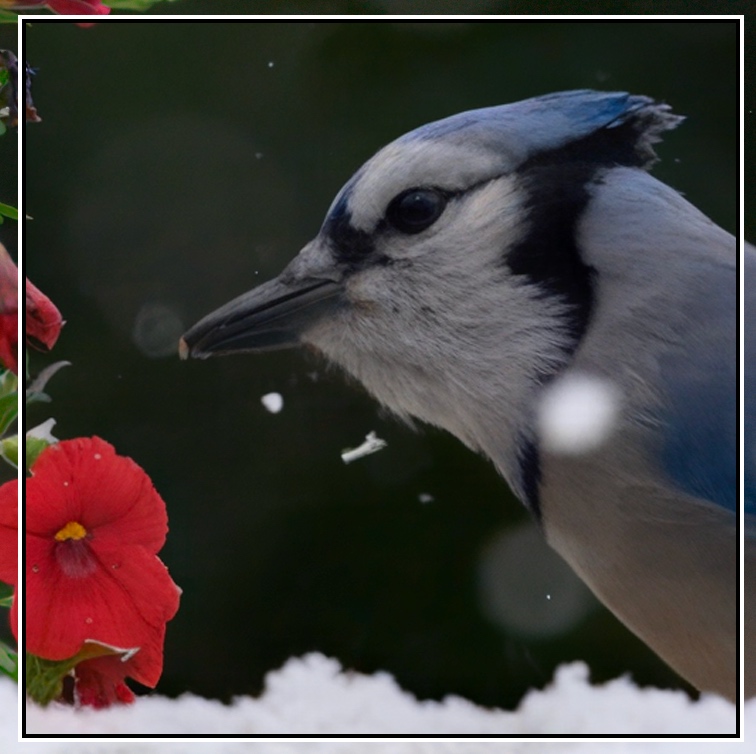
To be clear, I am a strong advocate of getting the image right in camera without the need for such tools. Does this newly super focused image have what it takes to make its into my portfolio, NO, however it sure did a good job bringing back the focus from what was an automatic delete in the culling process. Having said that, if I have one of those killer shots that is slightly out of focus before I send it to the trash bin I will absolutely be running it through Topaz Super Focus to see if the resulting image is a winner.
The Three Sharpen Strength Levels: When to Use Each
Sharpen Strength dictates how much detail enhancement is applied to an image. Choosing the correct strength depends on factors such as image resolution, degree of blurriness, and intended output (e.g., web, print, or large-format viewing).
1. Low Sharpen Strength
Best for:
- Slightly soft images
- High-quality images with minor focus issues
- Portraits (to avoid over-sharpening feathers and fur)
- Reducing subtle lens softness
When to Use: Low Sharpen Strength is ideal when an image already has decent clarity but could benefit from a subtle enhancement. It works particularly well for close up wildlife portrait photography, where excessive sharpening can make fur and feathers looked overly baked and crispy which we do not want. If your image has only minor softness due to lens aberrations or slight camera shake, this level provides a gentle improvement without making the image appear artificial.
2. Medium Sharpen Strength
Best for:
- Images with moderate blur
- Environmental photo’s where the environment is more prominent than the subject
- Macro shots with slightly soft details
- Restoring details in compressed or lower-resolution images
When to Use: Medium Sharpen Strength is a balanced setting that provides noticeable sharpening without being too aggressive. If you have an image that is somewhat soft but not completely out of focus, this setting will help restore natural details while keeping noise levels under control. It is particularly useful for landscapes, where fine details in foliage, rocks, or trees need to be enhanced without looking unnatural.
3. High Sharpen Strength
Best for:
- Images with significant blur
- Wildlife action shots with motion blur
- Low-light or high ISO images needing detail recovery
- Photographs with loss of sharpness
When to Use: High Sharpen Strength is designed for images that suffer from pronounced blur or loss of detail. It is useful when dealing with motion blur, particularly in fast-paced wildlife photography. However, this setting should be used with caution—if applied to an already sharp image, it can introduce haloing and artifacts.
Focus Boost Modes: Understanding None, Minor, and Major
The Focus Boost option in Super Focus goes beyond basic sharpening. It enhances the perceived depth and clarity of an image, specifically targeting areas that appear slightly out of focus.
1. Focus Boost: None
Best for:
- Images that are already in good focus
- Applying only basic sharpening without focus correction
- Preventing unnecessary artifacts in detailed areas
When to Use: If an image is already well-focused but just needs a bit of sharpening, it is best to leave Focus Boost off. This prevents over-processing and helps retain a natural look.
2. Focus Boost: Minor
Best for:
- Images with slight focus issues
- Macro or close-up photography where edges need enhancement
- Soft focus portraits where subtle sharpening is needed
When to Use: Minor Focus Boost is useful when an image has mild out-of-focus areas, particularly in macro photography where details like petals, insects, or textures need enhancement. It also works well in bird and animal portraits, where subtle focus correction can improve the subject’s eyes while keeping the overall look soft and natural.
3. Focus Boost: Major
Best for:
- Heavily blurred images
- Restoring extreme motion blur or missed focus shots
- High-detail shots where focus recovery is crucial
When to Use: Major Focus Boost is an aggressive setting meant for salvaging images that are noticeably out of focus. It can be a lifesaver when dealing with accidental soft-focus shots or high-motion images where fine details need restoration. However, it should be used carefully, as excessive boosting can introduce artifacts or unnatural textures.
Combining Sharpen Strength and Focus Boost for Optimal Results
There is a trial and error component to using Topaz Photo AI Super Focus. I have provided a table below that will help you to decide which combination of sharpen and focus boost to use for varying situations.

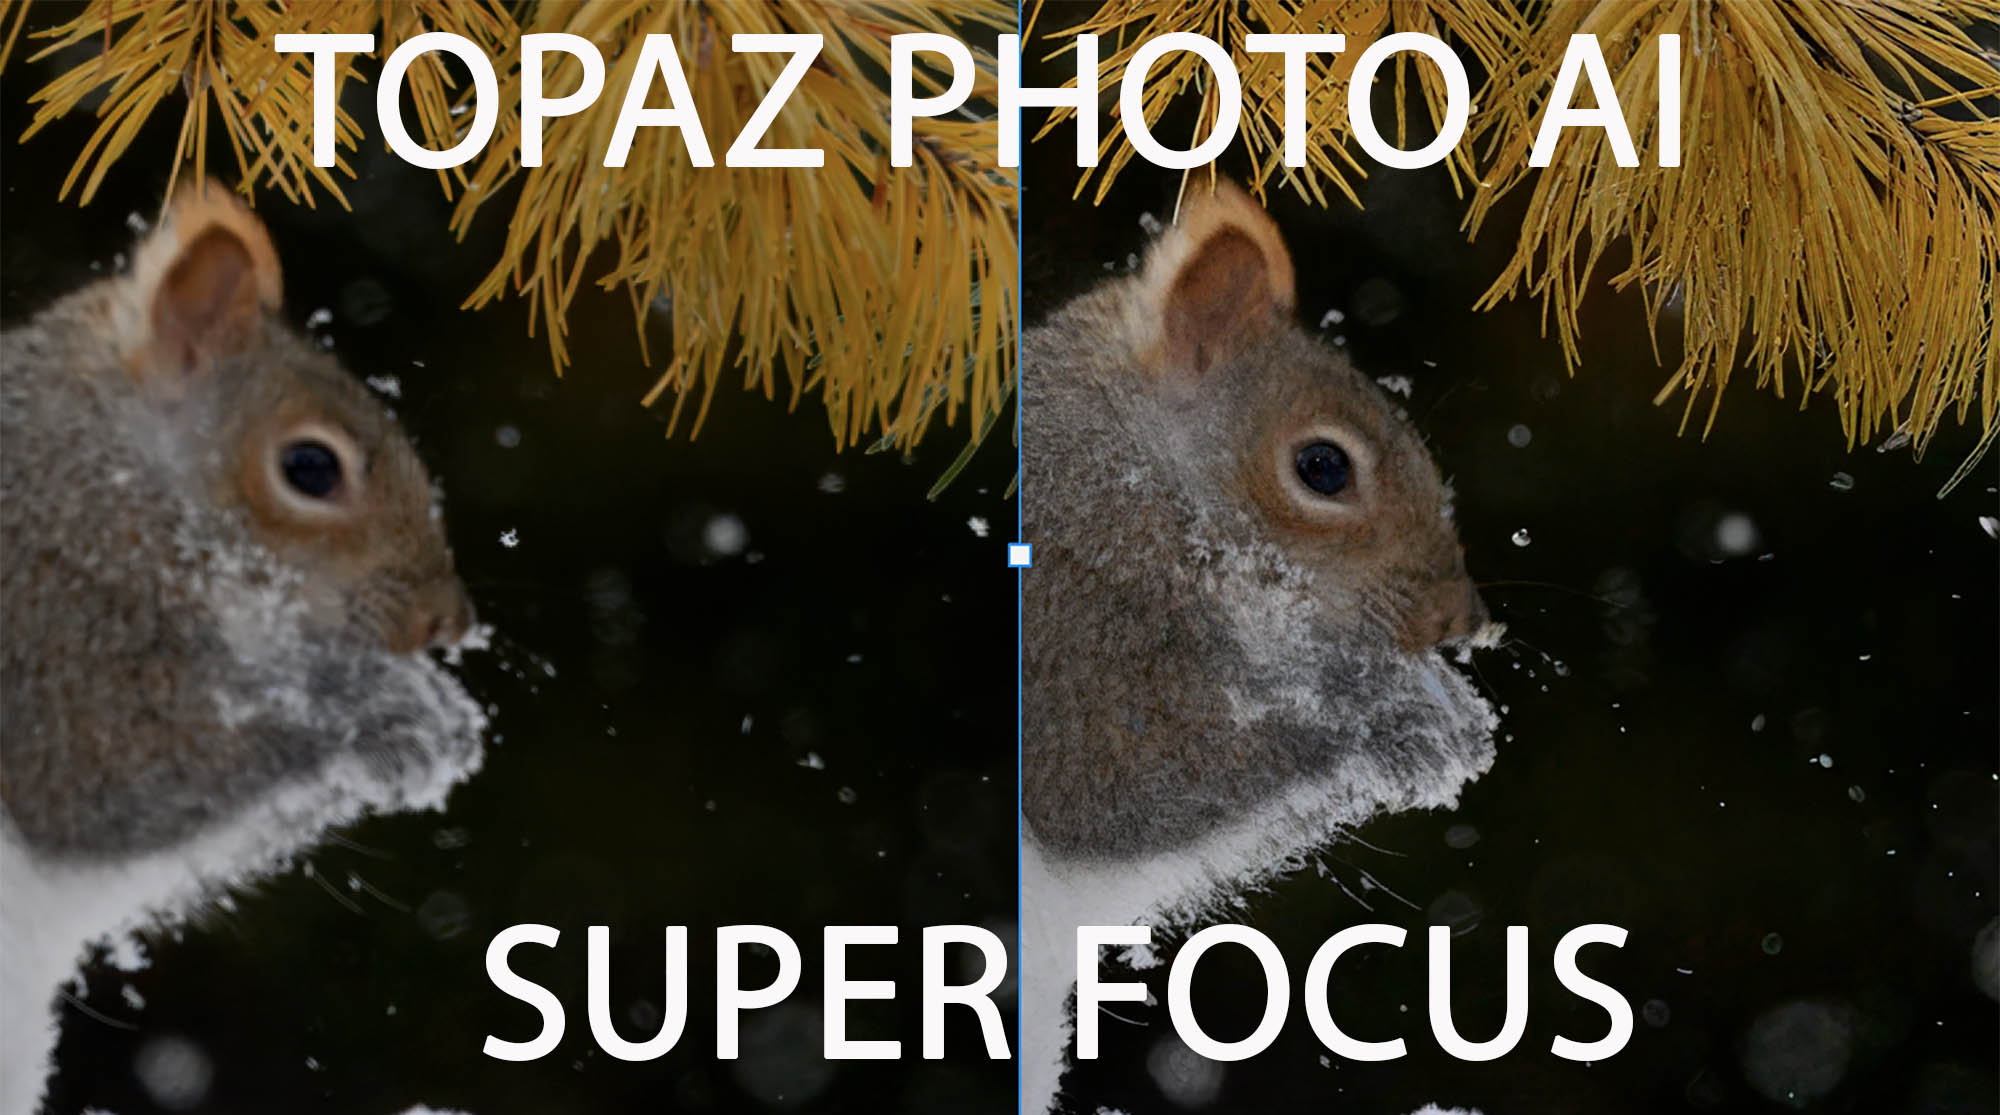
I always start with the lowest settings for both sharpen strength and focus boost. With this photo of a grey squirrel the lowest and middle settings placed emphasis on the tail only and would not bring focus or sharpening to the face. It was not until I used the combination of Sharpen High and Focus Boost Major that the face began to come into focus.
ix Out of focus photoThe resulting image however is way too baked and still not in focus.

Just know that in some cases no matter which combination you use Super Focus will not produce the result you are looking for but it is sure worth a try before you delete an otherwise great photo.
To maximize the effectiveness of Topaz Photo AI Super Focus, you should strategically combine the sharpen strength and focus boost settings. Here are a few recommended pairings:
| Sharpen Strength | Focus Boost | Ideal Use Case |
|---|---|---|
| Low | None | Minor adjustments, already sharp images |
| Low | Minor | Portraits needing subtle enhancements |
| Medium | None | General sharpening for landscapes and details |
| Medium | Minor | Slightly blurry images that need moderate recovery |
| Medium | Major | Mid-level focus correction for soft images |
| High | None | Extreme sharpening where focus is not a major issue |
| High | Minor | High-detail shots with some out-of-focus elements |
| High | Major | Restoring heavily blurred or motion-affected images |
By understanding these settings, you can tailor the sharpening process to each image, ensuring that you get the best possible results without introducing unwanted artifacts.
Conclusion: Mastering Super Focus for Sharper, More Defined Images
Topaz Labs Photo AI’s Super Focus feature is early days and still learning but it has the potential to change how we look at slightly out of focus photo’s. By intelligently combining Sharpen Strength (Low, Medium, High) and Focus Boost (None, Minor, Major), photographers can refine images that would have otherwise been deleted. The key to using these tools effectively is understanding when to apply each setting based on the level of sharpness or blur in an image.
For wildlife photographers placing a heavy emphasis on how sharp the eye of the subject is, Topaz Photo AI Super Focus is worth building into your workflow. It just might recover a photo you love but where motion blur or camera shake rendered it out of focus.
Happy editing!