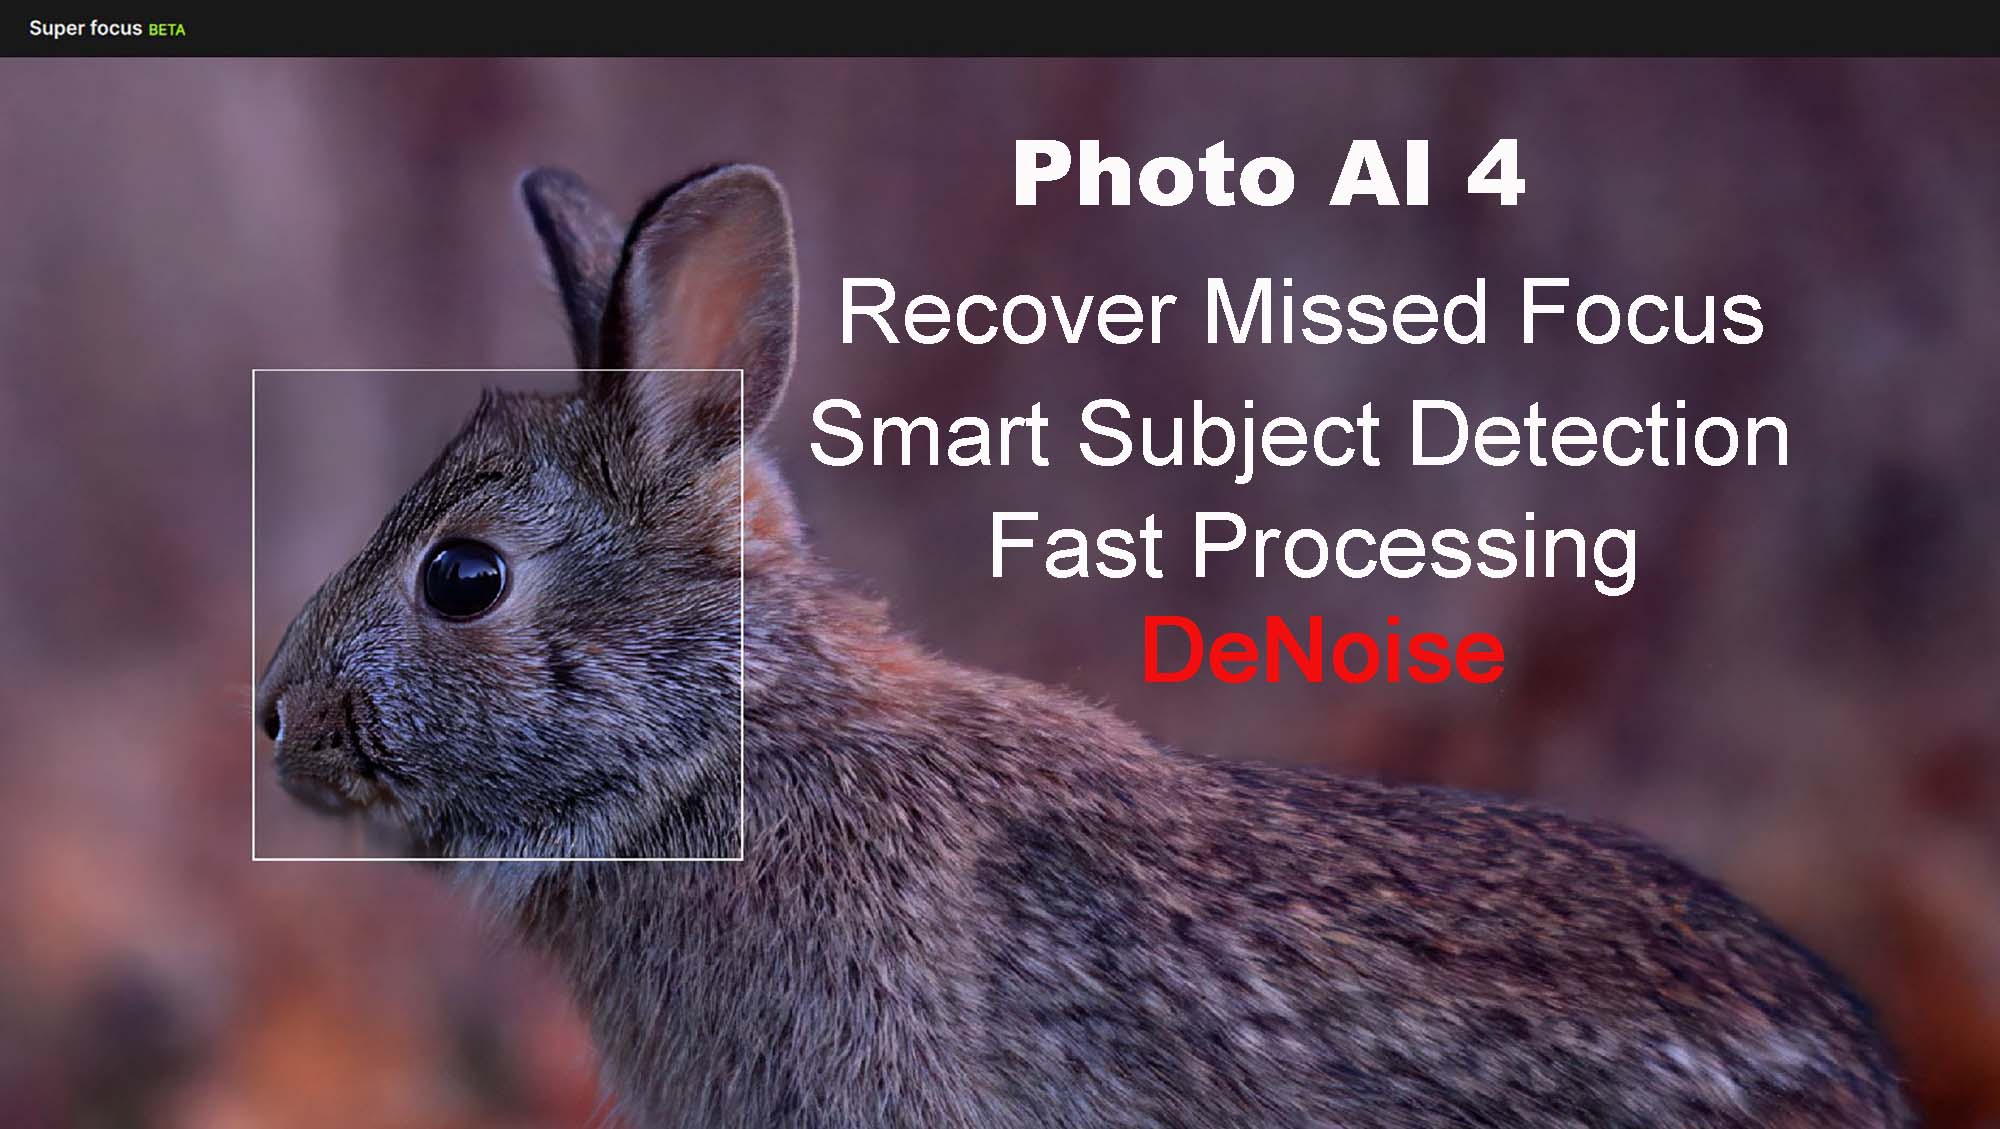
Topaz Photo AI 4 is an “all-in-one” image enhancer that denoises RAW files, corrects blur/missed focus, sharpens detail, upscales and balances lighting and color. Version 4 adds new/updated AI models and usability improvements aimed at faster, cleaner results—especially on problem files. Headliners include a Dust & Scratch model, Super Focus v2, and Face Recovery Gen2 (mostly for people, but the tech improvement transfers to wildlife).
Why Use Topaz Photo AI 4?
Wildlife doesn’t pose, and it rarely waits. You get what you get—high ISO, missed focus, heat shimmer, and subject movement. Topaz Photo AI 4 is built to salvage and polish those files. I’m going to be blunt: if you regularly shoot birds at dawn or mammals at dusk, Photo AI 4 earns a spot in your workflow.
If you find articles like this one helpful, please consider using my affiliate link for Topaz Labs Photo AI 4 when you make a purchase. It provides a small commission to support my site at no additional cost to you.
FREE TRIAL
To help you decide if Topaz Photo AI is going to meet your needs I would recommend you try before you buy. Topaz Labs offers a free 30-day trial of their software.
High-ISO shooters Push the limits of your camera’s ISO and squeeze more detail from noisy RAW photo’s with less plastic “smear.”
Long-lens birders: Super Focus v2 helps when AF barely missed the eye or motion blur crept in.
Action & distant subjects (shorebirds, raptors, whales): Subtle sharpening without haloes is the difference between keeper and cull.
Archivists & hide shooters: The new Dust & Scratch model plus an in-app healing brush accelerates scanned slide cleanup.
Batch processors: The revamped Autopilot and improved controls reduce fiddling when processing large sets.
If you only ever shoot at base ISO with perfect focus, fine—you don’t “need” it. The rest of us do.
How Photo AI 4 Enhances Wildlife Photos
RAW Denoise first – preserves feather/fur micro-detail while killing chroma and luminance noise. It can output a DNG for finishing in Lightroom/ACR/Photoshop.
Super Focus v2 – aims to provide a stronger, more natural de-blur model that brings back fine texture (plumage, whiskers, fur) without crunchy edges but still requires refinement.
Sharpen – finish tightening edges after focus recovery. New simplified controls make it harder to overcook.
Adjust Lighting / Balance Color – quick global corrections to unify exposures from variable field light.
Remove Objects / Heal – clean sensor spots, branches crossing the beak, or blind supports.
Upscale (up to 16×) – when you had to crop hard on a distant subject, upscale for print without mush.
Pros and Cons
Pros
Cons
Excels at high ISO noise reduction with sliders for micro adjustments
Super Focus v2 has a tendency to be too heavy handed
Does an excellent job upscaling images for print up to 16X
Super Focus is in Beta so I expect it will get more refined over time
Sharpening models provide excellent results with sliders for micro adjustments
Color and lighting corrections are accurate
One touch autopilot works well on most images out of the gate. Sliders allow for micro adjustments
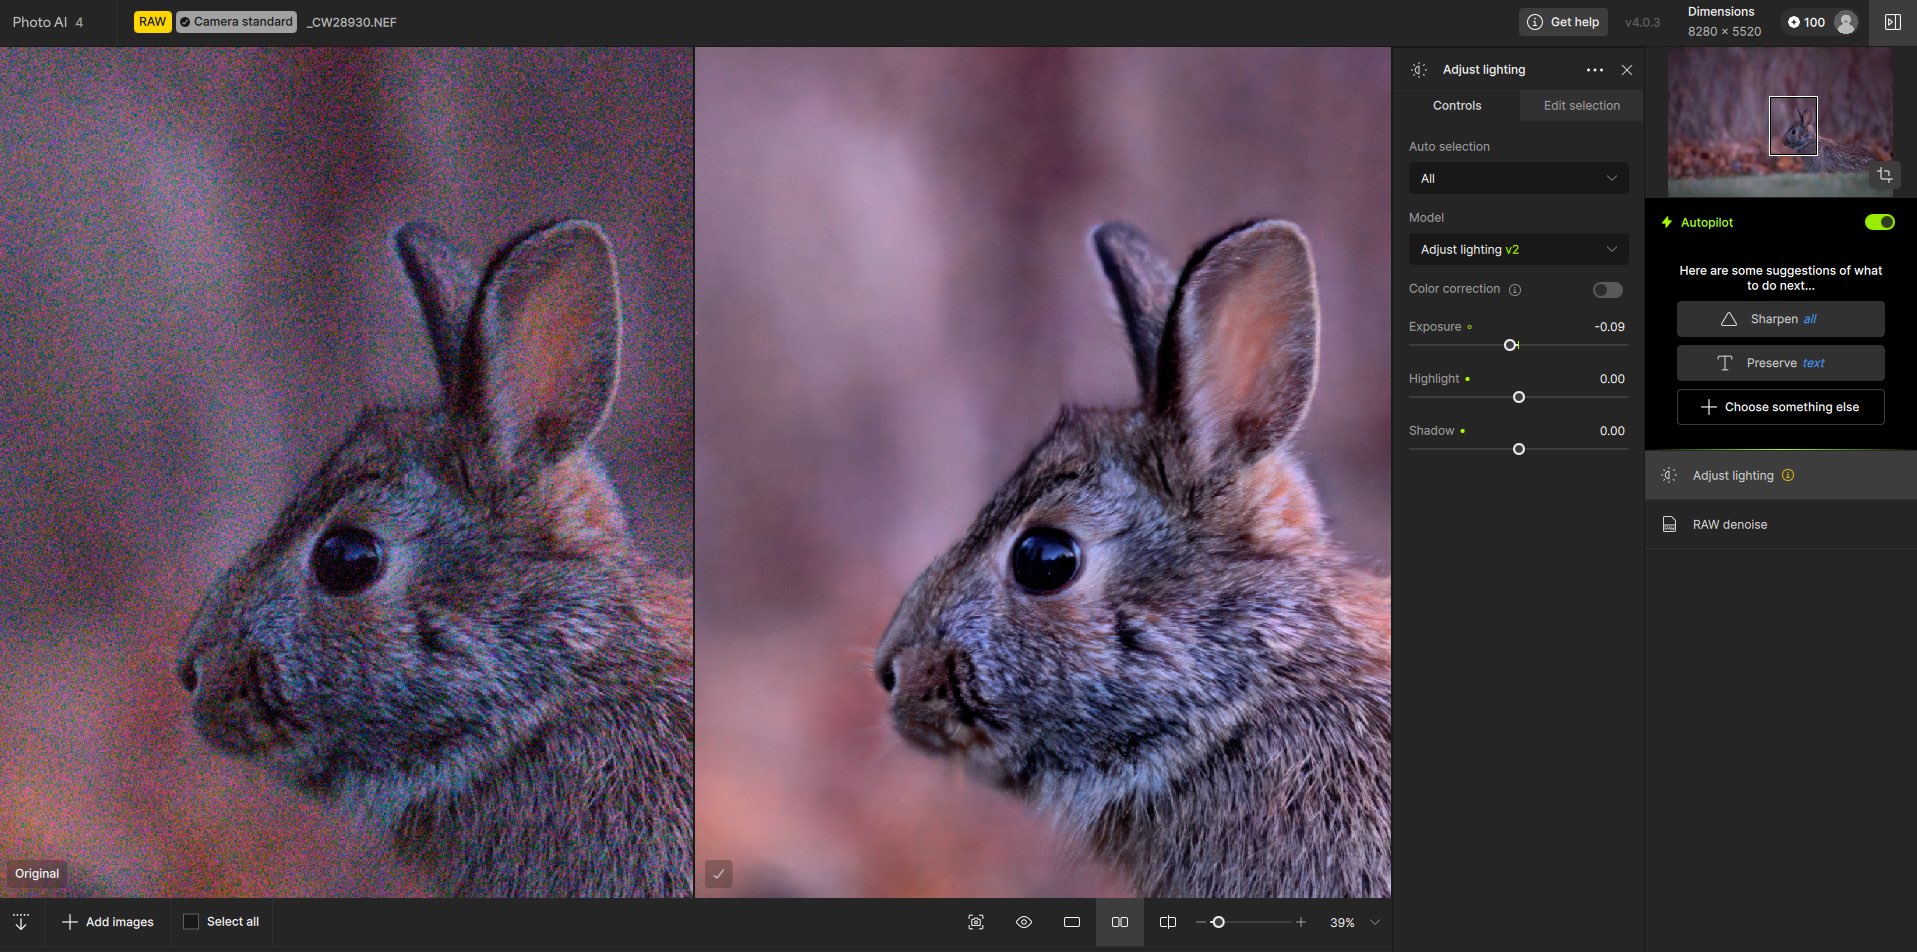
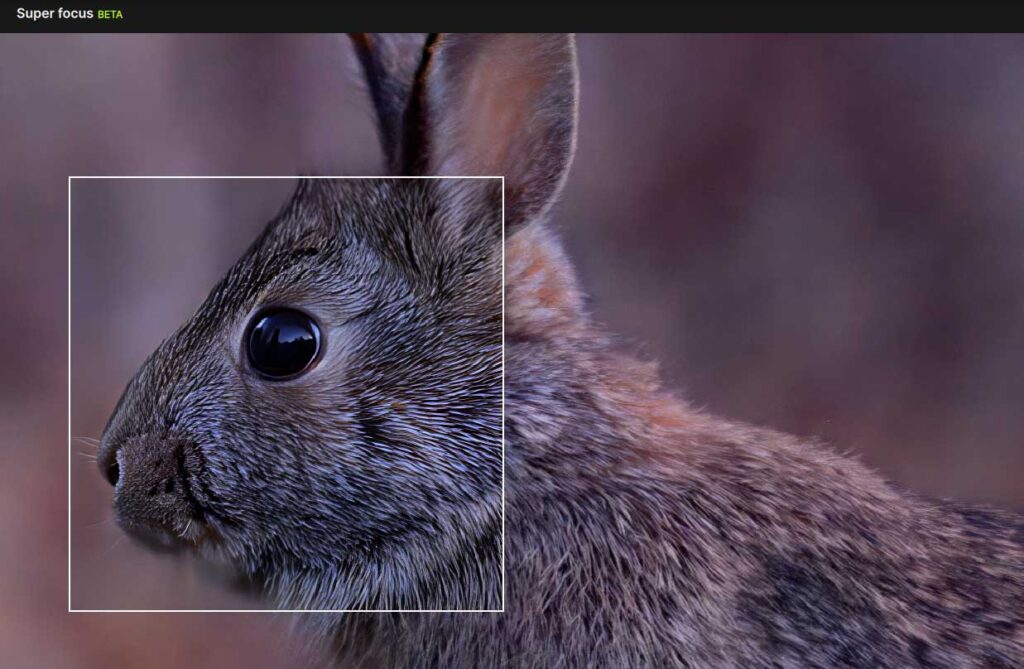
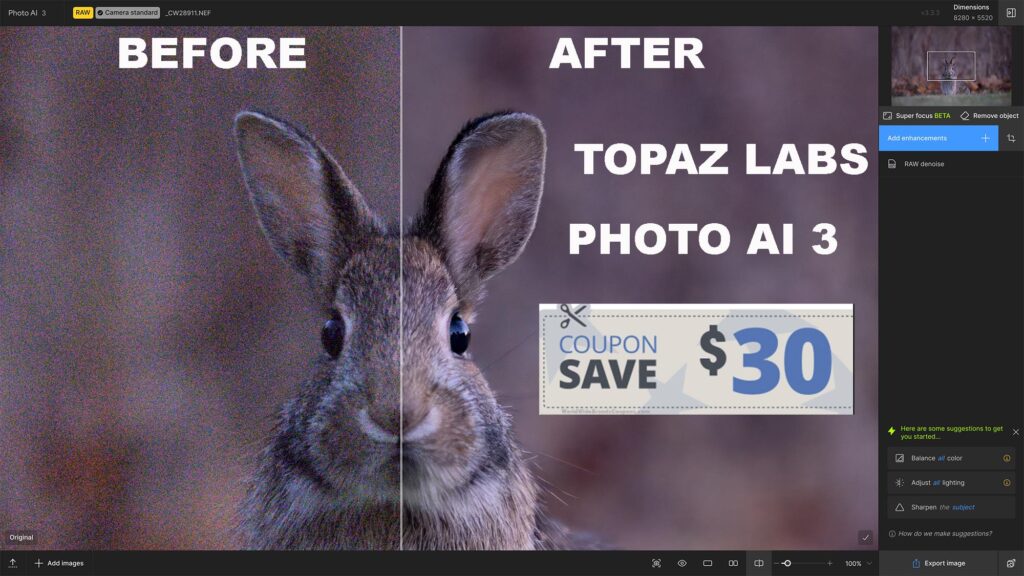
Super Focus V2
Below is an example of how Super Focus V2 rendered this image of a rabbit. With the slider zeroed out and the minimum setting of none selected there is no additional method of reducing the focus adjustments.
It definitely provides additional focus but as you can see from the image below, the selection under the white square is significantly over baked.
What’s New in Photo AI 4 (vs 3)
Dust & Scratch AI + Healing Brush – automatic dust/scratch removal with a quick, integrated touch-up brush. Runs locally or via optional cloud render. Note: local processing needs 8 GB VRAM; Intel Macs require cloud for now.
Super Focus v2 – improved recovery of missed focus/motion blur; crisper detail with fewer artifacts. (Beta version needs refinement)
Face Recovery Gen2 – not for wildlife, but indicates stronger detail reconstruction tech across the app.
Simplified Denoise/Sharpen controls – cleaner stacking and fewer artifact traps.
Cloud processing toggle & personalization – choose local vs cloud where available; user control improvements landed in version 4.0.1.
Ongoing fixes – e.g., RTX 50-series artifact fix in 4.0.2; Capture One round-trip fix in 4.0.3.
Photo AI 3 vs Photo AI 4 – Feature Comparison
Feature
Photo AI 3
Photo AI 4
RAW Denoise
✅
✅
Standard Sharpen
✅
✅
Super Focus v2 (enhanced de-blur)
❌
✅
Dust & Scratch AI + Healing
❌
✅
Face Recovery (v1 → Gen2)
✅ (Gen1)
✅ (Gen2)
Autopilot (revamped UI & intelligent selection)
✅ (basic)
✅ (improved)
Adjust Lighting / Balance Color
✅
✅
Preserve Text
✅
✅
Remove Objects / Context-aware heal
✅
✅
Upscale up to 16×
✅
✅
Optional Cloud Processing Toggle
❌
✅
Notes: Super Focus v2, Dust & Scratch, the Autopilot/UI overhaul, and the cloud toggle are the practical differentiators for photographers moving from version 3→4.
Step-by-Step: Processing a Wildlife Image in Topaz Photo AI 4
This is the no-nonsense, keeper-file flow that works for me.
Ingest & Cull Import RAWs into Lightroom Classic (or alternate Editing software). Tag likely keepers; don’t waste time on obvious non-keepers.
Send to Photo AI 4
Lightroom plugin: Right-click → Edit In → Topaz Photo AI. For high-ISO RAWs, choose RAW Denoise workflow and return as DNG. (This preserves maximum downstream latitude.)
Autopilot sanity check
Leave Autopilot ON for a first pass; it will add suggested enhancements and better select subjects than v3.
If it makes odd choices, toggle OFF and add filters manually.
Run RAW Denoise first
Start conservative. Too much denoise can soften fine details in feather and fur
Inspect at 100–200% on the eye ring (birds) or whisker pads (mammals).
Recover focus with Super Focus v2
Add Super Focus v2 if the eye isn’t tack sharp.
Use selection/masking to confine recovery to the head/torso; avoid boosting noisy backgrounds.
If edges get crunchy, back off strength before adding Sharpen.
Sharpen (finishing)
Add Sharpen modestly after focus recovery. New simplified controls make it harder to stack artifacts, but you still can. Watch for halos against sky or waterlines.
Global polish
Adjust Lighting to tame blacks/highlights; Balance Color to neutralize casts from canopy shade or blue hour. Do small nudges here; finish style in Lightroom.
Return & finish
Click Apply to round-trip the DNG back to Lightroom.
Final crop, HSL, local dodging/burning, output sharpening and distraction removal.
Export
Web: sRGB JPEG, quality ~80–90, long edge 2048–3000 px.
Print: 300 ppi; if you cropped hard, Upscale in TPAI4 before export.
Conclusion: Should Wildlife Photographers Use Photo AI 4?
Yes—if you care about keepers. Photo AI 4 doesn’t replace good fieldcraft, but it rescues borderline files and elevates already-solid work with less fuss than a plug-in stack. The RAW Denoise, Sharpening and Upscale combo is lethal on soft, high-ISO wildlife frames. The Autopilot and simplified controls speed up the editing process especially on batches.
For serious wildlife photographers, Photo AI 4 is a must try addition to your workflow.
Best Image Editor: DxO PureRAW 4 vs. Topaz Labs Photo AI 3 Which image editing software is best? DxO PureRAW4 does a slightly better job with High ISO image rendering[…]
What is the best image enhancer software? Topaz Labs Photo AI 3 is an advanced photo enhancement software that utilizes artificial intelligence (AI) to automate image optimization processes like noise[…]