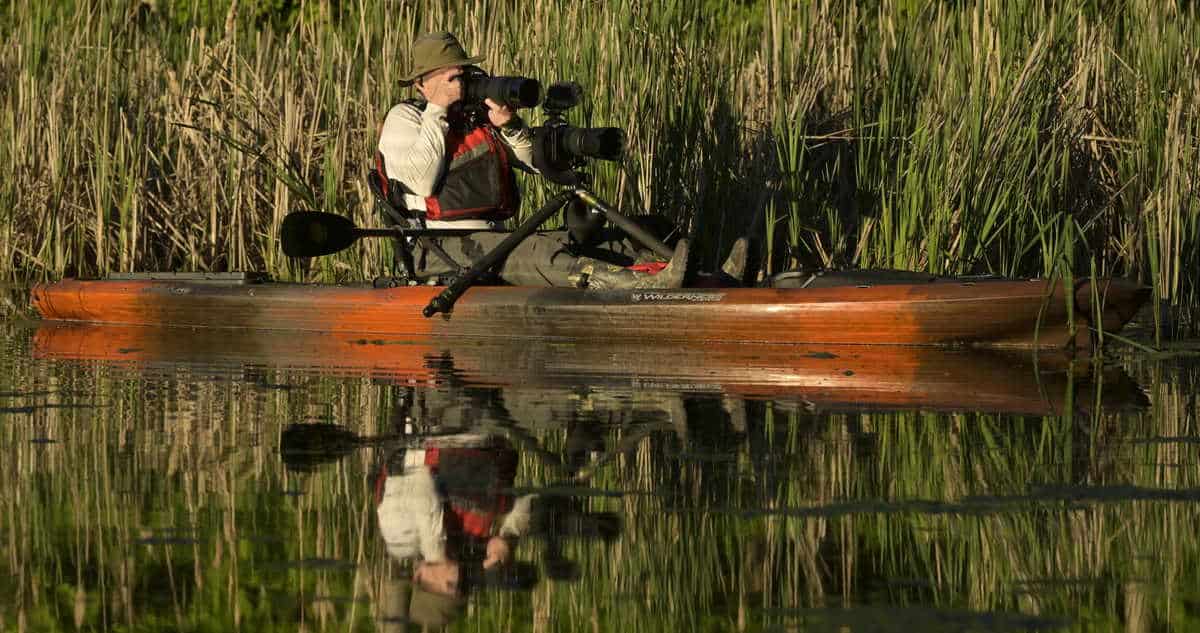
Wildlife Photography From A Kayak | Complete Beginners Guide
Learn how to select the best kayak for photography of wildlife, required accessories and tips and tricks to get you started with photography from a kayak.
This beginners guide to photography from a kayak will help you to select the best kayak for photography, required accessories and provide tips and tricks to get you started taking photographs from a kayak. Wildlife photography from a kayak is one of the most challenging and rewarding ways to capture images for wildlife photographers. I’m happy to share with you what I’ve learned in the past 15 years of paddling to shoot all kinds of wildlife.
Afraid of Tipping?
Let’s address this topic straight away shall we. The biggest fear that most photographers have when considering kayak photography is that they are going to tip and their precious gear is going to end up at the bottom of the lake. I’d be lying if I said that’s never going to happen. Turns out I have a very good friend who tipped a kayak and $10,000 worth of gear plunged to the depths beneath so it does happen. But hey, that’s what insurance is for, right?
In my experience if you’ve selected the proper gear and checked the weather ahead of time this outcome can be avoided. I do however highly recommend paddling a few times without camera gear to allow yourself to get comfortable and confident in your kayak before you load it up with camera gear and head out for the first time.
I’m sure you can guess what the most asked question surrounding the topic of kayak photography is.
What are the best kayaks for wildlife photography?
- Wilderness Systems ATAK 140 Fishing Kayak
- Wilderness Systems ATAK 120 Fishing Kayak
- Wilderness Systems Thresher 140 Fishing Kayak
- NuCanoe Frontier 12 Fishing Kayak 360 Fusion Seat
- 3 Waters Big Fish 103 Pro Fish Pedal Drive Fishing Kayak
- Bonafide SS127 Sit On Top Fishing Kayak
- Old Town Sportsman 120 Fishing Kayak
- Old Town BigWater Sportsman 132 Fishing Kayak
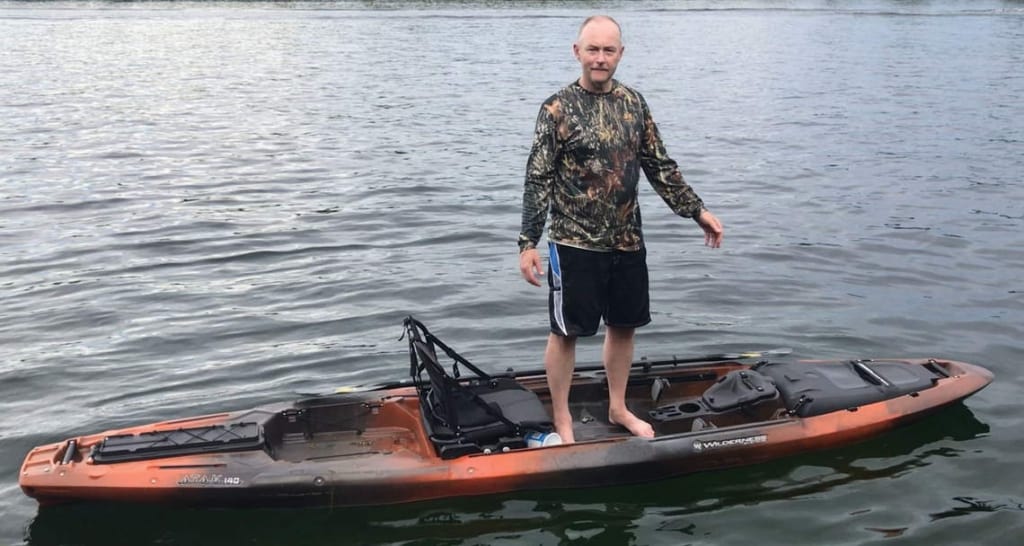
Fishing kayak’s make the best kayak’s for wildlife photography. They are wide, stable and can carry heavy loads. Above is a list of the kayak’s that I would recommend you consider. Below is a picture of the Wilderness Systems ATAK 140 that I purchased.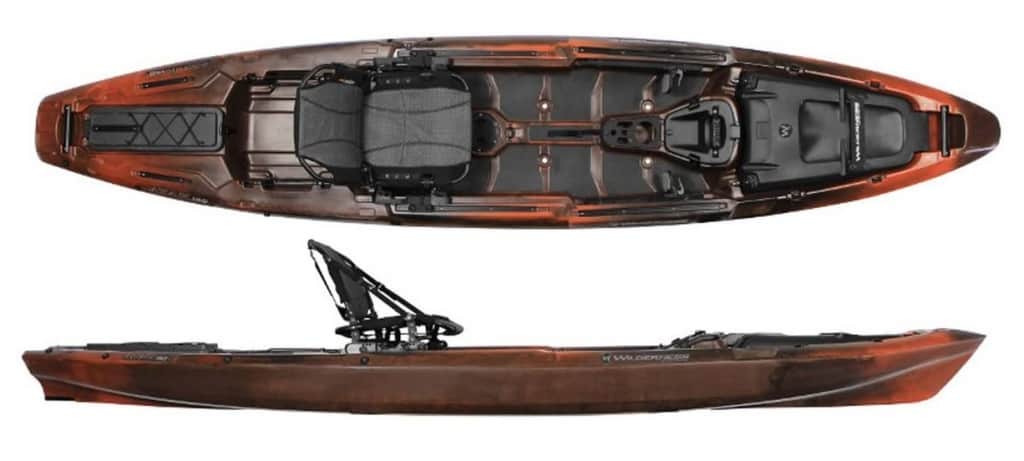
Three Must Have’s When Selecting a Photography Kayak
When I selected a photography kayak for my wildlife adventures I had three criteria that were an absolute must have.
1/ Stability: The first priority was stability to prevent tipping so it needed to be wide. This trait is inherent in most of the fishing kayaks so those were the models that I short listed.
2/ Roomy Cockpit: The second was having a roomy and open cockpit that had enough room for my camera gear while still being able to setup a tripod.
3/ Comfort: The third less obvious requirement was a comfortable seat. I am often in my boat for 5 hours or more at a time and I found the plastic molded seat in my first kayak to be very uncomfortable after just an hour. With the mesh seats provided in the high end fishing kayaks they’re as comfortable as my office chair. I can sit for a 5-6 hour shoot and never have back pain or numb butt.
The fishing kayaks listed above met all three of these requirements so you can feel good about purchasing any of those boats. These are not the only boats to meet the criteria so you may find others you like in your search for the perfect photography kayak.
Yes You Can Stand Up, But Why Would You?
It should come as no surprise that these fishing kayaks are crazy stable. That’s because they were designed with anglers in mind, and those anglers want to stand and cast. If an angler can stand and cast then I think you should feel very secure while seated with your camera gear.
Just for shits and giggles I did throw on my bathing suit after an evening paddle and took it out for a stand up test so I knew what I could get away with. Apologies for the camo, I hope you can see me ok.:)). Long story short, I could easily stand up and keep my balance without the fear of tipping which you can see in the image below.
I’m never going to be standing with my gear in hand but I am hopeful that the image below helps to alleviate any fears you may have had and has you starting to feel just a little bit excited about purchasing a kayak for photography. Are you there yet?
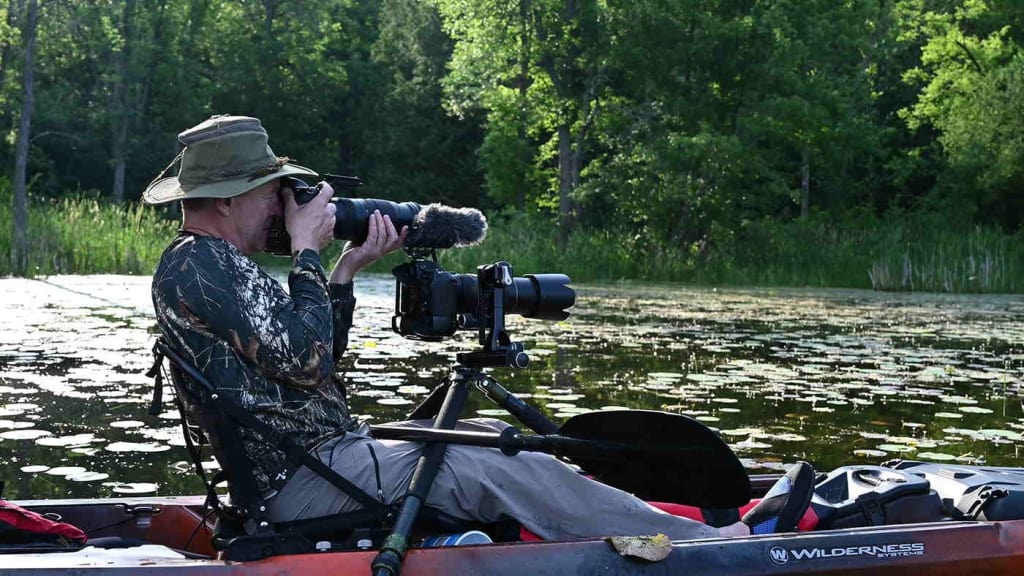
The ride I purchased was a Wilderness Systems ATAK 140 shown in their orange version in the image above. It’s a 14 foot boat and they also make a 12 footer. I stuff all of my camera’s, lenses, spare batteries, etc. in a large dry bag and place it between my legs. I then have my tripod setup in front of me to hold the camera that I will shooting video with.
I head out before the sun is up so I am usually on the lake when others are still sleeping. That’s why I attach a separate sound recording device to that video camera for optimal capture of the sounds of nature that surround me. I hand hold a second camera as I have found that tracking birds in flight from a tripod in my kayak is next to impossible unless the bird is at eye level.
This usually only happens at take off and then the moments thereafter are lost. This Summer I am looking forward to shooting with my new Nikon Z6II mirrorless and 500 PF 5.6 combo. Nice and light and with a 1.4X Tele-converter it’s at 700mm equivalent and thus far I’ve been getting pin sharp images from that combo.
Kayak Photography Gear Checklist
- Wilderness Systems ATAK 140
- Carbon Fiber Paddle
- Life Jacket (inflatable PFD)
- Waterproof Dry Bag
- YakAttack Rotogrip Paddle Holders
- Scupper plugs
- Kayak Safety Kit
- Sea to Summit Kayak Cart
- Mushroom Boat Anchor 5 lbs
Bill’s Kayaking Camera Gear
- Gitzo 3543xls tripod
- Gitzo Gimbal Fluid Head GHFG1
- Nikon Z6II camera body
- Nikon D5 camera body
- Nikon Z7II camera body
- Nikon 500mm F/5.6E PF Lens
- Nikon 80-400 F4.5-5.6 G ED VR Lens
- Nikon 14-30 f/4 S Lens
- Nikon 24-70 f/4 S Lens
- Shure VP83F Lens Hopper Sound Recorder With Windshield
- B+W Circular Polarizer filter
What Are The Advantages of Photography From A Kayak?
- Location, Location, Location- Most kayaks require only five inches of water which means you can virtually go anywhere, places where motor boats can not access. On my lake this means I can access back bays locations that only a kayak or canoe can access. Due to limited human access this is also where the wildlife tends to hang out.
- Eye Level Shooting – The key to capturing award winning wildlife images is to be at eye level with your subjects eyes. The seated position in my kayak places me very close to eye level with the wildlife I shoot on my lake such as Trumpeter Swans, Great Blue Herons, Osprey, Eagles, Otter, Beaver, Mink and Loons. You can see from a few of the sample images below how the shooting angle afforded from a kayak makes for an excellent perspective for my type wildlife photography.
- Access to Species – There are some species you just can not get great images of from land unless you’re lucky enough for them to swim or fly by your location. In my experience this almost never happens. Loons and Trumpeter Swans particularly are two species where photography from a kayak or canoe is the only way to capture these images.
- Silent Approach – Another advantage of shooting from a kayak is that you move around on the water without making any noise. When I approach back bays I am very gently dipping my paddle in the water to propel my kayak forward and if I see wildlife I stop paddling. Once the bird goes back to its natural behaviors of fishing or preening I continue my approach very, very slowly. By allowing the wildlife to get comfortable with my presence I can get fairly close without disturbing them.
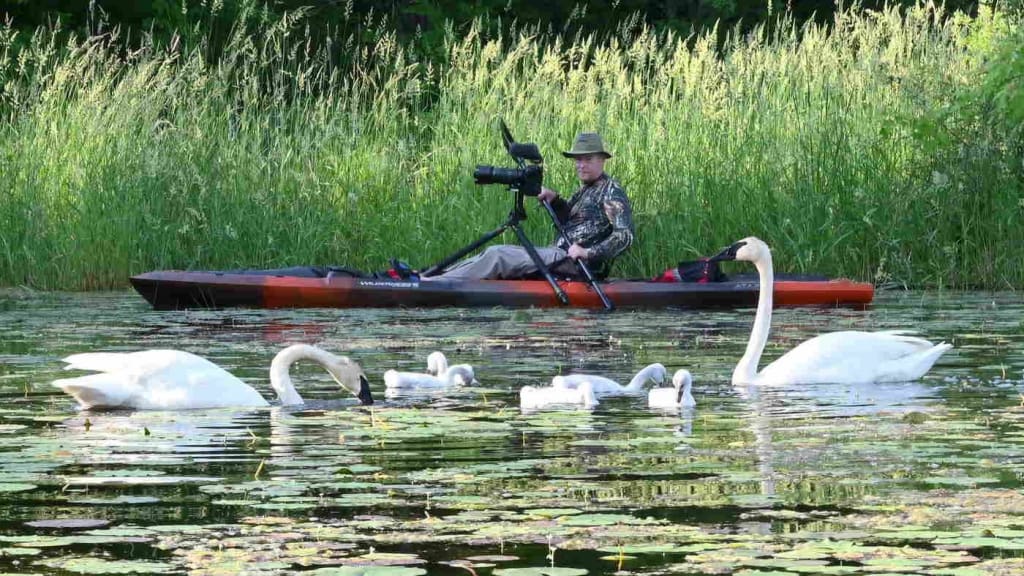
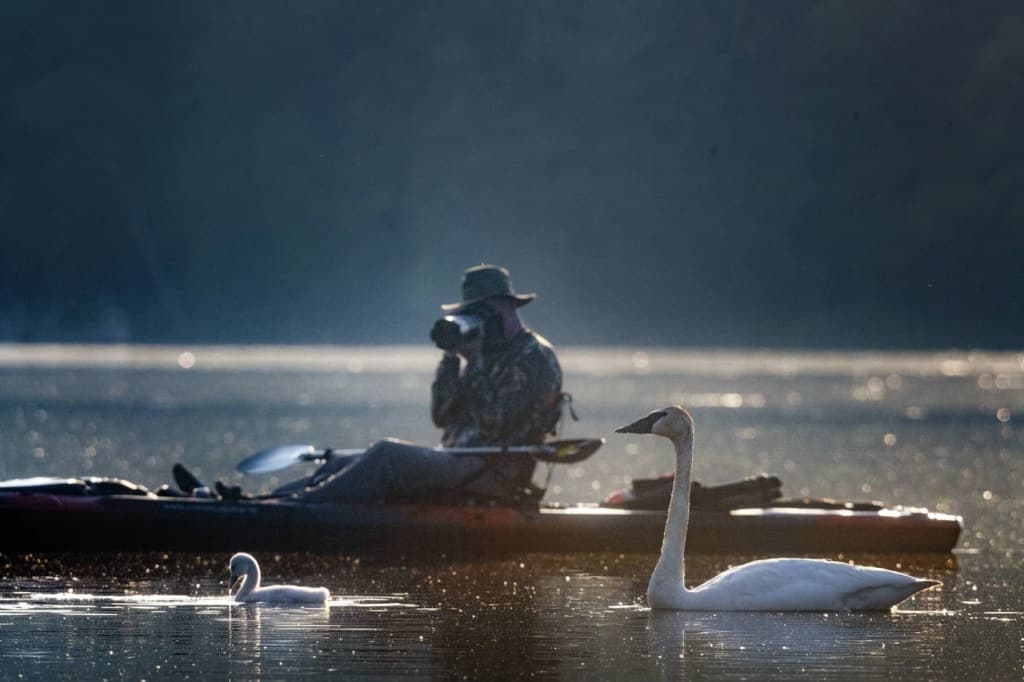
- Close Proximity – The silent approach is one way to get close to wildlife however there is another tactic I use regularly that works very well for me. There are certain spots on my lake where over the years I have noted some species return year after year. The trick is to get yourself in position in an area where you know the subject is likely to go to before they arrive and let them come to you. Feeding areas are good examples where this tactic works well. As shown below, I positioned my kayak with a pleasing background and ideal lighting and just waited for this Trumpeter swan and cygnet to come into my frame.
- Stable Platform – We’ve already covered how important stability is from a safety I don’t want to tip stand point. It should also be noted that these platforms allow for the use of long lenses like a 600mm either hand held or mounted to a tripod. I didn’t dare bring these longer lenses along in my river runner kayak.
- Comfort – There are few shoots where I’m as comfortable as I am in my Wilderness Systems ATAK 140 Kayak. Usually I’m standing for hours or lying on my belly in the cold. Don’t get me wrong I’m not complaining but when I hop in my kayak for a shoot the last thing I’m thinking about is how uncomfortable I am. The new seats in these fishing kayaks are a mesh like the high end office chairs so they provide a premium level of comfort.
This is the primary reason I now prefer shooting from my kayak as opposed to my motor boat. For all the reasons listed here the kayak allows you to access remote locations silently and with the right approach and a little patience get to within a range to capture quality images.
Kayak Photography – Tricks & Tips
1/ Slow And Stealthy – If you remember just one tip this one is the most important. DO NOT be in a rush to approach your subjects. Most of the wildlife on my lake gets spooked very easily and that means really giving deliberate thought to the approach. As soon as you spot a subject stop paddling and take notice whether or not they have taken notice of you. Observe their behavior for a few minutes.
If the subject is still paying attention to you just sit patiently and observe. Once they go back to fishing, preening or whatever else they were doing then you can begin to paddle but do so very slowly and one stroke at a time. To give you an idea of what slow is, I will often be an 30 minutes or more approaching a subject. I’ll take a few images then advance, take a few more and repeat until I am where I want to be in relation to the subject.
2/ Polarizing Filters – When you do photography from a kayak you are going to be dealing with reflections. Don’t get me wrong, I love images that include reflections, I purposefully look for those moments on calm water mornings. It’s just that a polarizing filter renders pictures with reflections so much nicer. Take note that a polarizing filter will reduce the available light by a stop or more so for the first shots of the early morning I do not use them as I will already be stretching my ISO to the outer limits to maintain a higher shutter speed.
However once the light is up a polarizer can render images that you just can’t get without it, even in post. Next time you’re out doing kayak photography screw on a polarizer and point your camera at about a 45 degree angle to the water. Rotate the outer ring and notice the difference that it makes to the reflection on the water. You’ll quickly notice surface reflections disappear and you’ll be able to see underwater quite clearly as can be seen in this under water image of a loon with a fish.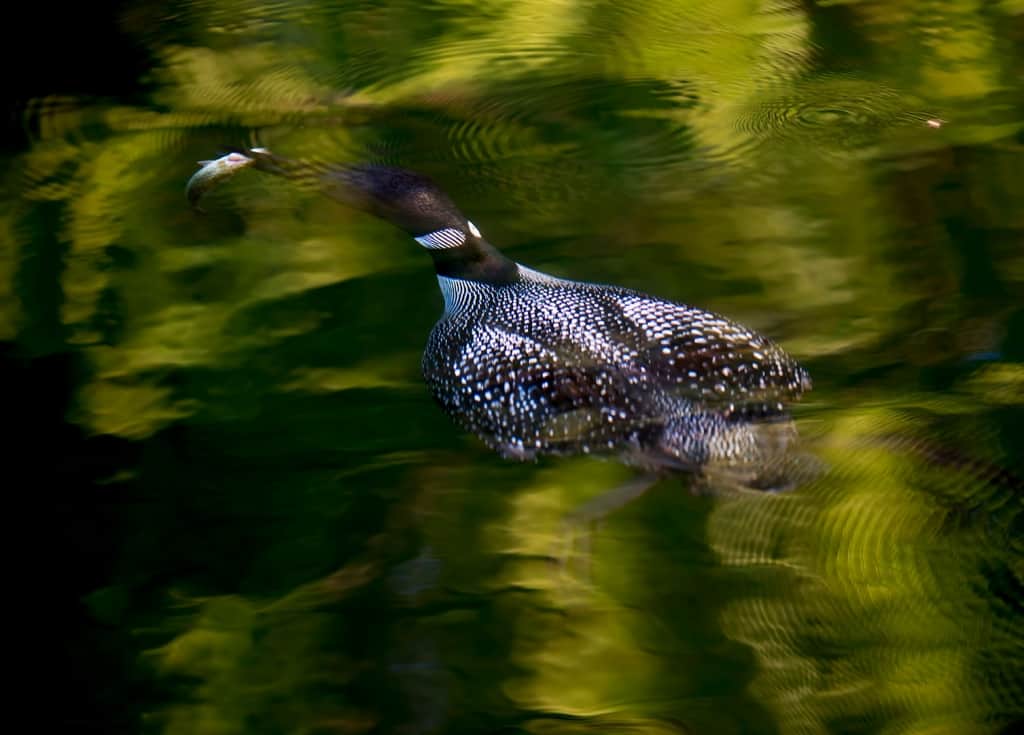
3/ Tripod or Handheld?
How about both. Fishing kayaks like the ATAK 140 have very large cockpits so you can easily setup a full size tripod. I use a tripod with a secondary camera body primarily for recording video to avoid camera shake. I always have a second body with me for taking hand held shots when the action heats up as I do find it very difficult to capture birds in flight from my tripod mounted camera given the limited range of motion. As I mentioned above I did just purchase a Nikon Z6II and I’m really looking forward to using it from my kayak given the silent shooting capability and In Camera Stabilization that will make for sharper images when hand holding in low light situations.
If you’re getting serious about photography from a kayak you may wish to consider a mirrorless camera. I dedicated an entire blog post to the subject of mirrorless cameras for wildlife photography. You can read that post at 8 Reasons To Use A Mirrorless Camera For Wildlife Photography
4/ Start Listening: Most photographers are so involved in capturing the image they forget to stop and listen to the sounds around them. Early morning’s on the water are usually very peaceful, often times the water is flat and the wildlife is just beginning to wake up. The sounds filling the air are amazing if you care to listen. I always have my Shure Lens Hopper Microphone plugged into my camera and a pair of head phones turned up just a hair to amplify the sounds around me. On my lake in the morning I am treated to the sounds of loons, blue and green herons, red-winged black birds, bull frogs, geese, trumpeter swans, and on goes the list.
5/ Fill The Frame and work the environmental shots:
With a stable kayak you can bring along longer lenses so you can fill the frame with your subjects. With nothing but the sound of your paddle hitting the water you can often get quite close to the wildlife so even shorter lenses can work if you don’t have a longer lens. Having said that keep an eye out for stunning back drops like stands of cattails in the marsh and include those as your subject passes by them.
6/ Level Horizons:
Pay attention to the horizons as you’re taking your images. From a kayak it is all too easy to forget about your horizons or not adjust for movement from waves. You may not realize it until you are reviewing your images at home that your wonderful image of a trumpeter swan is set to a horizon that is totally offset from level. You can always set your horizon to be visible in your camera’s viewfinder if you’re having an issue and in that way you’ll always be level.
7/Vertical Photographs:
Don’t forget to also take vertical photographs. The majority of my wildlife images on the water are taken in landscape mode however there are times when a background or taller subjects screams to be taken in portrait mode. You may not be shooting for a magazine cover but it’s never a bad idea to have that possibility in case you grab a winning image. While you’re at it be sure to leave enough area for the name of the magazine and the necessary information on the articles that are included in the issue.
8/ Trashy Images
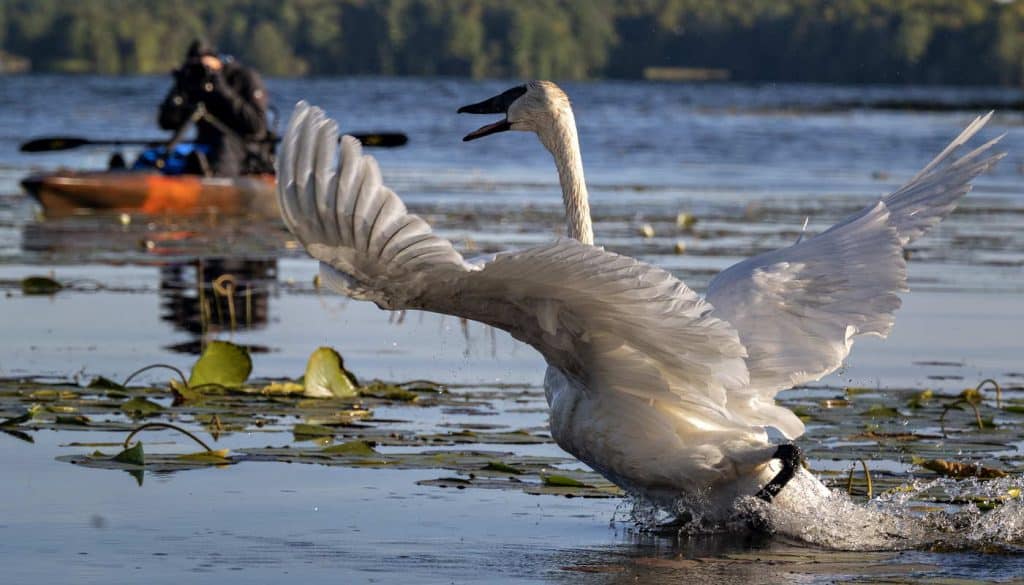
There is nothing worse when you get home and review your images only to see that your photograph includes a plastic bottle, tin can or anything else that someone couldn’t be bothered to carry out with them. Unfortunately, this does happen, so look around for unwanted trash that may show up in your photograph. And please do take an extra 5 minutes to take that trash out with you if you can safely reach it. Speaking of trashy images, be on the lookout for a “photo bomb” from your shooting companion. In this case it’s me in the background of this trumpeter swan image, I’m sneaky that way:))
9/ Wind Speeds: Get in the habit of checking wind speeds the night before your paddle. Anything under 8 km/h and I go out, 4-6 km is ideal for calm water reflection shots. Those lower wind speeds are most common very early, like 4:30 am. Most days on my lake the wind speeds pick up by 1km/hr with each passing hour on the clock, so I get up before the sun rises to get the best light and the calmest waters I can.
10/ Head Into The Waves: Most of my kayak photography is taken in protected bays. However when I head back out into the big water to go home the winds are usually up and that means big waves. It is best to point the bow of your kayak into the waves rather than letting them hit you starboard or port side. Often times the water will roll over the front of my kayak and into the cockpit but that’s the reason I have a dry bag and I pull my scupper plugs for rough water paddling.
VIDEO: Beginner’s Guide To Wildlife Photography From A Kayak
If you want to really dive into wildlife photography from a kayak I have recorded a 10 minute video that will walk you through everything you need to know to get out on the water.
Parting Words:
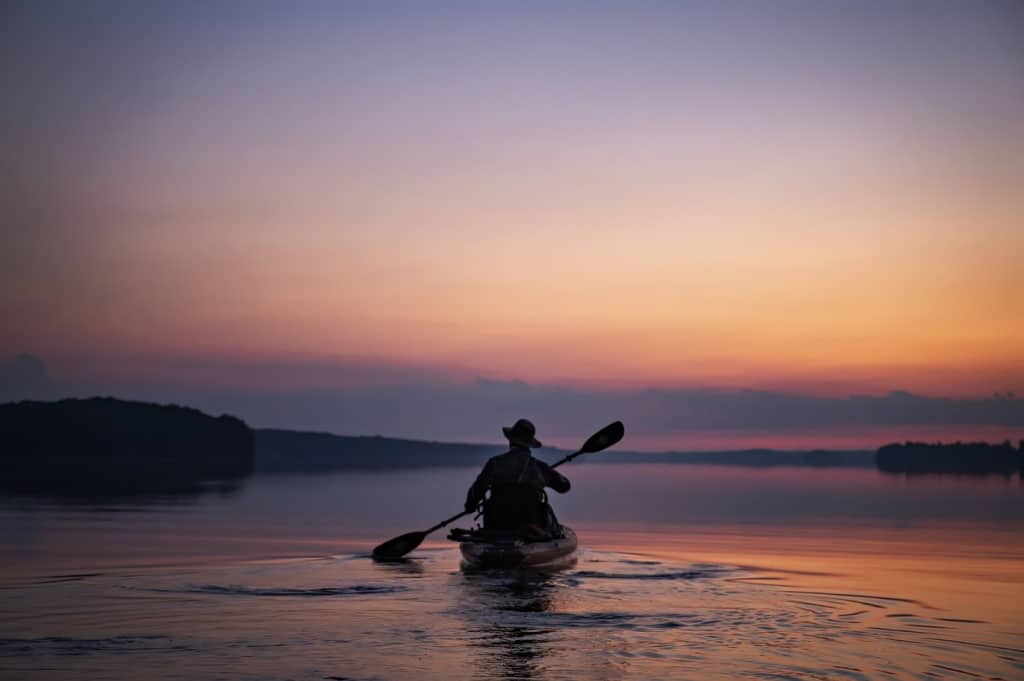
As I head off into the sunset I trust you’ve learned a thing or two and you’re excited to embark on a new adventure, photography from a kayak. If you’re still not quite sure, I suggest you take out a separate insurance policy to cover your gear in the unlikely event that you tip and dive in with both feet, pardon the pun.:))
If you’re interested in receiving more content like this, hit the subscribe button below and you’ll receive an email every time there is a new post.
Thank you so much for supporting my channel.
