Nik Collection 6 Review | Worth The Upgrade? | Compare V5 to V6
What is the Latest Version of Nik Collection?
Nik Collection Version 6 is the latest version improving on Nik Collection’s innovative U Point™ tool, including new Control Lines, Color Selectivity filters, inverted and diffused adjustments, and a cleaner look to the workspace.
If you want to help support this channel click on my affiliate link provided here DxO Nik Collection 6 to navigate to DxO. If you make a purchase it provides me with a small commission at no extra cost to you.
What Is Nik Collection 6?
Nik Collection 6 is a suite of eight plugins that provide global and local adjustment tools to your image editing workflow. The new suite can be used with Adobe Photoshop, Lightroom Classic, Infinity Photo or as a standalone for Mac and PC.
Nik Collection 6 launched on May 16, 2023, about a year after Nik Collection 5 was released in June 2022. While it’s always an exciting time when new software comes out, especially by DxO, it’s also gut-check time.
You must assess how well your current Nik Collection software slots into your workflow and checks off all your boxes before deeming an upgrade worth the time and money. That’s precisely what I intend to help you do in this guide.
Ahead, I’ll dive deep into the new features of Nik Collection 6 and compare them to what’s included in Nik Collection 5. By the time you’re done reading, you can decide if Nik Collection 6 is the best photo editing plugin around. Let’s go!
What Is New In Nik Collection 6?
Nik Collection Version 6 sees comprehensive upgrades to Nik Collection’s innovative U Point™ tool, including new Control Lines, Color Selectivity filters, inverted and diffused adjustments, and a cleaner look to the workspace. There’s also a new filter for Nik Color Efex, an updated interface for Nik Dfine, additional Smart Object functionality, and plenty more refinements to accelerate your photo editing workflow. For my workflow in wildlife photography, the ability to selectively change hue, saturation and luminance in Color Efex and the addition of control lines for selective gradients are the two upgrades that make this a worthy upgrade.
What Is Included with Nik Collection 6?
Nik Collection 6 includes the same eight plugins you’ve been accustomed to using but with a super-charged feature set and built for ease of use:
- Nik Silver Efex
- Nik Color Efex
- Nik Sharpener
- Nik Perspective
- Nik HDR Efex
- Nik Dfine
- Nik Viveza
- Nik Analog Efex
Try Nik Collection 6 For Free
A fully functional trial version of Nik Collection 6 can be downloaded and used for 30 days.
Nik Collection 6 Review – All the Features Included in This Suite
The original Nik Collection debuted in 1995. Just as photography and technology have come a dazzlingly long way since then, so too has this DxO suite of products.
The Nik Collection has always integrated seamlessly into most photography workflows, producing results in a matter of seconds. That remains unchanged with the Nik Collection 6, although a lot is different.
Let’s take a deep dive into what Nik Collection 6 has to offer.
Control Lines
One of the starring features of the Nik Collection, especially the latest iterations, is Control Points.
Within the software, you could use your mouse to place and adjust Control Points. Then, whatever changes you make only occur within those Control Points, from brightness to color level adjustments and more.
I bring up Control Points because, in Nik Collection 6, DxO introduces a brand new feature known as Control Lines.
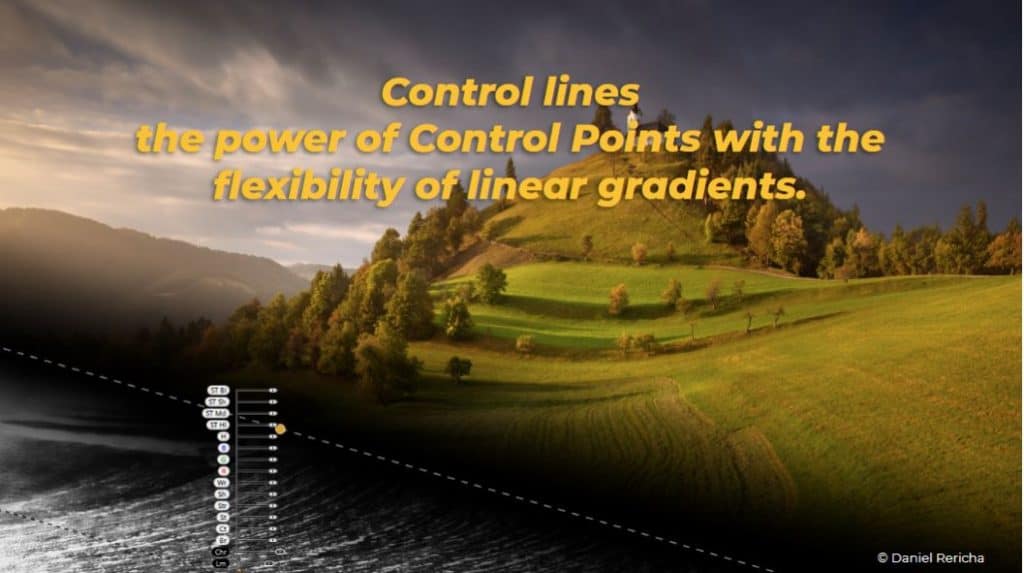 Control Lines are a great accompaniment to Control Points. You can still center in on specific parts of your photo that you wish to alter, but now you have the backing of linear gradients to help you.
Within the Control Lines feature, you now gain access to more specialized editing tools in Nik Collection 6.
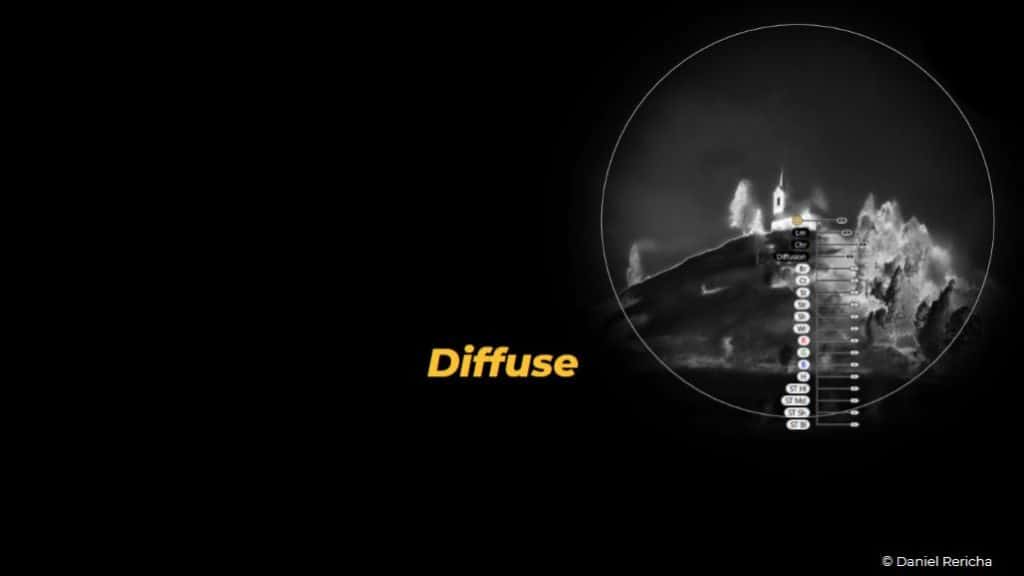
Diffuse, for example, introduces soft lighting in a natural, appealing way. If you have a few photos you shot in less-than-ideal lighting, it’s worth giving diffusion a try to see if you like the result.
Don’t get me wrong, there’s no substitute for getting the light right when you take the shot. However, if you capture an image that you love everything about other than the light, it’s worth giving diffusion a go.
 Invert isn’t a feature you’ll probably use all too often, but it’s there, nonetheless. I’d always rather have more features than fewer with my photography software, and in that regard, the Nik Collection 6 delivers.
As illustrated, when you invert a black-and-white photo, the white pixels become black pixels and vice versa. But if you invert a color image, the resulting photo will have a flipped color scheme.

Chrominance and luminance are also adjustable with Control Lines. Photo editing apps rarely offer one without another, so for Nik Collection 6 to be worthy of the best photo editing plugin, it needs both.
Chroma or chrominance is how intense and vivid a photo looks. If you set the chrominance settings to high, they’ll be very intense, while if you set them too low, the image becomes very pale.
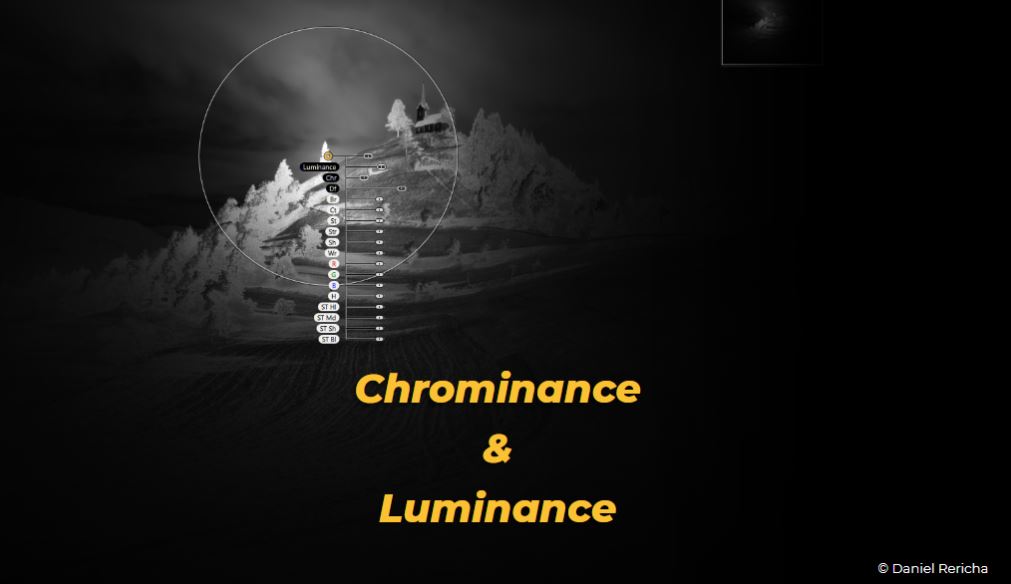 You can use the chrominance feature to restore the lighting in your photos to a more natural degree, make dim photos look more intense, and brighten washed-out, lifeless shots.
Luminance is how bright a color is. You can set this value separately in Nik Collection 6 to make certain colors stand out beautifully.
Fine Edits
Editing photos in Nik Collection 5 works a treat, but I think it’s even better in Nik Collection 6. You can finetune your edits and save your settings to use them recurringly as a reliable part of your workflow.
Simply name the adjustments once you’ve got them set just right, then save them. Voila, Nik Collection 6 adds the edit settings among your presets.
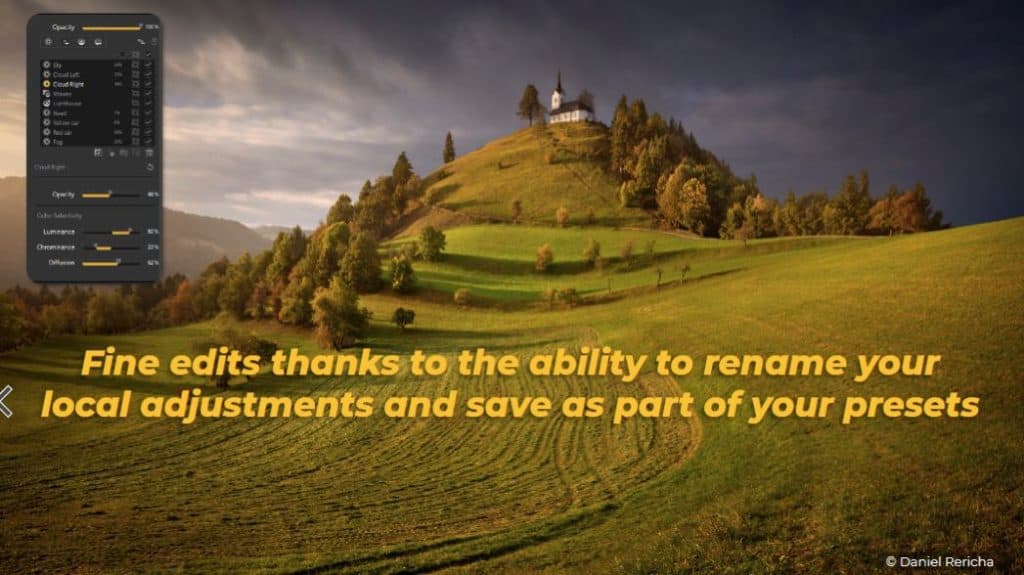
Any time you take photos with a similar backdrop, similar lighting, or whatever commonalities your photos share, you can save a remarkable amount of time in post by putting these preset edits over the images.
Of course, you’re free to continue to tweak your fine edit settings, creating even more presets that are precise down to the nth degree.
Another awesome editing feature within Nik Collection 6 is how it retains plugin edit information. When you have Nik Collection 6 running, you can choose to open any of the last 15 edits you made.
You can then take those edits and use one click to apply them to your new photo.
Search Within Nik Collection
How does searching within Nik Collection sound? If that’s a feature you’ve always longed for, it’s finally become a reality with Nik Collection 6.
Integrations
Nik Collection 6 already integrates with all your favorite workflow software options and tools, including DxO Photolab 5, Adobe Lightroom Classic, and Adobe Photoshop, to name a couple. Add one more to the list, as the latest version of the Nik Collection also integrates with Affinity Photo.
Nik Color Efex
While the above features are well and good, I’m sure you’re most curious about Nik Collection 6’s suite of plugins, so let’s get started talking about them, beginning with Nik Color Efex.
This slider allows you to adjust four color-related qualities of your image. Hue is rather straightforward, as you’re tinkering with the colors. You can use a slider bar or select from a menu of colors at the top of the plugin.
The next setting within Color Efex is saturation. By raising the saturation, you can enrich your images with color. Reduce the saturation for a more muted effect.
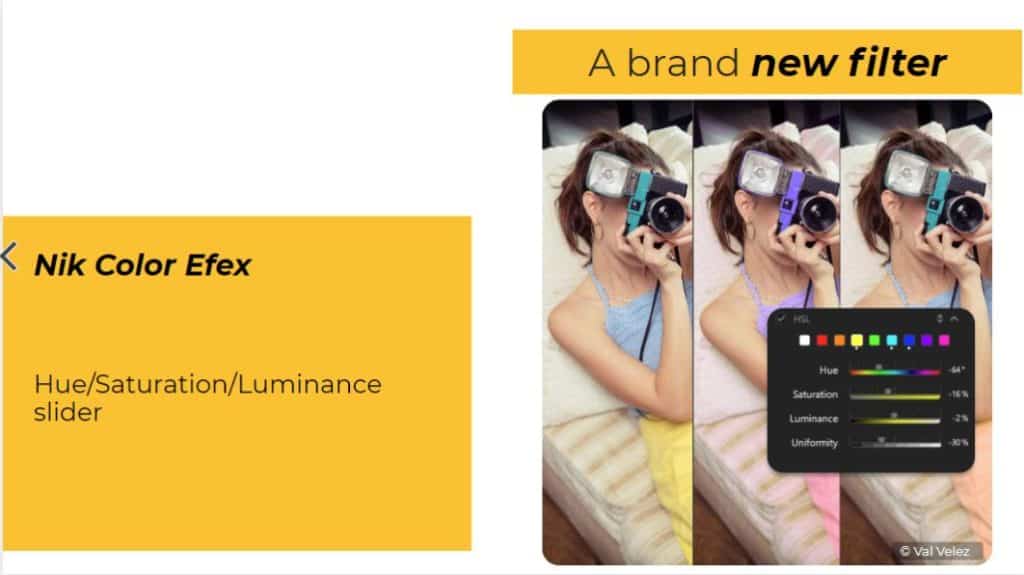 You can also set the luminance in Color Efex. The fourth option is uniformity, which prevents any of your colors from looking much brighter than the others. Well, unless that’s what you want out of your photography. In that case, then simply leave this setting alone.
Nik Perspective
Achieve geometric excellence unlike what you’ve seen in Nik Collection software before with the Nik Perspective plugin. In Nik Collection V6 Perspective has been redesigned from the ground up, allowing you to achieve photographic symmetry like never before to take your portfolio to new heights.
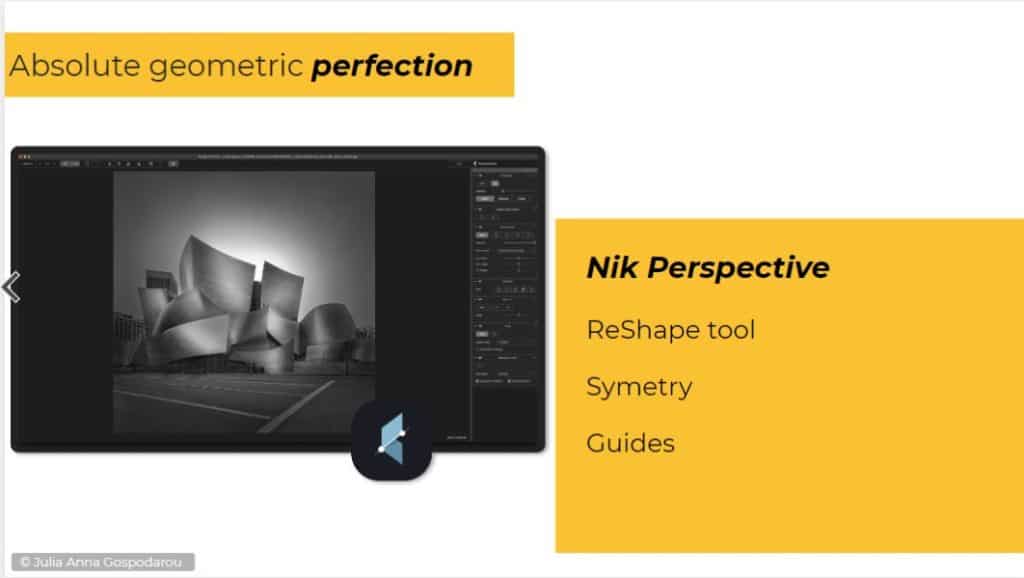
Set the perspective, crop your image down to perfect proportions, and use the ReShape tool. Nik Perspective almost feels like you’re working with a ball of clay. You’re shaping and molding it to get a fantastic final result.
Nik Dfine
Admittedly, Nik Dfine is not a new feature if you’ve used the Nik Collection for a while. However, this time around, for Nik Collection 6, DxO built Nik Dfine from the ground up.
Let me explain what the improved Nik Dfine does. This denoiser retains all the fine details of your images while eliminating noise. It’s compatible with Lightroom Classic and Adobe Photoshop.
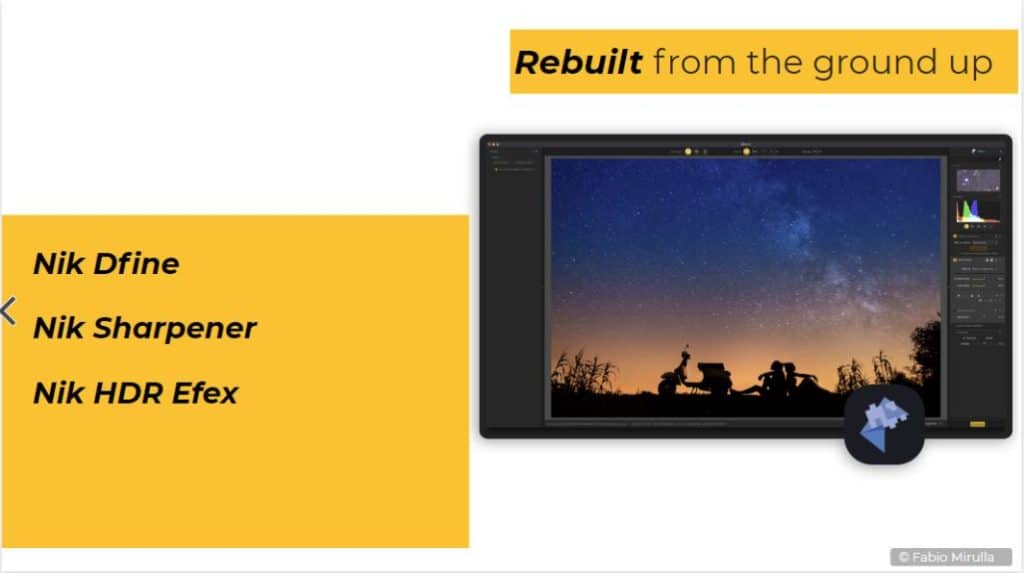 The advanced technology that has fueled past versions of Nik Collection software is now fine-tuned to an ultra-precise degree for Nik Collection 6. The software takes an image and creates spatial frequencies from it, defining the relationships between the pixels.
By gauging what the plugin reads as noise, it then vanishes. You’ve always been able to make Nik Dfine more precise by using U Points, which I’ll talk more about later, and Control Points. With Nik Collection 6, you have more powerful versions of both.
Nik Sharpener
Sharpness lends images crispness, especially when applied correctly. However, some photo-editing software doesn’t understand the right level of sharpening for a high-resolution image versus one you intend to print.
Nik Sharpener does, and it’s big, back, and better than ever in Nik Collection 6!
 With this Lightroom Classic and Photoshop plugin, you might stop using Photoshop’s sharpening tools altogether. The level of sharpening in Nik Collection 6 is smart and intuitive, and that’s due to the two-stage process this plugin uses.
First, there’s the RAW Pre-Sharpener, then Output Sharpening. The first stage of sharpening happens based on the level of detail in the image, while the second considers the intended use of the image, from high-def display to printed image.
If you want to get more hands-on with your sharpening, Nik Sharpener is compatible with Nik Collection 6’s newly-improved U Points. You’ll be able to adjust the precise level of sharpening and across which specific portions of your photos with a high degree of control.
Nik HDR Efex
The next new and improved feature in Nik Collection 6 is Nik HDR Efex. This is another plugin that has been completely rebuilt.
Nik HDR Efex helps you create your most appealing HDR images. This plugin makes a kind of patchwork of one image by stitching various pieces together, then blending them until they look seamless. You would never guess that you didn’t originally take an HDR image when using Nik HDR Efex.

In Nik Collection 6, this plugin works even more beautifully. It takes only a couple of clicks in Lightroom Classic or Photoshop, and the two-part process is underway.
Have you ever tried to combine photos with different types of exposures? You know what a pain it is, and the results don’t always come out naturally. Nik Collection 6 ensures natural-looking results every time without all the effort and guesswork.
So how does it happen? Nik HDR Efex uses an advanced algorithm that can map the tone of an image and then increase the dynamic range as needed. The result is a more dramatic, appealing shot.
The redefined U Point technology puts you in the driver’s seat when editing an image with Nik HDR Efex. Even better is that Nik Collection 6’s Control Points work with this plugin to deliver optimal editing options as you adjust the saturation, contrast, and exposure.
Nik Viveza
Nik Viveza also received a share of the love with the latest Nik Collection update. Part of the reason that Nik Collection 6 is a contender for the best photo-editing plugin is due to Nik Viveza.
This powerful plugin includes more than a dozen color presets. The presets come in different moods, with various colors highlighted more strongly than in others.
Once you select a preset you like, you’re not necessarily finished yet. If you so wish, you can make further tweaks to your image via sliders, such as manipulating the tone, adjusting the shadows, brightening the colors, or increasing detail.
As you might have guessed, U Point technology is an integral part of Nik Viveza. Nik Collection 6’s highly improved U points enable precision editing and local adjustments. Now you can bring out the details in specific parts of your images, such as brightening the sky or making someone’s clothing look more vibrant.
Control Points work with the latest version of Nik Viveza too. You’re using the same plugin you know and love but with more advanced technology and precision editing to save you time.
You can continue to take advantage of global adjustments within this plugin to save the tone and hues and apply them to future images. You can even export the presets you select and share them among the photography community if you wish.
Nik Analog Efex
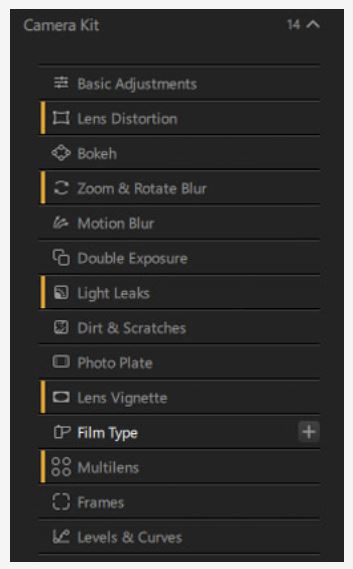 Guess what’s back in Nik Collection 6? That’s right, it’s Nik Analog Efex.
However, this isn’t merely the same plugin you’ve already used. Like the other plugins we’ve examined, this one has been improved to make it a more efficient part of any photographer’s workflow.
Harkening back to the days of analog photography, Nik Analog Efex allows you to apply that kind of flavor to your images even if you don’t own an analog camera. The vintage effects look more realistic than ever in Nik Collection 6.
The light leaks, vignetting, and scratches are so convincing that anyone that sees your photography will be positive that you shot it on an old camera. However, the technology here is all modern, including U Point technology that beautifully complements the plugins in Nik Collection 6.
You can control the amount of detail extracted, the brightness, contrast, and saturation with Control Points, establishing as many Control Points as needed to create an impactful image.
Nik Silver Efex
The last plugin in the suite, Nik Silver Efex, is for black-and-white photography. The controls of this plugin are like working in a dark room but digitally. Although you’re editing photos monochromatically, the wealth of color is astounding, especially in Nik Collection 6.
The algorithms that convert photos into black and white are advanced even more in the latest Nik Collection, and it shows! You can tweak as much smoothness, tone, contrast, and brightness in your photos as you wish, creating impressive, attention-grabbing shots.
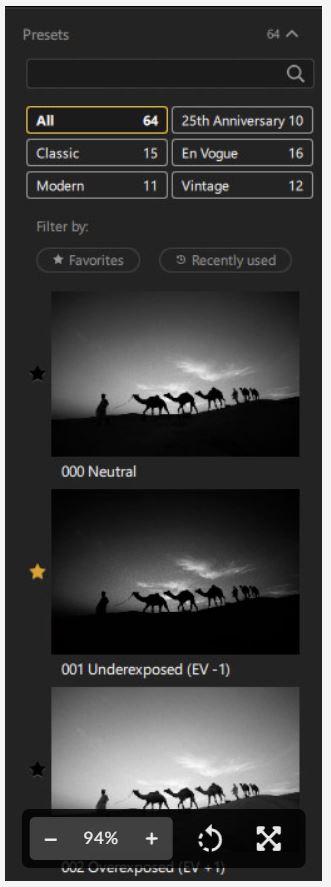 The effects and filters you know and love in Nik Silver Efex resonate so much better in Nik Collection 6. Even if you’ve never picked up a Fuji Neopan, Ilford Delta 100, or Kodak Tri-X 400 before, the classic film emulsions utilized by the latest Nik Silver Effex can make it look like you have those cameras in your arsenal.
The presets of this plugin are mere starting points. You can and should customize any of them as you wish, tinkering with contrast and grain structure to create your own masterpieces.
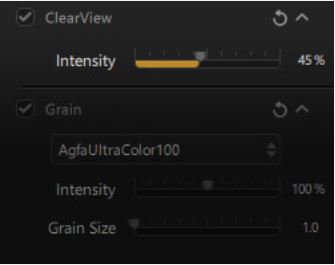
The ClearView technology included with Nik Silver Efex originally appeared in DxO PhotoLab 5 but is ultra-useful here too. The slider lets you customize how much haze your photo has, which can lend it an antique air only appropriate for certain kinds of photography.
 U Points are here for specific tweaks to Nik Silver Efex in Lightroom and Photoshop.
U Points
U Points are a cornerstone of some DxO software, Nik Collection among them. In Nik Collection 6, the technology that drives U Points is more advanced than ever before.
Now you’ll find it exceedingly easy to customize select portions of your images using the eight plugins reviewed above.
I’ve always thought U Points were sterling technology, and they just keep getting better and better with each new update of the Nik Collection.
Is It Worth Upgrading Nik Collection from V5 to V6?
Nik Collection 5 continued to change the game upon its release in summer 2022, but it had only been a year prior in 2021 that Nik Collection 4 came out. Now, here we are a year removed from the debut of Nik Collection 5, and already there’s another addition to the Nik Collection family.
While Nik Collection upgrades aren’t the most expensive photo-editing software you could get your hands on, at $79 for the upgrade, it’s not chump change, either.
This table will tell you what’s different between Nik Collection V5 and V6 so you can confidently proceed with your purchase.
| Feature | Differences Between Nik Collection 5 and Nik Collection 6 |
| Control Points | Nik Collection 5 features only Control Points; Nik Collection 6 improves upon Control Points and adds Control Lines for Linear Gradients |
| U Points | Nik Collection 5 and 6 have U Points, but Nik Collection 6 improves their precision and fine-tuning across all plugins |
| Nik Color Efex | Nik Collection 6 adds a hue, saturation and luminance slider |
| Searching | Nik Collection 6 allows you to search for presets from within the software |
| Integrations | Nik Collection 6 has more integrations than Nik Collection 5 adding Affinity Photo |
| Smart Objects | Nik Collection 6 adds smart objects to every plugin allowing you to add properties and characteristics to multiple layers, combining different tools, filters, and features. |
| Plugin Suite | Nik Collection 5 and 6 have the same plugins, but Nik Collection 6 has more advanced features, better engines, and more impressive technology behind each |
How Much Does Nik Collection 6 Cost?
If you’re interested in adding Nik Collection 6 to your suite of photo-editing tools, how much does it cost?
If you upgrade from an older edition of the Nik Collection to the latest version, you’ll pay $79 for the upgrade. A standalone license of Nik Collection 6 costs $149.
How Many Computers Can I Install Nik Collection On?
Nik Collection can be activated on a total of three personal computers, as long as it is never run on more than one computer at a time.
Should You Upgrade to Nik Collection 6?
Is Nik Collection 6 the best photo editing plugin around? It’s certainly one of them and I’ve had it integrated into my photo editing workflow since version 2, back then it was free and it was still an excellent plugin.
 Nik Collection 6 has the same legacy of trusted plugins and tools from past iterations of Nik Collection but with upgrades that make it even more useful. It integrates efficiently into your workflow, saves you time with preset edits and small changes, and doesn’t cost a ton more to upgrade.
So, should you do it? If the new features are things you use and that will improve your workflow the answer is yes. I especially like the addition of the control line feature as I have always found the circular Upoints limiting in controlling where they are applied.
The addition of the hue, saturation and luminance slider in Color Efex means I can remain within Nik Collection to do those tweaks which saves me a step in my workflow. If you’re on a version older than V5 the decision is a no-brainer – upgrade.

