
Best Lens for Wildlife Photography (2026): How to Choose the Right Focal Length, Aperture & Lens Type
Choosing the best lens for wildlife photography can feel overwhelming, especially with so many focal lengths, price points, and shooting scenarios to consider. Whether you’re photographing distant birds, fast-moving predators, or large mammals in low light, selecting the right lens is one of the most important decisions you’ll make as a wildlife photographer.
In this article, you’ll get a clear, practical breakdown of how to choose a wildlife photography lens that aligns with your budget, your subjects, and the way you actually shoot. You’ll learn how to analyze your existing portfolio to reveal the focal lengths you rely on most, and—if you’re just starting out—how to answer the right questions so you don’t waste money on the wrong lens. We’ll also compare prime vs. zoom lenses, explain how aperture affects low-light performance so you can make a confident, informed decision.
This post is built to eliminate confusion, give you actionable guidance, and ensure you walk away knowing exactly which lens will help you create the wildlife images you envision.
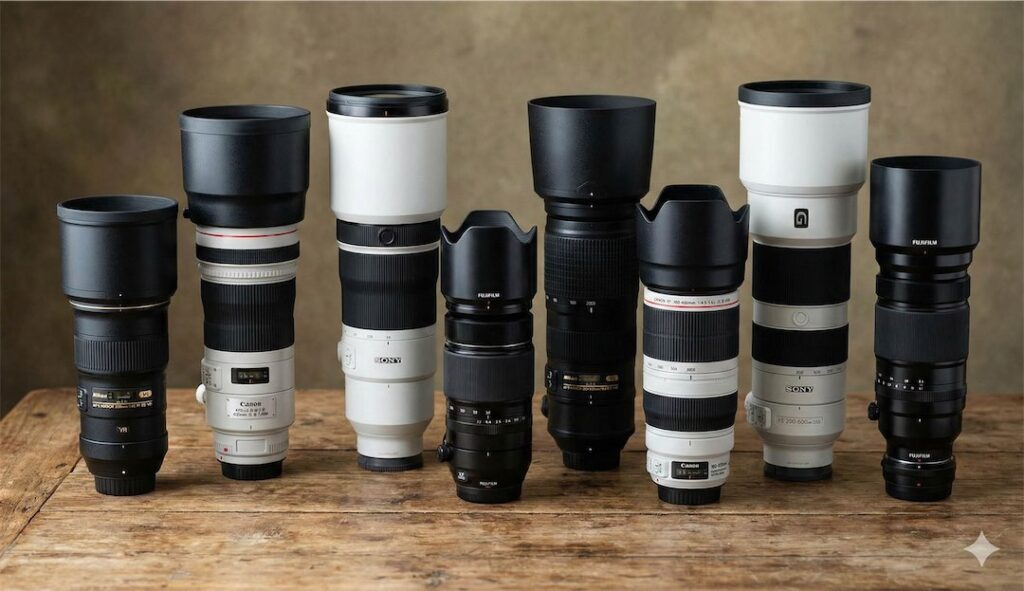
When building a wildlife photography kit, distinguishing between lens ecosystems is critical, as modern mirrorless lenses (like Canon RF, Nikon Z, and Sony E) are generally not compatible with older DSLR bodies without adapters. The table presented further down in this post organizes the best wildlife lenses by brand and system, breaking them down into budget-friendly and professional price tiers. Whether you are looking for a sub-$2,000 zoom to get started or a luxury prime lens over $5,000 for dedicated birding, this list covers the range of options from 100mm–800mm currently available at B&H Photo.
For those of you thinking about a purchase from B&H Photo or Camera Canada please consider using these links when you make your purchase. I receive a small commission to support my content creation efforts and there is no extra cost to you.
Unfortunately, B&H Photo will not ship lenses to Canada. For Canadians, once you narrow down your search, you’ll be able to order the lens through Camera Canada.
How to Use This Post
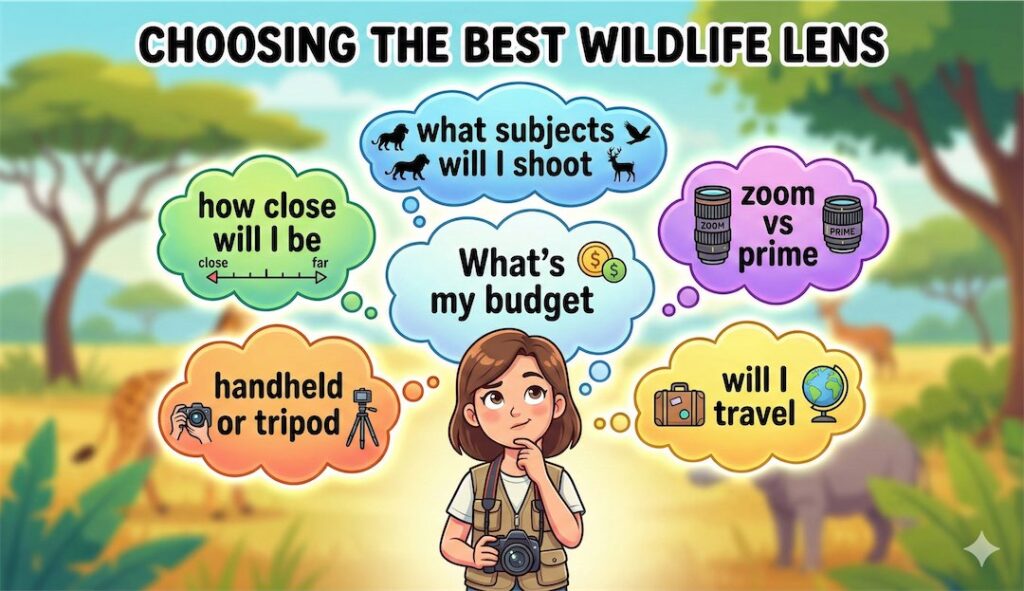
The number one question that I get asked from wildlife photographers looking for advice is, “What is the Best Lens for Wildlife Photography?” The truth is the best lens for wildlife photography is dependent on a whole host of variables. So the best wildlife photography lens for me may not be the same for you. My response to the question starts with questions like what subjects do you intend shoot, how far away will you be from those subjects, what lighting conditions will you be shooting in, whether a prime or zoom lens best meets your requirements, what’s your budget and so on.
The intent of this post is help you to determine what the best lens for your wildlife photography is going to be. And once you’ve read through steps 1-6 below and determined which lenses you feel best meet your specific use case you can come back to the lens table to click through to the various lenses listed below using the links provided so you can see exact pricing and availability for the lenses you are considering.
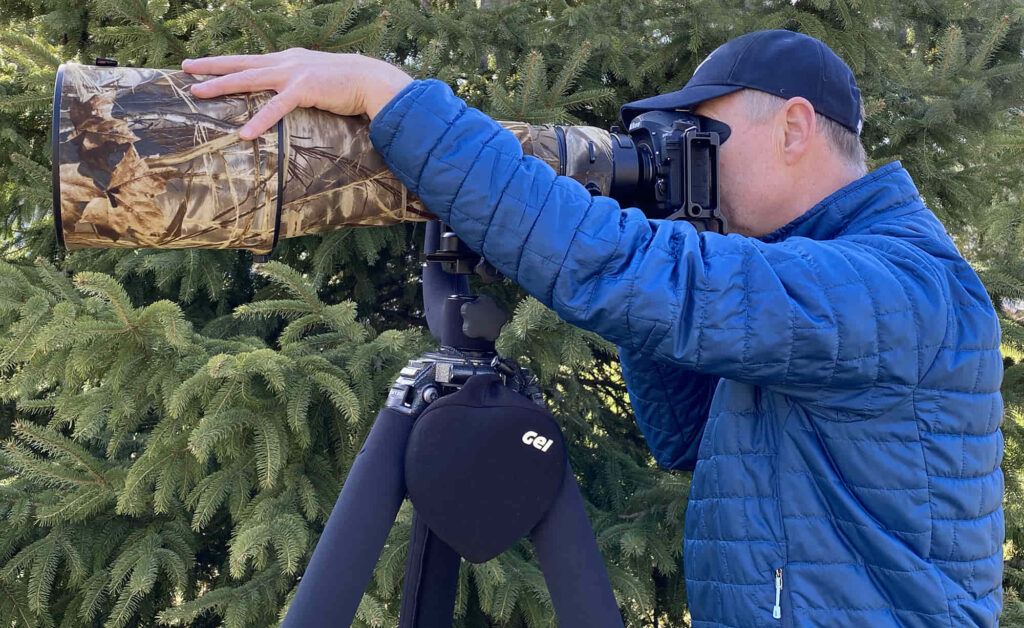
My OWN Lens Selection Dilemma
When I made the move to mirrorless from DSLR I continued using my Nikon F-mount lenses with a Nikon FTZ II adapter. At the time Nikon did not really have suitable lenses to replace my 600mm f/4 which is one of the lenses I rely on for the types of subjects that I shoot. Eventually Nikon came out with a Nikon Z 600mm TC and a Z 400 2.8 TC. The TC aspect of each of these lenses means that there is a built in 1.4 teleconverter that can be activated at the flip of a switch. If it were not for the TC aspect the choice would have been simple, replace my old DSLR F-mount 600mm with the new mirrorless Z-mount 600mm.
But with the teleconverter being built in to each lens that muddied the waters on my decision.
OPTION #1: The Nikon Z 400 2.8 TC having a built in 1.4 teleconverter meant I would have the benefit of a fast f/2.8 aperture at 400mm for optimum low light shooting. I would also have a 560mm f/4 at the flip of a switch and an 800mm f/5.6 with the use of an external Nikon Z 2X teleconverter. Everything I read indicated that the 800mm f/5.6 from the Nikon Z 400mm TC rivaled the image quality of the Nikon Z 800 f/6.3.
OPTION #2: The Nikon Z 600mm f/4 TC with built in 1.4 teleconverter would replace my trusty f-mount Nikon 600mm f/4 exactly with the option for an 840mm f/5.6 at the flip of a switch. I would then also have a 1200mm f/8 lens by attaching that same Nikon 2.0X teleconverter.
I went through the same 6-Step decision making process that I am going to walk you through in this post to make my decision. I decided to purchase the Nikon Z 400 2.8 TC for its low light capabilities, weight advantage and mapping out more precisely to the type of subjects that I shoot. I rarely spend any time beyond 800mm so the Nikon Z 400mm 2.8 TC made the most sense for me and I am loving it.
Lenses By Brand, System, Zoom/Prime and Budget
I have provided available lenses for the four major brands, Canon, Nikon, Sony and Fuji Films. If you are using another brand the same logic applies on how to select the best lens for your needs. For those of you not shooting with a camera brand other than the four that I have provided you can go click through to B&H Lenses or Camera Canada Lenses and search for the lens you are looking for.
Finding the best lens for wildlife photography isn’t about chasing specs — it’s about aligning your lens choice with your subject matter, shooting distance, and budget. Whether you’re photographing small songbirds or large mammals, this wildlife photography lens guide will help you choose the perfect setup for your needs.
Step 1: Match Your Subject to the Correct Focal Length
Your subject determines your focal length — the most important factor in wildlife photography.
Common Wildlife Photography Focal Length Recommendations
| Wildlife Type | Typical Shooting Distance | Recommended Focal Length | Example Lens Options |
|---|---|---|---|
| Large mammals (moose, elk, bears) | 100-300+ meters | 300mm–400mm environmental (600mm+ portrait) | Telephoto zoom or moderate prime lenses |
| Medium-sized wildlife (foxes, raptors, owls) | 30–60 meters | 400mm–600mm | Long telephoto or zoom-telephoto lenses |
| Small birds or distant subjects | 10–30 meters (or more, from hides/blinds) | 600mm–800mm (or longer) | Super-telephoto prime or long telephoto zoom |
Why it matters: The smaller or more elusive your subject, the longer the focal length you’ll need. If you’re photographing small birds from a distance, a 600 mm or 800 mm wildlife lens gives you the reach to fill the frame without aggressive cropping — preserving detail and quality.
Step 2: Use Your Portfolio Data to Discover Your Ideal Wildlife Lens
If you already have a wildlife portfolio, your metadata can reveal your natural shooting preferences and comfort zone.
How to Analyze Your Wildlife Lens Usage
- Open your favourite shots in Lightroom or any EXIF viewer.
- Sort (or filter) images by focal length.
- Identify the range used in your sharpest, most satisfying wildlife photos.
- Use that as a clue to what focal length your next lens should cover.
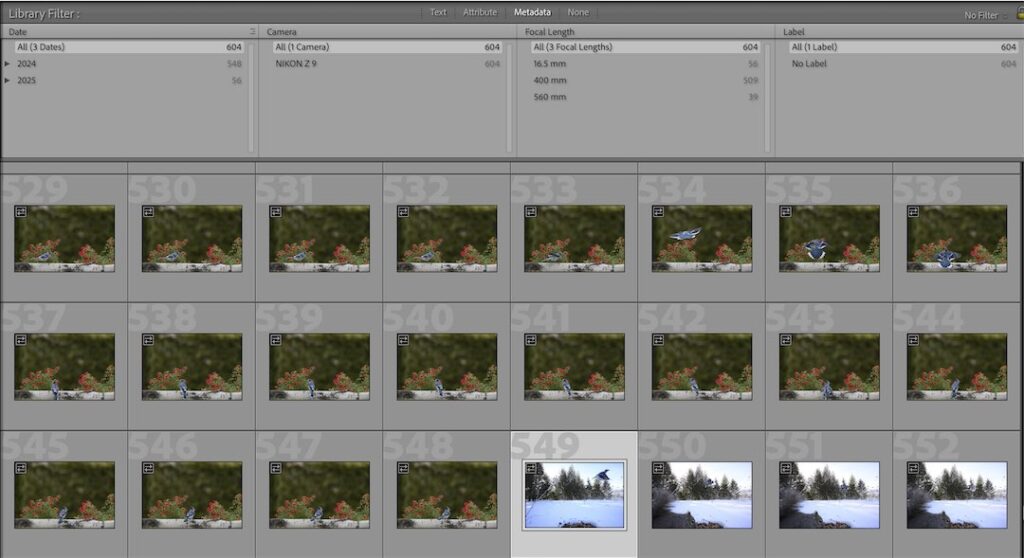
Here’s an example on how to perform the task using Lightroom
- Open the Library module and filter bar: Select your entire library in Lightroom. Go to “View” and check “Show Filter Bar”.
- Select the “Metadata” filter: Click the “Metadata” filter to open the filter options.
- Add and sort by focal length: Click a column header (like “Camera Info” or one of the default filters) and select “Focal Length” to add it to the filter bar.
- View your results: You can now see a list of the focal lengths used and the number of photos taken at each, allowing you to see which ones you favor.
In the example above the photographer takes most of their images at the 400mm focal range which is a strong indicator that a lens in that range will align well with their shooting style and subjects.
This method is great in certain use cases. Say you’ve had a 180-600 zoom lens for a while and you’re trying to decide which prime lens to buy. If the exif data says you shoot a majority of your images at 500mm that narrows down what prime lens best suits your needs.
Step 3: Wildlife Lens Buying Guide for Beginners
If you’re new to wildlife photography and don’t yet own a telephoto lens, begin by asking yourself key questions. Your answers determine the type of lens that will suit you best — from budget zooms to pro-level primes.
| Question | Why It Matters | Lens Recommendation |
|---|---|---|
| What’s your budget? | Wildlife lenses vary widely in price, from more accessible zooms to expensive super-telephoto primes. | Under $2,000 → budget-friendly zooms (100–400 mm / 200–600 mm) Over $5,000+ → consider primes or high-end telephoto zooms. |
| What wildlife will you shoot? | Subject type (size, distance, behavior) dictates focal length requirements. | Birds/small animals → 600–800 mm; large mammals → 300–500 mm might suffice. |
| How close can you get to subjects? | Distance determines how much reach you need — more reach = longer focal length. | If you can get relatively close, shorter telephoto is fine; if distance is large, opt for 600 mm+. |
| Will you shoot handheld or use a tripod/monopod? | Larger, heavier lenses are harder to hold — impacting usability and fatigue. | Handheld → choose lighter zooms; tripod → heavier primes are manageable. |
| Do you travel or hike frequently? | Portability affects how often you’ll actually carry and use the lens. | For hiking & travel → compact zoom; for stationary hides → longer primes acceptable. |
Step 4: Wildlife Photography Lens Comparison — Zoom vs Prime
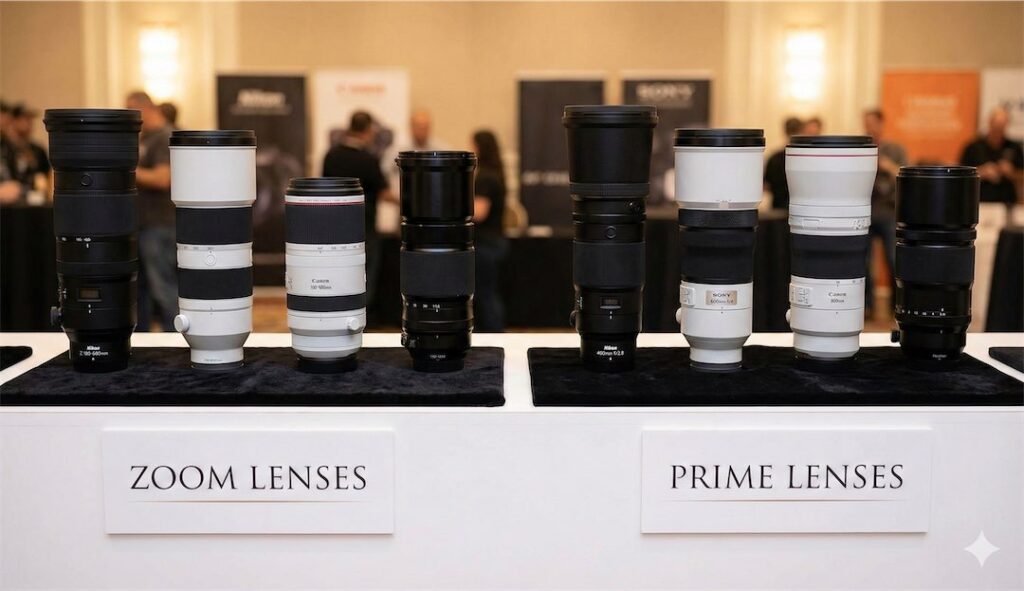
Choosing between a zoom lens and a prime lens depends on what you value more: flexibility and convenience, or optical performance and speed. Both have strong use cases in wildlife photography.
| Feature | Zoom Lens (e.g., 100–400 mm, 200–600 mm) | Prime Lens (e.g., 600 mm f/4, 400 mm f/2.8) |
|---|---|---|
| Flexibility | Variable focal range — ideal for unpredictable subjects. | Fixed focal length — you commit to one magnification, requiring repositioning for different framing. |
| Portability | Generally lighter and easier for travel. | Often heavier and best used on a tripod/monopod for stability. |
| Sharpness & Optical Quality | Good, but usually slightly behind high-end primes — especially at extremes. | Often superior sharpness, contrast, and clarity — great for headshots, detail, and low-light work. |
| Aperture / Low-Light Performance | Typically slower apertures (f/5.6–f/6.3) — may struggle in poor light without boosting ISO. | Often faster apertures (f/4, f/2.8) — better low-light, faster shutter speeds, smoother background blur. |
| Cost | More affordable entry & mid-range options. | Higher cost — often a pro-level investment. |
| Ideal For | Beginners, travel shooters, variable situations (different species, unpredictable movement). | Specialists, portrait-style wildlife photography, low light or detail-heavy work, experienced users. |
Step 5: Lens Aperture Explained — f/2.8 vs f/4 vs f/5.6
Your lens aperture determines how much light makes it to your camera’s sensor which is a key factor for wildlife photography at dawn, dusk, or under forest canopy. To help simplify this discussion, just know that the lower the fstop number, the more light makes it to the sensor. The advantage of that lower stop shows up in a few ways as shown in the table below.
With today’s camera’s allowing for workable ISO’s of 10,000 or more, there’s ongoing debate on just how important the lens aperture is. Higher ISO’s allow for more light entering the sensor so why bother buying an expensive lens with a lower aperture? The answer for some lies in the trade off for how clean the image will be when shot. The higher the ISO the more noise that is rendered in the image and then there’s also the issue of less background separation. I personally still opt for a faster f/2.8 or f/4 lens as it allows me to create a cleaner image with a smoother bokeh in the background. Those little things matter to me.
| Aperture | Light Gathering | Pros | Cons |
|---|---|---|---|
| f/2.8 | Very High | Excellent low-light performance, providing faster shutter speeds, lower ISO and strong background separation | Heavier lens, expensive price, often requires tripod/monopod for stability |
| f/4 | High | Good low light performance but one full stop less than 2.8. Still allows for faster shutter speeds, lower ISO and has good background separation but each is dialled down from the performance of the 2.8 lens. | Still heavier and pricier than consumer zooms |
| f/5.6 – f/6.3 | Moderate | Affordable, lighter, easier to carry and handheld | Less effective in low light; may require higher ISO or slower shutter speed |
Step 6: Practical Wildlife Lens Recommendations by Budget (2026)
| Budget | Recommended Lens Types | Ideal Subjects / Shooting Style |
|---|---|---|
| Under $2,000 | Telephoto zoom lenses — e.g., 100–400 mm, 200–600 mm zooms | Beginners; general wildlife; variable species; travel photographers |
| $2,000–$6,000 | Mid-range primes or higher-end zooms — e.g., primes 400mm f/4.5 prime/800mm 6.3/telephoto zooms that extend to focal ranges of 600mm with lower f-stop capability | Intermediate wildlife photographers; those shooting moderate distance animals or birds |
| $6,000+ | Super-telephoto primes or top-tier long glass — e.g., 400 2.8 and 600 mm f/4, heavy telephoto zooms with fast aperture | Professional wildlife specialists; distant or elusive subjects; low-light / dawn–dusk work |
The Vital Difference: Full Frame vs. APS-C Lenses
When you are investing in a lens for wildlife photography, you will notice that lenses are generally categorized into two main families: those built for Full Frame cameras and those built for APS-C (Crop Sensor) cameras.
While the mounts might look identical and they may even physically snap onto the same camera body, they are engineered very differently. Choosing the “wrong” one for your specific camera can lead to either poor image quality or unnecessary weight and expense.
1. The Difference in “Image Circle”
The biggest physical difference is the size of the image the lens projects—known as the Image Circle.
- Full Frame Lenses: These contain larger glass elements designed to project a large image circle that covers a big full-frame sensor (35mm).
- APS-C Lenses: These are designed with smaller glass elements that project a smaller image circle, just big enough to cover the smaller APS-C sensor.
Why You Should Match the Lens to the Camera
Scenario A: Putting an APS-C Lens on a Full Frame Camera If you mount a lens made for a smaller sensor onto a powerful full-frame camera, the lens won’t project a wide enough image to cover your sensor.
- The Result: You will likely see severe vignetting—big black circles around the corners of your photo.
- The Fix (and the cost): Most modern cameras will automatically crop the image to remove the black corners. However, this means you are throwing away nearly 50% of your camera’s megapixels! You turn a high-resolution pro camera into a lower-resolution file, losing the detail you need for wildlife.
Scenario B: Putting a Full Frame Lens on an APS-C Camera This combination actually works perfectly fine in terms of image quality, but it isn’t “optimized.”
- The Result: Since the lens is built to cover a huge sensor, your smaller APS-C sensor effectively ignores the outer edges of the glass. You are only using the “sweet spot” in the center.
- The Downside: Full-frame lenses are significantly heavier, larger, and more expensive. You are essentially paying for extra glass and carrying extra weight that your camera sensor never uses.
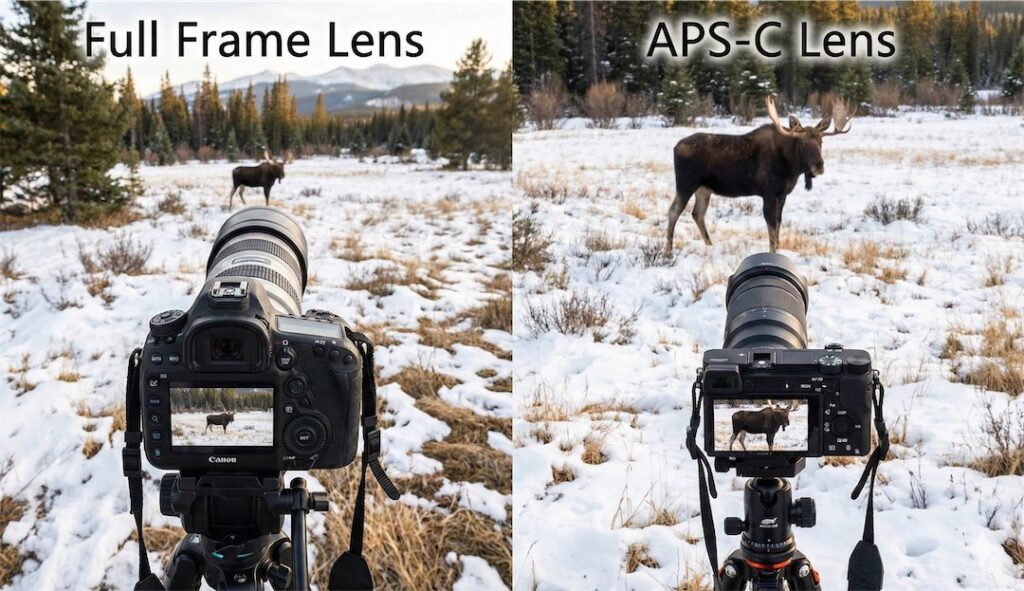
The “Reach” Advantage for Wildlife
For us wildlife photographers, using an APS-C camera (or an APS-C mode) creates a distinct advantage known as “crop factor.” Because the sensor is smaller, it crops into the center of the image, making the subject appear much closer—usually by a factor of 1.5x or 1.6x. However Full-frame cameras offer superior low-light performance, better dynamic range, wider fields of view, and shallower depth of field (more background blur/bokeh) due to their larger sensors, capturing more detail and producing cleaner images with less noise than APS-C cameras.
Both of my cameras are full frame for the reasons I have highlighted above.
- A 200mm lens on a full frame camera behaves like a 200mm lens.
- That same 200mm lens on an APS-C camera behaves like a 300mm lens.
The Bottom Line: To get the best performance, buy the lens optimized for your sensor.
- If you shoot Full Frame: Buy Full Frame lenses to utilize your entire sensor and get the highest resolution and light-gathering capability.
- If you shoot APS-C: Buy APS-C specific lenses to keep your setup lightweight and affordable, or buy Full Frame lenses only if you plan to upgrade to a full-frame camera body in the future.
Final Thoughts — Finding Your Best Lens for Wildlife Photography

Selecting the perfect wildlife lens is not about getting the “biggest” or “fastest” lens — it’s about finding the balance between reach, aperture, weight, and cost that matches your subjects, shooting style, and how you work in the field.
- Beginners: Start with a zoom lens (e.g., 100–400 mm, 200–600 mm) — flexible, affordable, travel-friendly.
- Intermediate shooters: Upgrade to mid-range primes or faster zooms (e.g., 400 mm f/4.5, 500–600 mm telephoto). Mixed use for wildlife and environment images.
- Dedicated professionals / specialists: Invest in high-end super-telephoto primes (e.g., 400mm 2.8, 500/600 mm f/4, 800 mm f/5.6) — ideal for distant, elusive, or low-light subjects.
- All photographers: Review your existing photos — your EXIF data reveals what focal lengths and apertures suit your style best.
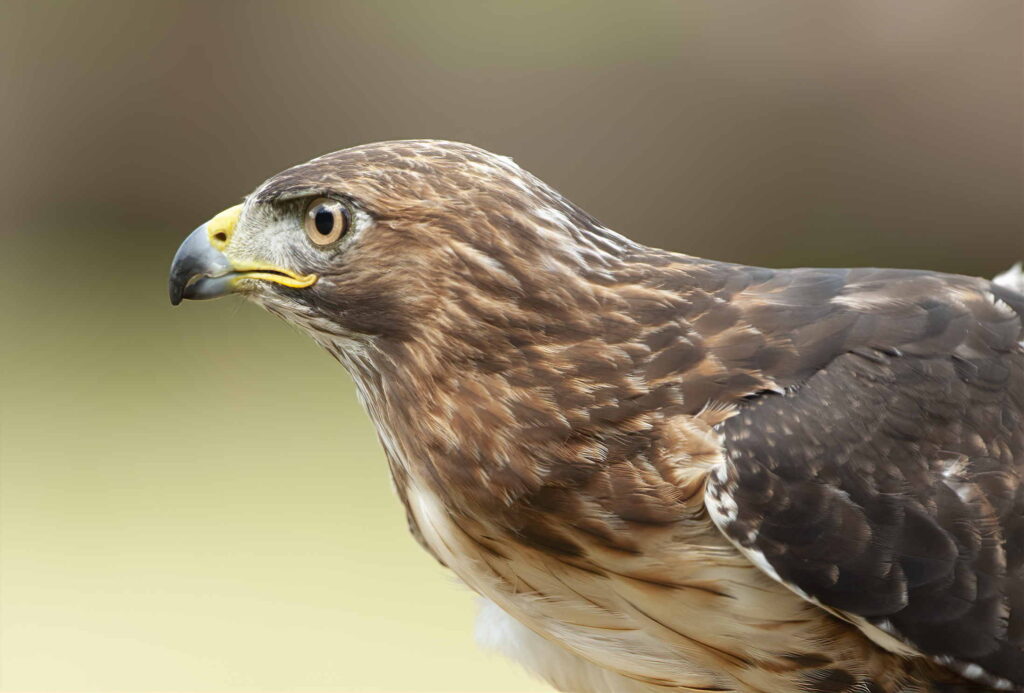
The right wildlife lens helps you capture sharper, more detailed, and expressive images — whether it’s the fine detail of a bird’s plumage, the gaze of a predator at dawn, or a moose standing tall in golden light — all while keeping a respectful distance. That balance is at the heart of ethical, impactful wildlife photography.