


Nikon Z9 step-by-step guide on how to replace the original Z9 eyepiece with a Hoodman HoodEYE eyecup that was made for the Nikon Z6/Z7. The full instructions below will walk you through how to dismantle the base from the eyepiece of the Nikon Z9 (DK-33) and attach the rubber HoodEYE eyecup from an eyecup that can be ordered on Ebay for about $10.
Now that Hoodman has finally dropped their new HoodEye eyecup for the Nikon Z9 and it is available from B&H for $29.99, I see no reason for the DIY version unless you happen to have a spare HoodEYE eyecup lying around that would do the job. Here’s a DIY hack that lets you MacGyver one if you wish to go that route.
HUGE shout-out to Lance B from the Fred Miranda forum for posting up this DIY Hack.
For those of you thinking about a gear purchase, please consider using one of my affiliate links to either B&H or Amazon Canada. I receive a small commission to support my content creation efforts and there is no extra cost to you.
If you’re interested in receiving more content like this, hit the subscribe button at the bottom of this page and you’ll receive an email every time there is a new post. I’ll have a lot more coming your way in the coming weeks.
Thank you for your support.
For those of you shooting wildlife, especially birds in flight, below are two free guides that I put together to help you get your Nikon Z9 settings optimized for that genre of shooting.
Nikon Z9 | Menu Settings Guide For Birds In Flight
Nikon Z9 | Autofocus Settings Guide For Birds In Flight
EBAY Link to eyecup Lance B used for his installation.
STEP-BY-STEP INSTRUCTIONS
STEP 1: Remove the Nikon Z9 eyepiece (DK-33) from the camera by pressing the button to the left and below of the EVF and rotating it anti-clockwise until it comes off.
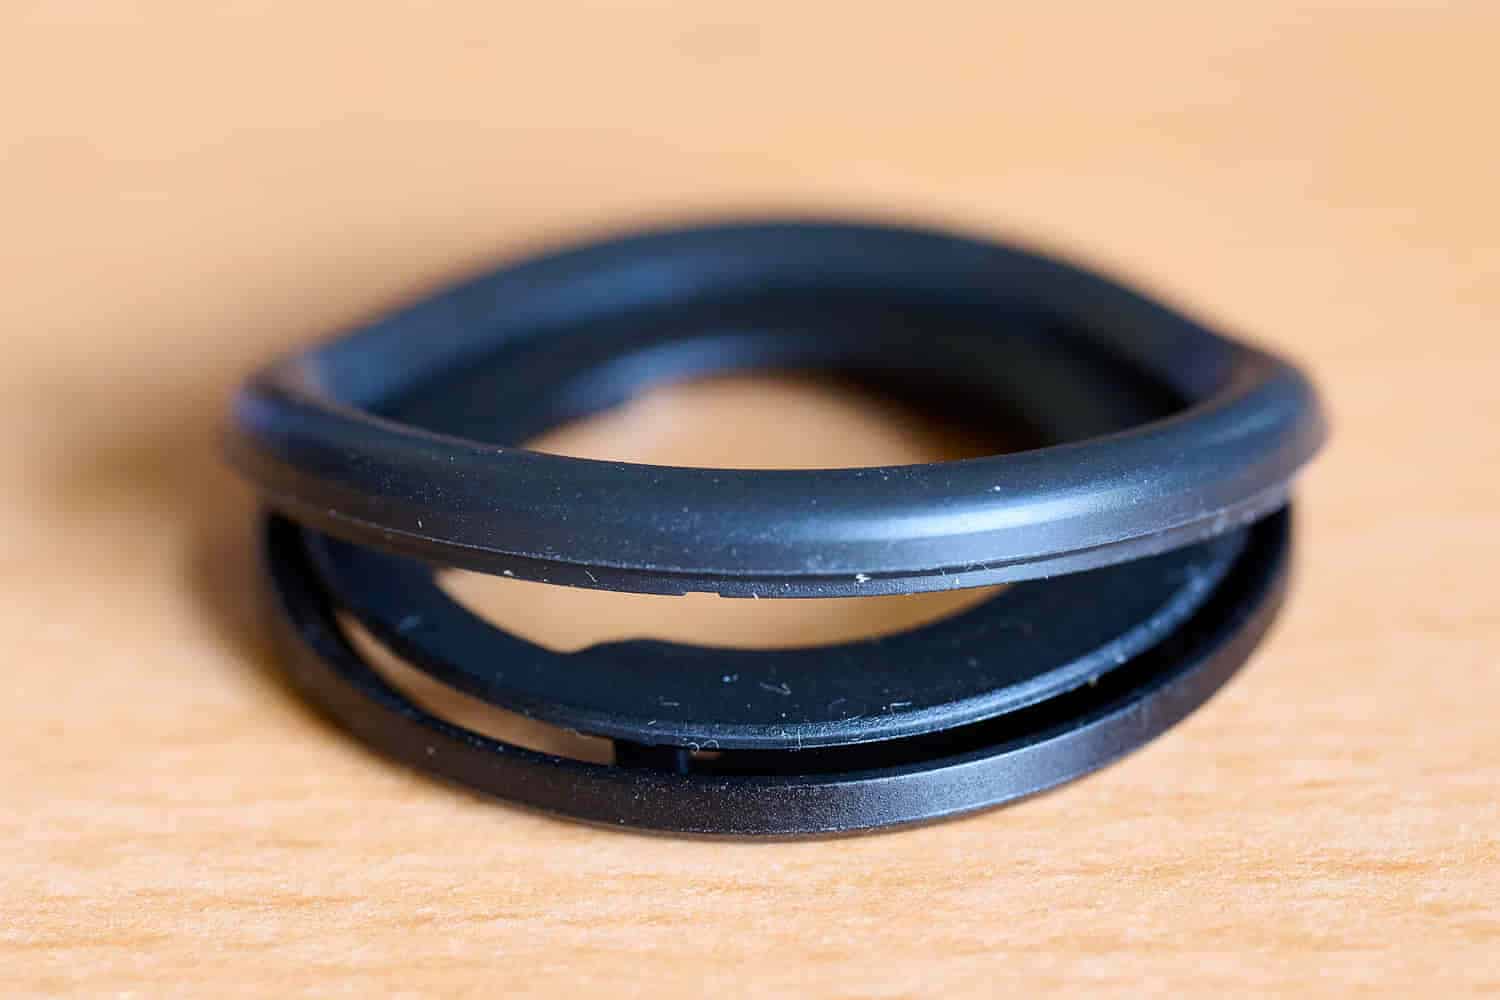
STEP 2: Peel away the rubber of the Nikon Z9 eyepiece per the image below.
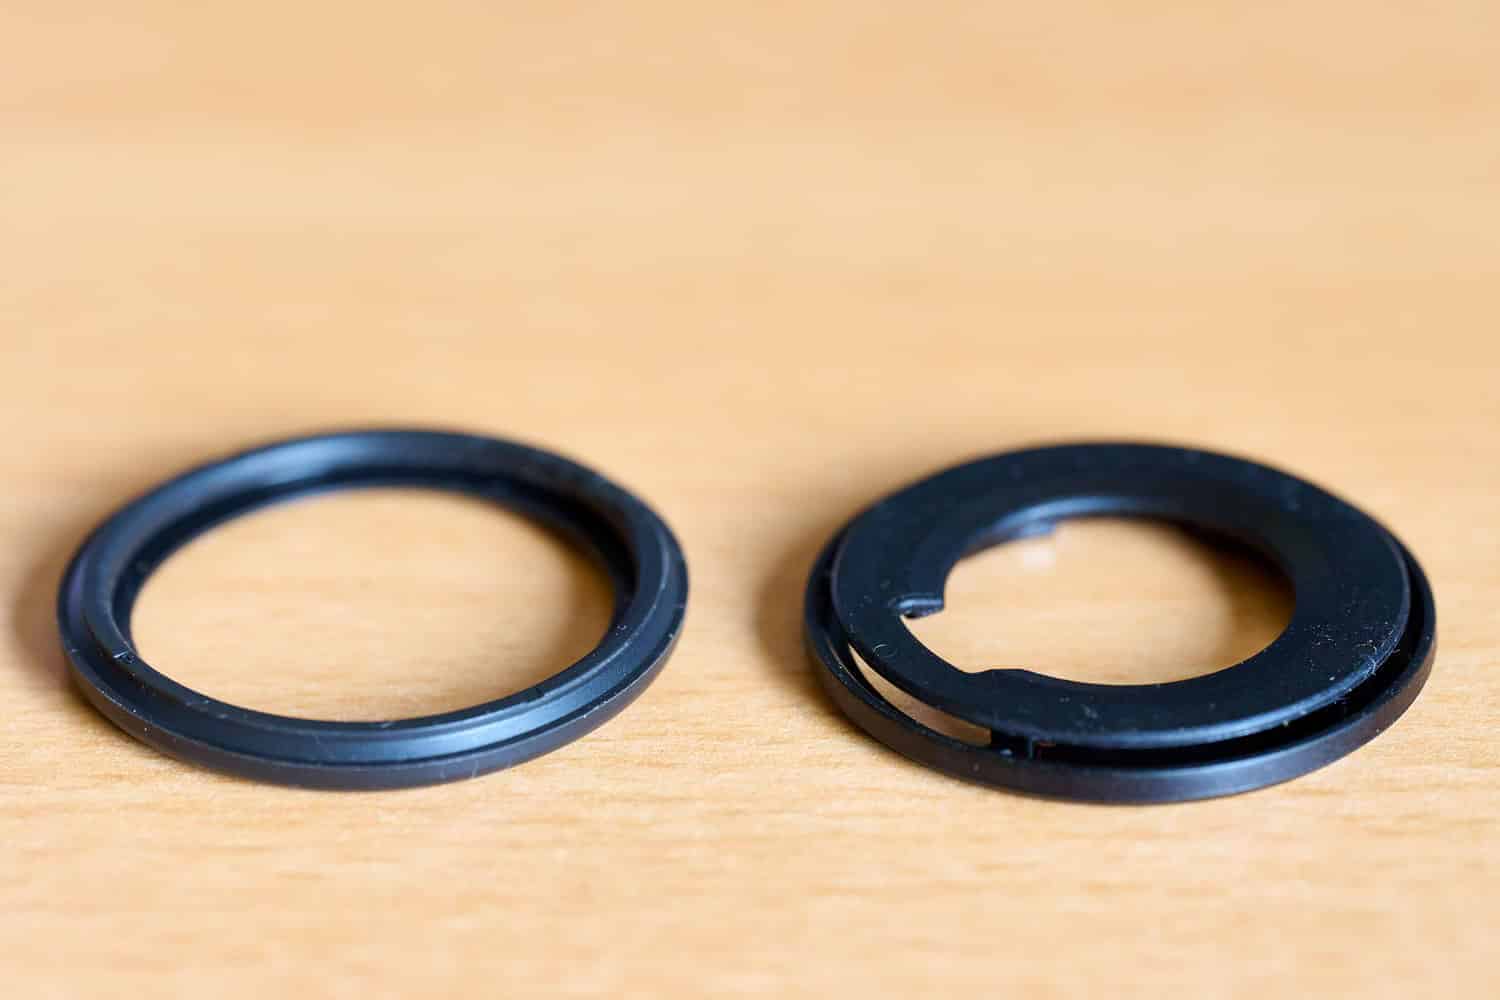
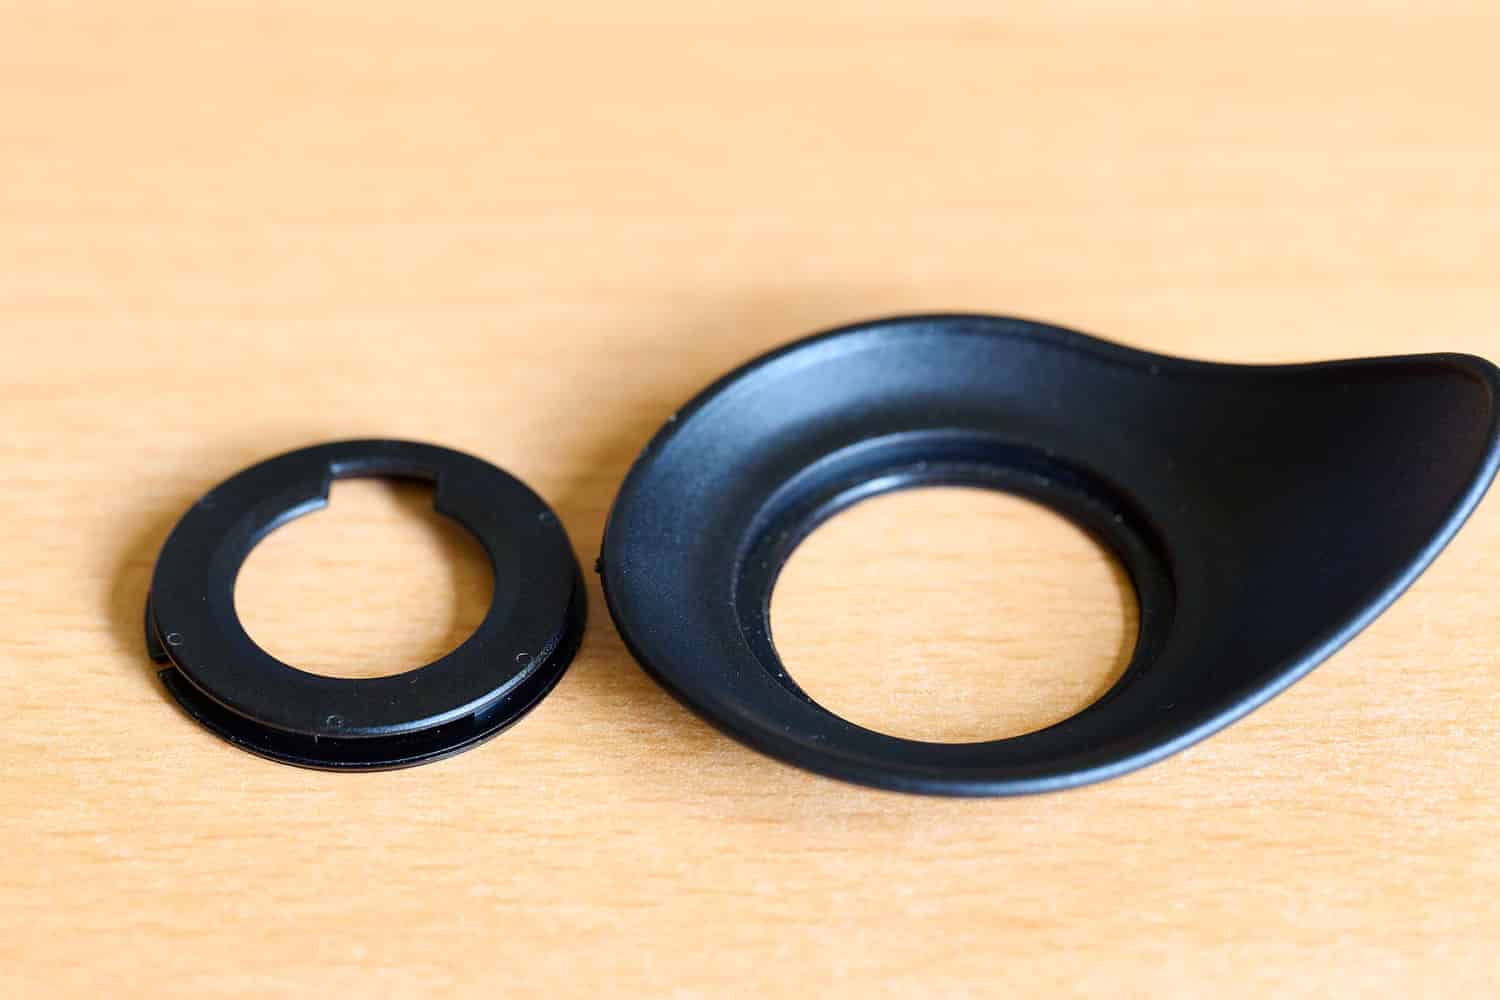
You will now have the plastic base that we will be using to mount the rubber eyecup to. That’s the piece shown on the right hand side of the image below. It is actually two pieces that you will need to carefully separate in the next step.
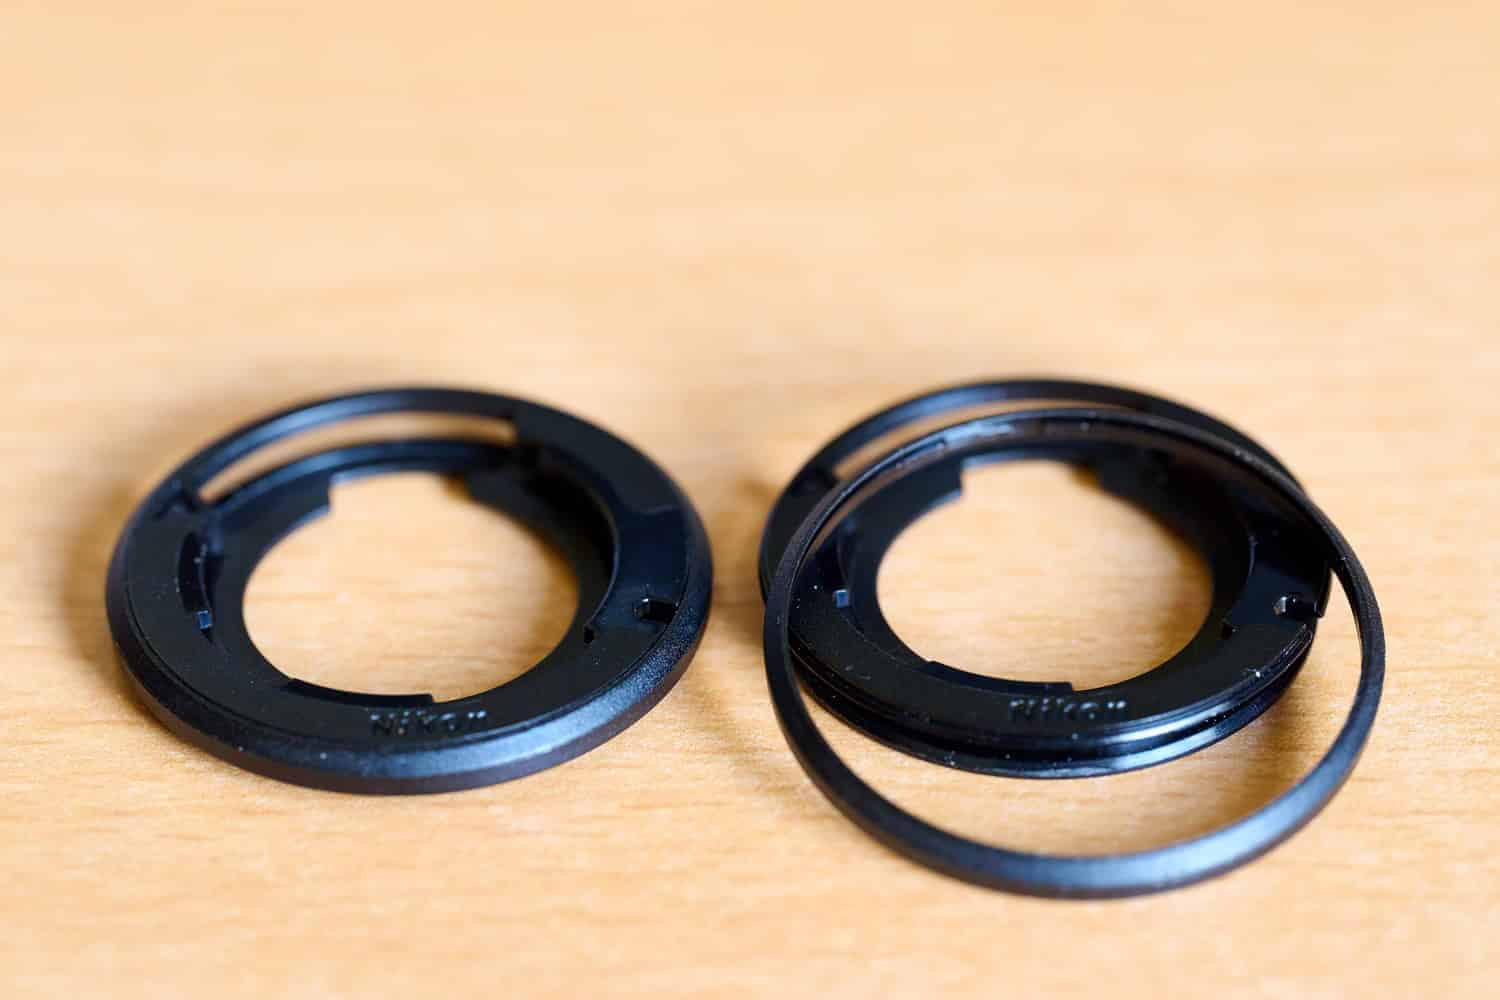
STEP 3: From the side that has the Nikon logo, you need to use your thumbnail or similar to split the thin plastic ring away from the holder as shown in the image below.
It can be a little difficult to do but it will come off reasonably easily. There are a few clips holding the ring onto the base, once you get once side lifted, keep working your way around to the next clip and gently pull the two pieces apart.
You will only be using the base plastic piece that attaches to the camera. Store the left over pieces in your Nikon Z9 box in case you ever want to put the original eyepiece back on your camera.
STEP 4: Turn the base back over so that the Nikon logo is facing the away from you. Now it is time to mount the rubber eyecup that you purchased or had from your Nikon Z6/Z7. I had a HoodEYE H-EYEN22R that I used. The circle for the rubber opening was a little smaller but it worked fine with a little help.
Lance B indicated the the rubber eyecup from the one he purchased went on quite easily. If you don’t have one lying around I’d purchase the one Lance bought as it sounds like it went on much easier than the HoodEYE H-EYEN22R that I used.
FYI, my assembly was a two person job. I stretched the rubber ring while my wife pushed the flange of plastic base into the rubber.
PRO TIP: Make sure you line up the longest part of the new rubber cup horizontally to how the DK-33 holder sits on the camera. The cut-out square on the base is the top of the eyepiece when it is mounted to your camera. Make sure your rubber eyecup is going to be in the horizontal position you want it to be in before you mount it to the base. The reason for this is that the new eyecup will not rotate on the holder and if you try to do so you may break the holder.
Just orientate it for being left or right eye dominate (your preference) when putting it back together as it won’t rotate easily when installed. Most people prefer to mount the eyecup in the direction shown in my cover image, with the wider part of the rubber cup facing to the right side of the camera.
STEP 5: Lock the new eye piece back onto your Nikon Z9 by rotating the cup clockwise around the electronic viewfinder.
Congratulations, you’re done!!!
Below are a few accessories that I have found very useful that you may wish to take a look at.
Nikon Z9 | 11 Must Have Accessories For The Z9.
- FTZII Mount Adapter B&H Price Check
- Nikon Z TC-1.4X B&H Price Check Amazon Canada Price Check
- Nikon Z TC-2.0X Teleconverter B&H Price Check Amazon Canada Price Check
- Prograde Cobalt 325GB CFexpress For Stills B&H Price Check Amazon Canada Price Check
- Angelbird 2TB CFexpress For Video B&H Price Check Amazon Canada Price Check
- Prograde Dual Slot Card Reader B&H Price Check Amazon Canada Price Check
- EN-EL18d Spare Battery B&H Price Check Amazon Canada Price Check
- Small Rig Camera Cage SmallRig Price Check Amazon Canada Price Check
- Glass Screen and Top LCD Screen Protectors B&H Price Check Amazon Canada Price Check
- Lenscoat Rain Cover B&H Price Check Amazon Canada Price Check
- Rode Videomic Pro External Microphone B&H Price Check Amazon Canada Price Check
- PocketWizard Plus IIIe Remotes B&H Price Check Amazon Canada Price Check
Bonus: Nikon Z 100-400mm Replacement Foot B&H Price Check
If you’re interested in receiving more content like this, hit the subscribe button at the bottom of this page and you’ll receive an email every time there is a new post. I’ll have a lot more coming your way in the coming weeks.
Thank you so much for supporting my channel.